
Planting
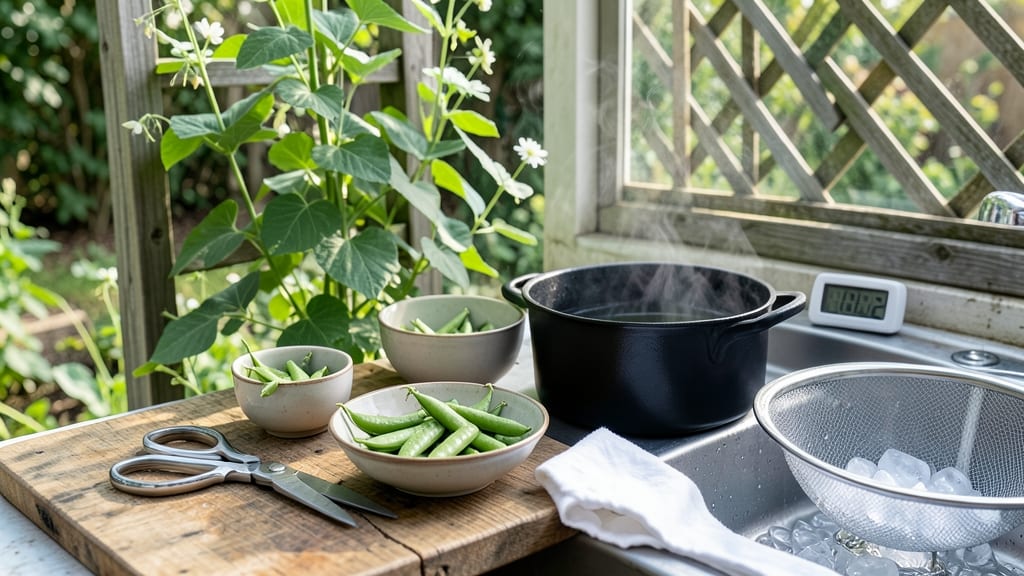
How to blanch peas before freezing captures their peak garden flavor—bright green, sweet, and crisp—so they stay that way for months. The key is acting fast: blanching within 24 hours of harvest preserves their freshness and prevents dullness. I’ve learned the hard way that skipping this step leads to mushy, flavorless peas, but when done right, blanching locks in color, crunch, and nutrients for up to 12 months in the freezer.
You’ll need just three things: a large pot for boiling water, a bowl of ice water, and a slotted spoon. The process takes about 5 minutes per batch, but timing is everything—too long in the water, and they turn mushy; too short, and they won’t stay bright.
The ice bath stops cooking instantly, which is why it’s non-negotiable. Even if you’re short on time, this step makes all the difference.
After blanching, spread the peas on a tray to freeze solid before bagging. This prevents clumping, so you can scoop out just what you need without thawing the whole batch.
The result? Peas that taste like summer, even in January—bright green, crisp, and packed with flavor, just like the day you picked them.
Pro tip: Label your freezer bags with the date and variety (sugar snap, snow peas, or shelling peas). Most gardeners freeze peas in 1-pound portions, perfect for stir-fries or side dishes.
And if you’re short on space, freeze them flat on a tray first—it saves room and makes storage easier. Trust me, your future self will thank you.
📚 In This Guide
- What you need
- Instructions
- Tips and common mistakes
- Wrapping up and next steps
What you need
- ● Fresh or thawed peas – 1 to 2 pounds (about 2 to 3 cups), depending on your needs. Use sugar snap, snow, or garden peas for best results.
- ● Large stockpot or deep saucepan – A 6- to 8-quart pot with a lid to fit your peas comfortably.
- ● Ice water bath – A large bowl or basin (at least 1 gallon capacity) to hold cold water for shocking.
- ● Slotted spoon or spider strainer – For easy transferring of peas between hot and cold water.
- ● Timer or stopwatch – To monitor blanching time precisely (critical for texture!).
- ● Fine-mesh colander or strainer – For draining excess water after blanching.
- ● Paper towels or clean kitchen towels – To pat peas dry before freezing.
- ● Air-tight freezer bags or containers – Heavy-duty, zip-top bags or rigid containers (like silicone molds) for storage.
- ○ Vinegar (white or apple cider, optional but recommended) – 1 tablespoon per gallon of water to help preserve color and prevent graying.
- ○ Salt (optional) – A pinch per gallon of water to enhance flavor (skip if using vinegar).
- ● Food scale – For precise measurements if following a recipe.
- ● Blanching basket or steamer insert – Speeds up the process and reduces mess.
- ● Vacuum sealer – Extends shelf life by removing air (great for long-term storage!).
- ● Labeling markers or tags – To date and label your frozen peas for easy tracking.
Step-by-step instructions for blanching peas before freezing
Preserving peas at their peak freshness is simple when you follow these exact steps.
Gather and Prepare Your Peas
Start with 1 pound of fresh peas—either shelled or in pods, depending on your preference. Rinse them thoroughly under cool water to remove any dirt or debris. I like to swish them gently in a colander for about 30 seconds to ensure they're clean without damaging the delicate skins. Pat them dry with a clean kitchen towel or paper towels. This step is crucial because excess moisture can lead to uneven blanching and poor texture later.
For podded peas, trim the ends carefully with a sharp knife. You want to remove just enough to expose the peas inside without cutting into them. This keeps the peas intact while making them easier to blanch. If you're using shelled peas, skip this step and move directly to blanching.
Prepare the Blanching Water
Fill a large pot with enough water to cover the peas by at least 1 inch. Use 1 quart of water per pound of peas, so for 1 pound, you'll need about 4 cups of water. Bring the water to a rolling boil over high heat. Once boiling, reduce the heat to maintain a steady, vigorous simmer. The water should be hot enough to create small bubbles but not so intense that it boils over.
While the water heats, prepare an ice bath by filling a large bowl or sink with 2-3 inches of ice and cold water. This will be used immediately after blanching to stop the cooking process and lock in the peas' vibrant color and crisp texture. The ice bath should be ready before you start blanching to avoid any delays.
Blanch the Peas
Carefully add the peas to the boiling water, stirring gently to ensure they don’t stick together. For shelled peas, blanch them for 2 minutes, while podded peas should blanch for 3-4 minutes. You’ll know they’re done when they’re bright green and slightly tender but still firm to the bite. Overcooking will turn them mushy, so keep a close eye on the timer.
Once blanched, use a slotted spoon to transfer the peas immediately to the ice bath. Stir them gently to ensure they cool evenly. Let them sit in the ice bath for 3-5 minutes until completely chilled. This step is critical—it halts the cooking process and preserves their texture and color. Drain the peas well in a colander before proceeding.
Dry and Package the Peas
Spread the drained peas out on a clean kitchen towel or paper towels in a single layer. Pat them dry gently to remove any excess moisture. This step helps prevent freezer burn and clumping. For best results, spread them out on a baking sheet lined with parchment paper and place them in the freezer for 1-2 hours to firm up. This makes them easier to package and ensures they retain their shape.
Once firm, transfer the peas to airtight freezer bags or containers. Squeeze out as much air as possible before sealing to minimize freezer burn. Label each bag with the date and contents. For long-term storage, peas will keep their quality for up to 9-12 months in the freezer. When ready to use, simply transfer them to a pot of boiling water for 2-3 minutes to thaw and cook them quickly.
Tips & tricks for perfectly preserved peas
Here's what nobody tells you about blanching peas that'll make all the difference in your freezer stash.
Timing is Everything: Those 2 minutes for shelled peas and 3-4 minutes for podded peas are non-negotiable for texture. I learned this the hard way after ruining three batches—overcooking even by 30 seconds turns them mushy. Set a timer and watch for that perfect bright green color. The peas should sink but still have a slight bite, not turn translucent.
Ice Bath Prep: Have your ice bath ready before you start blanching—this isn't optional. I once skipped this step because I was distracted, and my peas lost all their vibrant color and became dull. The ice bath should be cold enough to chill the peas within 3-5 minutes, not just lukewarm water. Use plenty of ice (at least 2-3 inches) to ensure rapid cooling.
Drying Matters: After draining, spread peas on a clean towel in a single layer and pat them completely dry. Any remaining moisture creates ice crystals during freezing, which ruins texture. For extra insurance, place them on a baking sheet lined with parchment paper and freeze for 1-2 hours before packaging. This step prevents clumping and makes them easier to portion later.
Storage Wisdom: When packaging, squeeze out all air from freezer bags using the "seal and roll" method. Label each bag with the date—peas keep best for 9-12 months, but flavor starts degrading after 6 months. For quick use, store some in the fridge for up to 5 days without freezing. The texture stays crispest when used within 3 months of freezing.
Pro Tips for Blanch Peas Before Freezing
- Here's what nobody tells you about blanching peas that'll make all the difference in your freezer stash.
- Timing is Everything: Those 2 minutes for shelled peas and 3-4 minutes for podded peas are non-negotiable for texture...
- Ice Bath Prep: Have your ice bath ready before you start blanching—this isn't optional. I once skipped this step beca...
Frequently asked questions
Got questions about blanching peas before freezing? You’re not alone—here are some of the most common concerns, answered for quick and easy prep!
How long should I blanch peas before freezing?
Blanch peas for 2 to 3 minutes in boiling water, then immediately plunge them into ice water for the same duration. Over-blanching can turn them mushy, while under-blanching may not kill enzymes that degrade texture. Stick to the timer!
Can I freeze peas without blanching first?
Technically yes, but blanching is highly recommended—it preserves color, texture, and flavor. Unblanched peas may develop off-flavors, lose nutrients faster, and turn mushy after thawing. The extra 5 minutes upfront saves time (and frustration) later!
What’s the best way to dry peas after blanching?
Pat them thoroughly with a clean kitchen towel or paper towels to remove excess moisture. Any leftover water can cause ice crystals during freezing, leading to soggy peas. Spread them on a baking sheet for 10–15 minutes in a cool, dry place for even drying.
How long do blanched peas last in the freezer?
Properly blanched and frozen peas stay fresh for 9 to 12 months at 0°F (-18°C) or colder. For best quality, label packages with the date and use them within 6 months. Freezer burn can occur after that, but they’re still safe to eat.
What if my peas turn gray or lose color after freezing?
Gray peas usually mean over-blanching or oxidation. To prevent this, keep blanched peas submerged in ice water until fully cooled, then transfer to the freezer within 30 minutes. Add a splash of lemon juice to the ice bath to brighten color and slow browning.
Can I reuse the blanching water for another batch?
No—reuse the water, and you risk bacterial growth from residual peas and starch. Always use fresh, boiling water for each batch. Save the starchy water for soups or stocks (after straining), but never for blanching again!
Wrapping up and next steps
Blanching peas before freezing is your secret weapon for keeping their vibrant color and crunchy texture locked in for months! With just a few simple steps—boiling, icing, and drying—you’ll save time and money while enjoying restaurant-quality peas straight from your freezer. 🌱
Now that you’re armed with the know-how, why not batch-prep a big harvest? Try freezing them in portions for easy meals—think soups, stir-fries, or even homemade veggie burgers. Happy freezing, and enjoy the convenience (and taste!) of your garden all year round! ✨