
Propagation
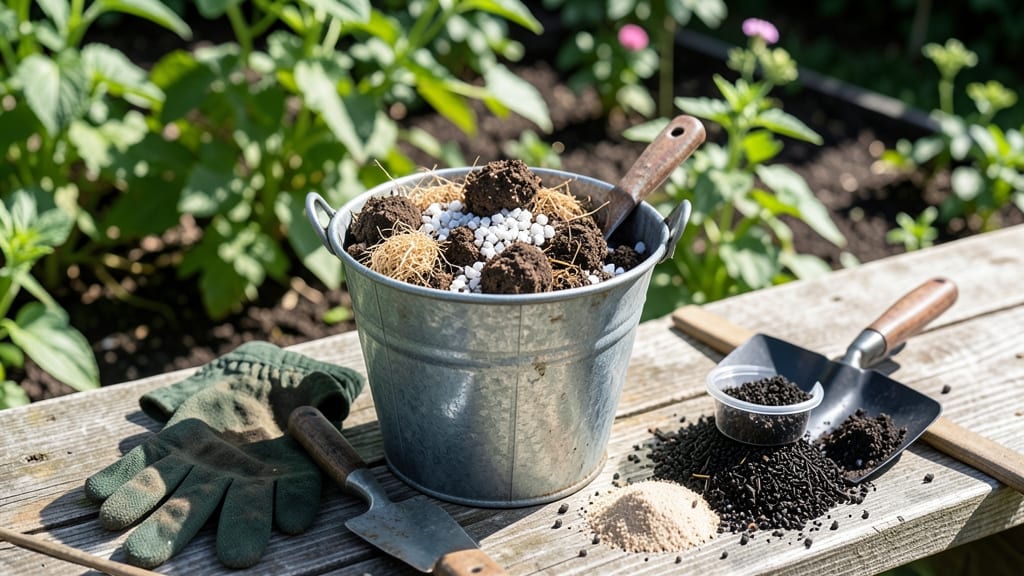
Your garden soil holds hidden potential for lush potting mixes. ✨ I’ve turned ordinary backyard dirt into a thriving blend that outperforms store-bought mixes—here’s how to sterilize, balance, and customize it for any plant.
The secret lies in the ratio: 60% garden soil, 30% compost, and 10% perlite or vermiculite for aeration. Sterilize your soil first by baking it at 200°F for 30 minutes to kill pests and weeds—this step alone prevents seedling failures.
Adjust textures based on your plants: seedlings need finer mixes, while succulents demand extra grit.
You’ll end up with a light, fluffy medium that holds moisture without drowning roots. The right mix supports seedlings that germinate in 5-7 days, houseplants that thrive for months, and container gardens that burst with color. No more wilted starts or compacted soil—just healthy growth from day one.
Works for every season and space, from seed-starting trays to patio containers. Let’s get mixing—your plants will thank you!
📚 In This Guide
- What you need
- Instructions
- Tips and common mistakes
- Wrapping up and next steps
What you need
- ● Garden soil: 5–7 gallons (enough to fill your container or bag) Tip: Choose soil from a well-drained, organic-rich area (avoid compacted or clay-heavy spots).
- ● Compost or well-rotted manure: 2–3 cups (for nutrients and microbial activity) Pro tip: Homemade compost or store-bought organic compost works best!
- ● Perlite or vermiculite: 1–2 cups (for aeration and moisture retention) Note: Perlite is lighter; vermiculite holds more water.
- ● Peat moss or coconut coir: 2 cups (for moisture retention and structure) Sustainability tip: Coconut coir is eco-friendly and reusable!
- ● Garden gloves: 1 pair (to protect your hands from dirt and sharp edges).
- ● Large mixing container: A wheelbarrow, plastic bin, or sturdy bucket (at least 10 gallons).
- ● Garden fork or trowel: For breaking up clumps in the soil.
- ○ Sieve or mesh screen: (Optional) To remove rocks and debris for a smoother mix.
- ○ Spray bottle with water: (Optional) To moisten dry ingredients.
- ● Sterilization method: Choose one: Baking tray + oven (for small batches)
- ● Microwave-safe container (for quick sterilization)
- ● Boiling water (for large quantities)
- ● Sunny, dry day: Ideal for mixing and drying components naturally.
- ● Storage container: Airtight bucket or bag with holes for drainage (for leftover mix).
Step-by-Step instructions for creating a sterilized potting mix from garden soil
Here's my foolproof method for transforming garden soil into a nutrient-rich, sterile growing medium perfect for seedlings and container plants.
🌱 Step 1: Collect and Screen Your Garden Soil
Start by gathering 4 gallons of garden soil from a clean, weed-free area. Avoid soil from heavily fertilized spots or areas with visible pests. Spread the soil on a tarp and use a ¼-inch mesh screen to remove rocks, debris, and large clumps. This ensures your mix will be light and aerated—critical for root development.
I like to work in batches of about 1 gallon at a time to make screening easier. Run your hands through the screened soil to feel for any remaining grit. If you find small stones or twigs, don't skip the screening—roots need a smooth medium to penetrate easily.
🔥 Step 2: Sterilize the Soil Using One of Two Methods
For oven sterilization, spread the screened soil in a thin layer on a baking sheet and bake at 200°F for 30 minutes. Stir halfway through to ensure even heating. This kills pathogens and weed seeds while preserving organic matter. Let it cool completely before proceeding—hot soil can damage beneficial microbes later.
Alternatively, for microwave sterilization, divide the soil into 1-cup portions and microwave on high for 2 minutes per cup. Stir between intervals to prevent uneven heating. This method works well for small batches and is perfect for seed-starting mixes. Real talk: I use microwave sterilization for my windowsill herb starts because it's fast and doesn't require oven space.
🌿 Step 3: Amend the Soil for Optimal Drainage and Nutrition
Mix the sterilized soil with 1 part perlite or vermiculite for every 3 parts soil. This creates air pockets that prevent compaction—a common issue with garden soil alone. For 4 gallons of soil, you'll need about 1 gallon of perlite. Add this gradually while stirring to distribute evenly.
Next, incorporate ½ cup of compost per 4 gallons of mix to restore organic matter. I like to sift the compost through a fine mesh to avoid introducing large chunks. The goal is a fluffy, dark blend that holds moisture without becoming soggy. Press a handful gently—it should crumble easily when released.
⏰ Step 4: Test and Adjust Moisture Levels
Sprinkle warm water into the mix gradually until it reaches a moist but not wet consistency. You'll know it's right when a handful forms a loose ball that holds together but doesn't drip water. This prevents both over-saturation and dryness, both of which stress young roots.
Let the mix sit for 24 hours before use. This allows any residual moisture to distribute evenly and gives the blend time to settle. If you notice the mix feels too dense after sitting, add a little more perlite—this is your chance to fine-tune the texture before planting.
🪴 Step 5: Use Immediately or Store for Future Projects
Fill your containers with the fresh potting mix, leaving ½ inch of space at the top for watering. Tap the container gently to settle the soil without compacting it. This ensures roots have immediate access to air and moisture. For seedlings, I always use this mix because it's sterile, lightweight, and promotes strong root systems.
To store unused mix, place it in a sealed container and keep it in a cool, dry place. It will stay viable for up to 3 months. Before reuse, check for mold or musty smells—if present, sterilize again. Here's the thing: even homemade mixes benefit from a quick refresh before each planting season.
Tips & tricks for perfect sterilized potting mix
Transforming garden soil into a premium growing medium takes attention to detail—here's how to avoid common pitfalls and elevate your mix to seed-starting perfection.
Screening Precision: In Step 1, don't rush the screening process. Use a ¼-inch mesh screen and work in 1-gallon batches to ensure thorough removal of debris. I've learned this the hard way—even small stones can puncture delicate seedling roots. For extra efficiency, fold the screen corners to create a funnel shape when pouring soil through.
Sterilization Safety: When using the oven method in Step 2, spread the soil in an even ¼-inch layer on baking sheets. Uneven layers can lead to under-sterilized pockets where pathogens survive. After the 30 minutes at 200°F, let the soil cool completely before handling—hot soil can actually introduce harmful bacteria through condensation. I always place the baking sheets on a wire rack to allow air circulation during cooling.
Perlite Integration: In Step 3, when mixing the 1 part perlite to 3 parts soil ratio, add the perlite first and stir vigorously before incorporating the compost. This prevents perlite clumping, which can create air pockets that disrupt moisture distribution. For a visual cue, aim for a final mix that looks like "fluffy chocolate cake batter"—light but with good structure.
Moisture Testing: The 24-hour settling period in Step 4 is your quality control moment. After adding warm water, press the mix into your hand—it should hold together when squeezed but not feel damp to the touch. If it's too dense after settling, add a splash of water and a pinch more perlite (about ¼ cup per 4 gallons) to restore the ideal crumbly texture.
Pro Tips for Make Potting Mix From Garden Soil
- Transforming garden soil into a premium growing medium takes attention to detail—here's how to avoid common pitfalls ...
- Screening Precision: In Step 1, don't rush the screening process. Use a ¼-inch mesh screen and work in 1-gallon batch...
- Sterilization Safety: When using the oven method in Step 2, spread the soil in an even ¼-inch layer on baking sheets....
Frequently asked questions
Got questions about turning your garden soil into a thriving potting mix? Here are some of the most common ones—and their answers—to help you DIY like a pro!
Can I use garden soil directly for potting mix?
Not ideal! Garden soil is often too dense, retains too much moisture, and may contain weeds or pathogens. Always amend it with compost, perlite, and peat moss (or coconut coir) to improve aeration and drainage. Think of it like upgrading from a dirt road to a smooth highway for your plant roots!
How long does homemade potting mix last?
With proper sterilization and storage, your mix can last 6–12 months in a dry, sealed container. Over time, organic matter breaks down, so refresh it by adding compost or worm castings. Pro tip: Label your mix with the date to track freshness!
What if my soil is too sandy or clay-heavy?
Adjust the texture with these fixes:
- Sandy soil: Add 20% peat moss or coconut coir to boost water retention.
- Clay soil: Mix in 30% perlite or vermiculite to lighten it up.
Do I really need to sterilize the soil?
Sterilization kills weeds, fungi, and pests that could harm seedlings. Use one of these methods:
- Bake soil at 200°F (93°C) for 30 minutes.
- Microwave in 10-minute bursts (stir between each).
- Soak in a 10% hydrogen peroxide solution for 30 minutes.
What’s a quick alternative if I don’t have all the amendments?
No problem! Start with a 50/50 mix of garden soil and compost, then add one of these:
- Crushed leaves or straw (for organic matter).
- Sand or rice hulls (for grit).
- Used coffee grounds (for acid-loving plants).
Wrapping up and next steps
Creating your own potting mix from garden soil is a rewarding way to give your plants the perfect growing environment—without breaking the bank! 🌱 By sterilizing, blending, and enriching your soil, you’ll provide roots with the aeration, drainage, and nutrients they crave.
Now that you’re armed with the know-how, why not experiment with different textures or add-ins to tailor the mix to your favorite plants?
Ready to dig deeper? Start small—try making a batch for your next propagation project or a houseplant refresh! Your green thumb (and wallet) will thank you. Happy gardening! 🌿