
Tools
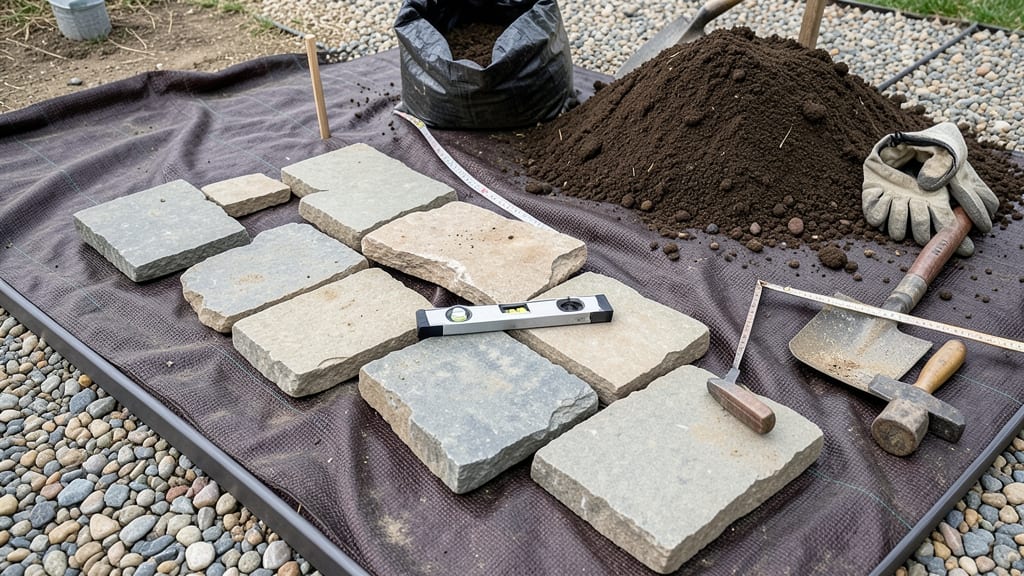
Building a raised stone garden bed transforms your yard into a timeless, low-maintenance growing space. 🌱 The natural edges blend seamlessly with landscapes while creating a sturdy frame that lasts decades—no rot, no warping, just pure durability.
My first stone bed still looks brand-new after five years, and the soil stays perfectly drained for root health all season. You’ll need local field stones (or river rocks), a tamper, landscape fabric, and basic soil mix.
The key is layering: start with a gravel base for drainage, then stack stones in a herringbone pattern for stability. This design handles foot traffic and weather without shifting, unlike wood or metal beds. Even beginners can nail the look with just a level and a little patience.
Once filled with 12-18 inches of soil, your bed will warm up faster in spring, stay dry in winter, and accommodate plants that struggle in compacted ground. The edges also create a built-in barrier to keep weeds at bay.
I’ve used mine for everything from heirloom tomatoes to perennials, and the year-round productivity makes it worth every hour spent building. For a budget-friendly twist, use stones you’ve collected from your property—just clean and sort them first.
Add a gravel border for extra definition, or plant creeping thyme along the edges for a fragrant, living border. The result? A garden feature that’s both functional and stunningly natural.
📚 In This Guide
- What you need
- Instructions
- Tips and common mistakes
- Wrapping up and next steps
What you need
- ● Field stones or river rocks – 10–20 stones per square foot (varies by bed size; larger stones for base, smaller for edges). Recommended: Flat, irregular stones (3–12 inches in diameter).
- ● Landscape fabric – 1 roll (4–6 ft wide) to prevent weed growth and stabilize soil.
- ● Garden soil or compost mix – 2–3 cubic feet per square foot of bed (topsoil + compost for fertility).
- ● Gravel or crushed stone – 1–2 inches of base layer (for drainage and stability).
- ○ Optional: Sand – For leveling and filling gaps between stones.
- ○ Mortar (optional) – For securing stones if extra stability is needed.
- ● Edging material – Brick, pavers, or metal edging (to define the bed neatly).
- ● Shovel and spade – For digging and moving soil.
- ● Wheelbarrow or bucket – For hauling soil, stones, and gravel.
- ● Level or string line – To ensure your bed is even.
- ● Rubber mallet or hammer – For tapping stones into place.
- ● Tape measure – To mark and measure dimensions.
- ● Gloves and safety glasses – For protection while handling heavy stones.
- ○ Optional: Stakes and string – For marking bed layout.
- ● Plate compactor – To compact the base layer for stability.
- ● Choose a sunny or partially shaded location with good drainage.
- ● Check local building codes or HOA rules if your bed is large or near structures.
- ● Plan your bed’s size and shape (rectangular, circular, or freeform) based on space and plants.
- ● Clear the area of grass, weeds, or debris before starting.
Step-by-Step instructions for building a raised stone garden bed
Here’s how to create a sturdy, long-lasting bed that stays weed-free and drains beautifully.
🪴 Step 1: Choose the Perfect Location and Layout
Pick a spot with 6+ hours of sunlight daily and easy access to water. Clear the area of grass, weeds, and debris—this prevents future pressure from roots or invasive plants. I like to sketch the dimensions first; a 4-foot by 8-foot bed fits most small gardens perfectly. Use a garden hose to outline the shape, adjusting until it feels balanced in your space.
Check for level ground by laying a straight board across the area—if it rocks, you’ll need to level it before proceeding. Uneven beds lead to poor drainage and unstable stone walls. For extra durability, I add a 4-inch layer of landscape fabric under the stones to block weeds and stabilize the base.
🪨 Step 2: Build the Foundation and First Stone Layer
Start by laying a 2-inch layer of compacted gravel as your base—this ensures proper drainage and prevents soil erosion. Use a rubber mallet to tap the stones into place, filling gaps with smaller gravel. For the first stone layer, select flat, 6-12 inch stones that interlock tightly. Place them edge-to-edge, slightly overlapping like puzzle pieces, with the largest stones on the outside for stability.
Here’s the thing—I always use a level to check each row before moving up. A crooked foundation will make the walls lean over time. If stones feel unstable, add a handful of gravel underneath to lift them into place. Leave the center open for now; you’ll fill that with soil later.
💧 Step 3: Stack Stones in a Staggered Pattern for Strength
For the second and third layers, stagger the stones so the edges align like brickwork. This creates a stronger, more durable wall that won’t crumble under pressure. Use a mix of flat and slightly curved stones—flat ones on the inside, rounded ones on the outside—to create a natural, rustic look. Fill gaps between stones with smaller rocks or gravel to lock them in place.
I like to build the walls 12-18 inches tall, depending on how much soil I want to retain. The taller the wall, the more stable it needs to be—so take your time with the top layers. Once the walls reach your desired height, tap them gently to settle everything. If a stone feels loose, add more gravel underneath and press it down firmly.
🌱 Step 4: Fill the Bed with Soil and Plant
Now it’s time to add the native topsoil or a mix of garden soil and compost. Fill the bed to within 2 inches of the top edge—this prevents soil from spilling out when you water. I like to mix in a slow-release fertilizer at this stage to give plants a strong start. Press the soil down lightly to remove air pockets, but don’t compact it too much.
For the first planting, I recommend perennials or deep-rooted plants like lavender, rosemary, or herbs—they thrive in raised beds and won’t outgrow the space quickly. Space plants according to their mature size, and water them deeply right after planting. The raised bed will drain faster than ground-level soil, so keep an eye on moisture levels, especially in hot weather.
✂️ Step 5: Add Finishing Touches for Longevity
To keep weeds at bay, top the bed with a 2-3 inch layer of mulch—wood chips or straw work well. This also helps retain moisture and regulates soil temperature. If you notice stones shifting over time, add a few more to reinforce weak spots. A raised stone bed is designed to last decades, but a little maintenance now prevents bigger repairs later.
Finally, I like to add a border of smaller stones or pebbles** along the inside edge to keep soil from washing out during heavy rains. This is especially useful if your bed gets a lot of foot traffic. Step back and admire your work—you’ve just created a low-maintenance, beautiful space that will reward you for years.
Tips & tricks for building a raised stone garden bed
Here's what nobody tells you about building a bed that lasts for years—these tricks will save you from common pitfalls and make your project even more durable.
Stone Selection Matters: While the instructions call for 6-12 inch stones, I always look for stones with slightly rough edges—they interlock better and create a more stable structure. Smooth river stones might look pretty, but they slide apart over time. For the first layer, prioritize flat stones that can support the weight above them, even if it means using slightly smaller pieces. This creates a solid foundation that won't settle unevenly.
Leveling is Non-Negotiable: In Step 1, when you check for level ground, I can't emphasize enough how critical this is. Use a 4-foot level (not just a small one) to verify the entire bed area. Uneven bases cause drainage issues and make the walls lean over time. Pro tip: If you find uneven spots, dig down slightly and add gravel to create a uniform base before laying your landscape fabric. This extra step prevents future headaches.
Staggering Technique for Strength: The staggered pattern in Step 3 isn't just about looks—it's structural engineering. Think of it like brickwork: each stone should sit in the gap between two stones in the layer below. For the outer walls, use slightly curved stones on the outside to create a natural, wind-resistant shape. This technique distributes weight evenly and prevents the walls from bowing outward under pressure from the soil.
Soil Prep is Key: When adding your native topsoil in Step 4, I recommend mixing in a handful of perlite or coarse sand (about 10% of the soil volume) to improve drainage. Raised beds already drain faster than ground soil, and this adjustment prevents water from running straight through. Also, consider adding a thin layer of compost directly on top of your garden soil before mixing—it creates a nutrient-rich zone right where your plant roots will establish.
Pro Tips for Build A Raised Stone Garden Bed
- Here's what nobody tells you about building a bed that lasts for years—these tricks will save you from common pitfalls and make your project even more durable.
- Stone Selection Matters: While the instructions call for 6-12 inch stones, I always look for stones with slightly rough edges—they interlock better and create a more stable structure.
- Leveling is Non-Negotiable: In Step 1, when you check for level ground, I can't emphasize enough how critical this is.
Frequently asked questions
Got questions about building your raised stone garden bed? You’re not alone! Here are answers to the most common concerns—whether you’re planning ahead or troubleshooting along the way.
What’s the best time of year to build a raised stone garden bed?
Spring or early fall are ideal! Building in spring lets you plant immediately, while fall gives roots time to establish before winter. Avoid extreme heat or frozen ground—both make digging and leveling harder. If you’re in a mild climate, year-round is fine, but spring/fall minimize stress on plants and your back!
Do I need to line the bottom of the bed with landscape fabric?
It depends! If your soil is healthy and well-draining, skip it—fabric can trap moisture and block beneficial microbes. However, if you have clay soil, weeds, or pests, a biodegradable landscape fabric (like coconut coir) can help. For long-term beds, consider cardboard or newspaper as a natural weed barrier instead. Always leave gaps for drainage!
Can I use irregular or odd-shaped stones for the bed’s edges?
Irregular stones add rustic charm and require less cutting than uniform ones. Just stack them securely with gravel or sand between layers for stability. For a cleaner look, use flat stones on the outside with rougher ones inside. Pro tip: mortar isn’t needed—gravity and interlocking do the job!
How do I keep my stone bed from sinking or shifting over time?
Prevent sinking with a sturdy base: Dig a shallow trench (6–12 inches deep) and fill it with compacted gravel or crushed stone before adding soil. For shifting, ensure stones are wedged tightly and the bed isn’t overfilled with soil (leave 2–3 inches from the top). If gaps appear, add smaller stones or sand to fill them. A perimeter of larger stones also adds extra support!
What’s a budget-friendly alternative to natural stone for the edges?
Try these cost-effective options:
- Cinder blocks or concrete pavers: Stack them like stone for a modern look.
- Recycled bricks or concrete: Often free or cheap at demolition sites.
- Logs or branches: Natural and free if sourced sustainably (great for woodland gardens!).
- Metal edging (galvanized or vinyl): Affordable and reusable, but less rustic.
Wrapping up and next steps
Building a raised stone garden bed is a rewarding project that enhances your garden’s beauty and functionality! With natural stones, you’ve created a durable, low-maintenance space perfect for year-round planting—whether you’re growing veggies, flowers, or herbs. 🌱
Now that you’re ready to roll up your sleeves, the next step is to choose your plants and get growing! Start with soil prep, select your favorite seeds or seedlings, and watch your garden thrive with the sturdy foundation you’ve built.