
How To
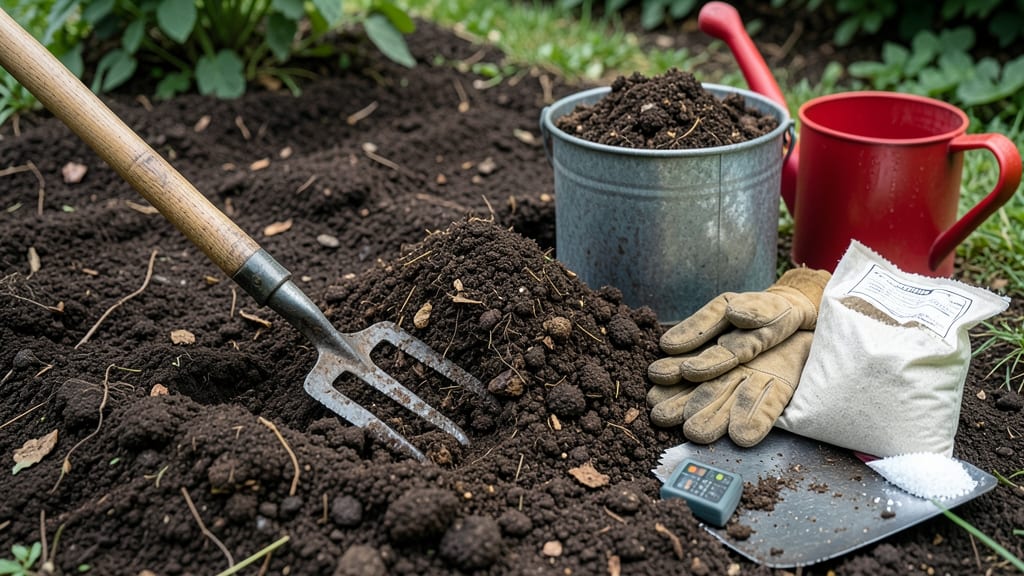
Amending soil for planting isn’t guesswork—it’s science you can see. 🌱 After my first garden failed because of compacted clay, I learned the hard way that roots need the right balance: air, water, and nutrients.
The secret lies in testing what your soil lacks and adding exactly what it needs, whether that’s organic matter, grit, or minerals. Most gardeners overcomplicate this. You don’t need a lab—just your hands, a few simple tools, and an understanding of your soil’s texture.
Sandy soil? Add compost and clay to hold moisture. Clay-heavy? Mix in sand and organic matter to loosen it. The goal is crumbly, dark, and alive—the kind that makes plants thrive without fighting for survival.
By the end, you’ll have a science-backed mix that improves drainage, retains nutrients, and encourages strong root growth. No more wilting seedlings or stunted veggies—just a foundation that works for flowers, veggies, or lawns. Let’s get your soil ready.
Start with a simple test: grab a handful of damp soil and squeeze. If it crumbles easily, you’ve got good loam. If it sticks together like clay or falls apart like sand, you’re starting from scratch.
The fix is always the same—compost first, then adjust with sand, lime, or sulfur based on your soil’s pH and texture. For most plants, equal parts compost and existing soil works wonders.
But heavy feeders like tomatoes or peppers might need extra compost, while succulents thrive in gritty mixes. The key is layering: spread amendments 6–12 inches deep for roots to benefit all season long.
Don’t overthink it—even small changes make a difference. My clay soil now grows tomatoes taller than my waist because I added compost and a handful of sand. The same principles work for containers, raised beds, or in-ground plots.
Just match your amendments to your soil’s needs, and your plants will thank you with lush growth and bountiful harvests.
📚 In This Guide
- What you need
- Instructions
- Tips and common mistakes
- Wrapping up and next steps
What you need
- ● Compost: 2–3 inches (5–7.5 cm) spread evenly over the planting area. Look for well-aged compost (avoid fresh manure—it can burn plants!).
- ● Organic Matter: Peat moss or coconut coir: 1–2 inches (2.5–5 cm) per square foot (for sandy or clay-heavy soils).
- ● Leaf mold or shredded leaves: 1–2 inches (2.5–5 cm) for moisture retention.
- ● Soil Amendments (Choose 1–2): Vermiculite or perlite: 1 part per 4 parts soil (for drainage).
- ● Sand (coarse): 1 part per 3 parts soil (for sandy soils only—never use fine sand!).
- ● Biochar: 1–2 cups per square foot (boosts microbial life).
- ● Balanced Fertilizer: 1–2 cups of 10-10-10 or 5-5-5 organic fertilizer per 100 sq ft (or follow package instructions).
- ● Garden fork or tiller: For turning soil to a depth of 8–12 inches (20–30 cm).
- ● Garden rake: To level and smooth the soil after amending.
- ● Gloves and knee pads: Because gardening is hard work!
- ● Wheelbarrow or bucket: For mixing and transporting materials.
- ○ pH test kit: Optional but highly recommended to check soil acidity (aim for 6.0–7.0 for most plants).
- ● Worm castings: 1–2 cups per square foot (natural nutrient booster!).
- ● Mycorrhizal fungi: Sprinkle on roots before planting (boosts root growth!).
- ● Mulch (straw, wood chips): 2–3 inches (5–7.5 cm) after planting to retain moisture.
- ● Soil moisture meter: To track hydration levels post-amendment.
Step-by-Step guide to amending soil for planting
Here's how to create the perfect foundation for healthy plants—no guesswork, just science-backed results.
🌱 Step 1: Test Your Soil's Current Condition
Before adding anything, grab a handful of soil and squeeze it tightly. If it crumbles easily, it's likely sandy and drains too fast. If it holds a tight ball that won't break, it's heavy clay that stays soggy. Most garden soil falls somewhere in between—loamy but still needing improvement. A simple pH test kit (available at garden centers) will tell you if your soil is too acidic or alkaline for your plants.
I like to dig a small hole about 6 inches deep and examine the layers. Dark, crumbly soil with visible earthworms is a good sign. Compacted, grayish layers mean poor drainage. This step ensures you're fixing the right problems—whether it's adding organic matter, adjusting pH, or improving aeration.
🌿 Step 2: Add Organic Matter for Structure and Nutrition
Spread a 2-3 inch layer of compost or well-rotted manure over the planting area. This improves soil structure, holds moisture, and feeds beneficial microbes. I prefer compost because it won't burn plants with excess nitrogen like fresh manure can. Work it into the top 6-8 inches of soil using a garden fork or tiller—just enough to loosen the soil without turning it into a muddy mess.
For sandy soil, mix in 1-2 inches of peat moss or coconut coir to help retain moisture. Clay soil benefits from shredded leaves or straw to break up compaction. The goal is to create a loose, crumbly texture that roots can easily push through. You'll know you've done it right when the soil feels like a damp sponge—not gritty or sticky.
💧 Step 3: Balance pH for Plant Health
Most vegetables and flowers thrive in slightly acidic to neutral soil, with a pH between 6.0 and 7.0. If your test shows soil too acidic (below 6.0), sprinkle dolomitic lime according to package instructions and work it into the top 6 inches of soil. For alkaline soil (above 7.0), mix in sulfur or peat moss to lower the pH gradually.
I like to add lime or sulfur in early fall so it has time to adjust before planting. Avoid quick fixes like wood ash, which can raise pH too fast and harm plants. After amending, wait 2-4 weeks before planting to let the soil settle and microbes activate. You'll see healthier foliage and stronger roots as a result.
☀️ Step 4: Improve Drainage and Aeration
For heavy clay soil, mix in 1-2 inches of perlite or coarse sand to create air pockets. Sandy soil benefits from composted bark or vermiculite to help retain moisture. Work these amendments into the top 6 inches of soil, breaking up any remaining clumps. The goal is to create a soil that drains well but still holds enough moisture for roots.
Dig a small hole to check your work—soil should feel loose and slightly gritty, not compacted. Add a handful of worm castings for extra nutrients and microbial activity. This step ensures roots get the oxygen they need to grow strong, preventing rot and disease. You'll notice plants establish faster and handle drought better.
⏰ Step 5: Let the Soil Settle Before Planting
After amending, water the area deeply to help amendments integrate. Wait 1-2 weeks before planting to let the soil stabilize and microbes colonize. This gives organic matter time to break down and improves soil structure naturally. You'll see earthworms and other beneficial creatures moving in, which is a great sign.
For container gardens, mix amendments directly into potting soil before planting. The key is patience—rushing leads to uneven results. Once settled, your soil will hold moisture without becoming waterlogged, support strong root growth, and provide the nutrients plants need to thrive. Now you're ready to plant with confidence!
Tips & tricks for perfectly amended soil
These science-backed strategies will help you create the ideal growing environment for your plants—without the guesswork.
Soil Texture Test: In Step 1, when you're testing your soil's texture, pay close attention to how it feels when damp. Sandy soil should crumble like fine powder, while clay holds together tightly. For loamy soil (the gold standard), it should form a loose ball that easily falls apart when dropped from 2 inches. This simple test tells you exactly what amendments you'll need—whether it's moisture retention for sand or drainage for clay.
Layering Matters: When adding your 2-3 inch layer of compost in Step 2, don't just dump it on top. Instead, spread it evenly and work it into the top 6-8 inches of soil. This creates a nutrient-rich zone where roots will thrive. For container gardens, mix amendments directly into the potting soil before planting—this ensures even distribution from the start.
pH Timing is Critical: After adjusting pH in Step 3, resist the urge to plant immediately. The 2-4 week waiting period is essential—it gives lime or sulfur time to fully integrate and prevents pH shock to young plants. I always test pH again after this period to confirm it's in the ideal 6.0-7.0 range for most plants.
Drainage Check: In Step 4, after adding perlite or sand, dig a small hole to verify your work. Soil should feel like a damp sponge—not gritty or compacted. If water pools in the hole after 30 minutes, you need more drainage amendments. This simple test prevents root rot and ensures healthy oxygen flow to roots.
Pro Tips for Amend Soil For Planting
- These science-backed strategies will help you create the ideal growing environment for your plants—without the guessw...
- Soil Texture Test: In Step 1, when you're testing your soil's texture, pay close attention to how it feels when damp....
- Layering Matters: When adding your 2-3 inch layer of compost in Step 2, don't just dump it on top. Instead, spread it...
Frequently asked questions
Got questions about soil amending? You’re not alone!
Here are answers to the most common queries to help you get started with confidence.
How often should I amend my soil?
Most experts recommend amending soil every 1–3 years, depending on your plants’ needs and soil type. Sandy soil drains fast and may need annual top-ups, while clay or loamy soil can hold amendments longer. Test your soil’s pH and nutrient levels annually to guide your schedule.
Can I amend soil too much?
Yes! Over-amending can disrupt soil balance, especially with excess organic matter (like compost) or synthetic fertilizers. Stick to 2–3 inches of amendments per season and mix them into the top 6–12 inches of soil. Too much can lead to nutrient burn, poor drainage, or even harmful fungal growth.
What’s the best time to amend soil?
Fall is ideal for most regions—it gives amendments time to break down over winter. For spring planting, amend 4–6 weeks beforehand to allow microbes to integrate nutrients. Avoid amending right before planting; fresh amendments can compete with young roots for nutrients.
Are store-bought soil amendments better than homemade?
Not necessarily! Homemade options like compost, worm castings, or grass clippings work great for organic gardening. Store-bought amendments (e.g., lime, peat moss) are convenient but can be pricier. Test your soil first—homemade may suffice if your soil just needs texture or nutrients, while bought amendments target specific deficiencies.
Will amending soil attract pests?
Not if done right! Fresh amendments like manure or high-nitrogen compost can attract pests, but aged compost or balanced mixes (e.g., compost + sand + perlite) minimize risks. Avoid over-fertilizing, and mulch after amending to deter insects. Healthy soil with proper drainage is the best pest deterrent.
How deep should I amend the soil?
For most plants, amend the top 6–12 inches of soil. Shallow-rooted plants (like herbs or lettuce) need only 4–6 inches, while deep-rooted trees or shrubs benefit from deeper (12–18 inches) amendments. Use a shovel or tiller to mix amendments thoroughly—don’t just top-dress!
Wrapping up and next steps
Amending your soil is the foundational step to unlocking a lush, productive garden—whether you're growing veggies, flowers, or just greening up your space. 🌱 By testing your soil, balancing nutrients, and incorporating organic matter, you’re giving your plants the perfect home to thrive. Remember, healthy soil equals happy plants!
Now that you’re armed with the science-backed know-how, it’s time to roll up your sleeves! Start small—pick one bed or pot—and apply what you’ve learned. Watch your garden transform as your plants reward you with vibrant growth. Happy planting! 🌿