
Propagation
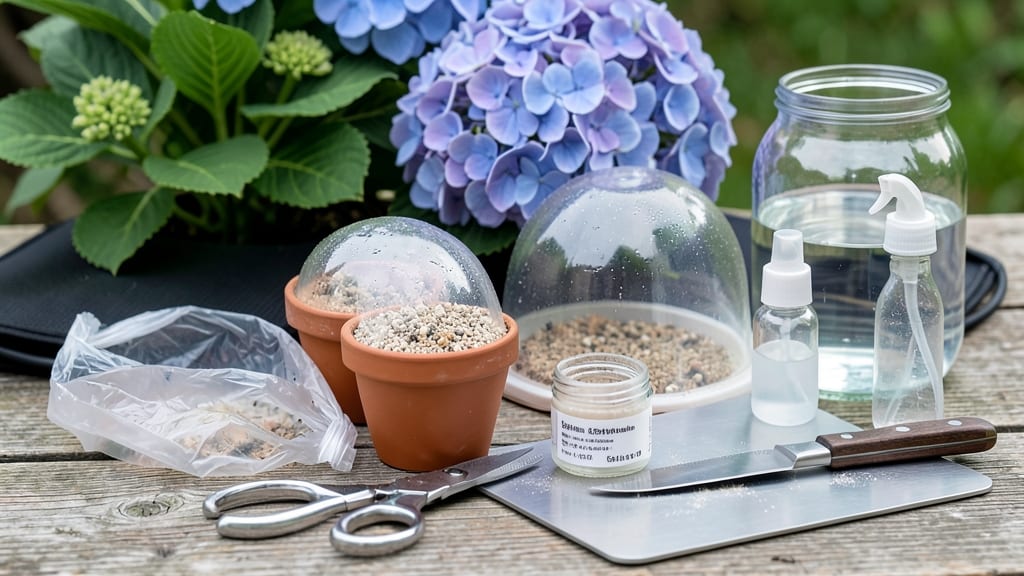
Cloning hydrangeas lets you multiply your favorite plants without digging up roots. ✨ I’ve turned one stunning bush into five thriving clones using stem layering—a method so simple even my black thumb can’t mess it up. The key? Patience and a few basic supplies you likely already have.
Timing matters most: late spring or early summer when new growth is strong but not yet woody. You’ll need sharp pruners, rooting hormone (optional but helpful), and a bit of patience—no fancy equipment required.
The process takes about 8-12 weeks until roots form, but the payoff is worth it: identical plants with the same vibrant blooms.
Start by bending a healthy stem to the ground, securing it with a U-shaped wire or rock, and covering the middle section with soil. Keep the area moist but not soggy—overwatering is the #1 killer of new roots.
By midsummer, you’ll see tiny roots forming where the stem touches soil, ready to become independent plants.
Once roots establish, gently separate the clone from the parent plant and transplant it. These new bushes will bloom just like their parent—sometimes even better—because they’ve already proven their strength. Perfect for filling gaps in your garden or sharing with fellow plant lovers.
📚 In This Guide
- What you need
- Instructions
- Tips and common mistakes
- Wrapping up and next steps
What you need
- ● Healthy hydrangea plant: Choose a mature, non-flowering stem (greenwood, not woody) with at least 3-4 leaf nodes.
- ● Sharp pruning shears or clean knife: Sterilize with rubbing alcohol for a clean cut.
- ○ Rooting hormone (optional but recommended): A gel or powder (e.g., Clonex or Rootone) to boost root growth.
- ● Plastic wrap or clear plastic bag: 6–12 inches long (for humidity retention).
- ● Moistened sphagnum moss or perlite: 1–2 cups (to keep the stem damp during rooting).
- ● Small container or tray: With drainage holes (e.g., a 6-inch nursery pot or seed tray).
- ● Twist ties or rubber bands: To secure the plastic wrap.
- ● Watering can or spray bottle: For gentle hydration (avoid soaking!).
- ○ Garden gloves: Optional but helpful for cleanliness.
- ● Clear plastic dome or propagator: Creates a mini greenhouse effect for faster rooting.
- ● Hydrogen peroxide (3% solution): Dilute 1:10 with water to sterilize tools or cuttings.
- ● Labeling tags: To track your clones (especially useful if propagating multiple varieties!).
- ● Slow-release fertilizer: A pinch mixed into the soil after transplanting (for post-rooting care).
Step-by-step instructions for cloning hydrangeas using stem layering
Here's my foolproof method for creating new hydrangea plants without digging up roots.
🌿 Step 1: Select Healthy Stems for Layering
Choose 4-6 low-growing stems (about 6-12 inches long) from your mother plant in early summer when new growth is firm but still flexible. Look for stems with 3-4 leaf nodes—these are the spots where roots will form. Avoid stems that are flowering this year, as they won't root effectively.
Gently bend one of these stems downward until it touches the soil. The goal is to create a gentle curve without breaking the stem. If it snaps, pick a different one. You'll know you've found the right stem when it bends naturally and doesn't feel brittle.
💧 Step 2: Create a Moisture Pocket for Root Formation
Dig a small 1-inch deep groove in the soil along the bent stem. This creates a pocket where the stem can settle naturally. Use your finger to loosen the soil slightly so the stem makes direct contact with the earth—this is crucial for root development.
Water the area deeply until the soil feels damp to the touch about 2 inches down. The moisture triggers the stem to produce roots where it touches the soil. I like to add a small handful of perlite to the groove—it helps retain moisture while allowing airflow, which prevents rot.
✂️ Step 3: Secure the Stem and Monitor Growth
Use a plastic plant stake or bent wire to hold the stem in place at the groove. The weight of the stem should press it into the soil, but it shouldn’t be crushed. If the stem springs back, dig a slightly deeper groove or use a heavier stake.
Keep the soil consistently moist (not soggy) for the next 8-12 weeks. You'll see new leaves emerge from the buried portion of the stem—this is your signal that roots are forming. If leaves yellow or wilt, water more frequently or provide afternoon shade to prevent stress.
🌱 Step 4: Separate the New Plant When Roots Form
After 8-12 weeks, gently dig around the buried stem to check for roots. If you feel resistance or see small white roots (about 1-2 inches long), it's ready to separate. Use a small trowel to cut just below the new root system—this minimizes damage to both the mother plant and the new clone.
Transplant the new hydrangea into its own pot or garden spot, keeping the soil moist but not waterlogged for the first 2 weeks. The first year, it may grow slower than mature plants, but with patience, it’ll establish itself fully by next spring.
⏰ Step 5: Care for Your New Clone Through First Season
Water your new hydrangea once weekly during dry spells, aiming for 1 inch of water per week. Mulch around the base with 2-3 inches of organic mulch (like shredded bark) to retain moisture and regulate soil temperature. Avoid fertilizing until new growth appears in spring—you want roots to strengthen before pushing foliage.
Watch for pests or wilting—these are signs the plant is struggling. If leaves curl or drop, check the soil moisture and adjust watering. By late summer, your clone should look nearly identical to the mother plant, ready to thrive independently.
Tips & tricks for successful hydrangea stem layering
Here's what I learned after propagating dozens of hydrangeas—these little details make all the difference between success and frustration.
Timing is Everything: Early summer is your best window for stem layering because the new growth is still flexible and full of energy. I've tried this in late spring and fall, and the success rate drops significantly. The plant needs warm soil and plenty of sunlight to trigger root formation during those critical 8-12 weeks.
Stem Selection Secrets: Look for stems that are about pencil-thick and have at least 3-4 leaf nodes—the more nodes, the more potential root points. I always avoid stems with flowers because they're putting energy into blooms rather than root development. Pro tip: Gently pinch the stem—if it snaps easily, it's too brittle and won't root well.
Moisture Management: That 2-inch deep watering isn't just about initial moisture—it's about creating the right soil conditions. I've found that adding perlite to the groove helps maintain consistent moisture without creating waterlogged conditions that can rot stems. Check soil moisture weekly by sticking your finger 2 inches down—it should feel like a damp sponge, not a soggy washcloth.
Root Formation Watch: Those new leaves popping up from the buried portion are your green light that roots are forming. I've seen some gardeners get impatient and check too early—wait for the full 8-12 weeks before digging. If you see small white roots (about 1-2 inches long), that's your perfect signal to separate. If you dig too soon, you might pull out a stem with just a few tiny root hairs that won't support the plant.
Pro Tips for Clone Hydrangea
- Here's what I learned after propagating dozens of hydrangeas—these little details make all the difference between success and frustration.
- Timing is Everything: Early summer is your best window for stem layering because the new growth is still flexible and full of energy.
- Stem Selection Secrets: Look for stems that are about pencil-thick and have at least 3-4 leaf nodes—the more nodes, the more potential root points.
Frequently asked questions
Got questions about cloning hydrangeas?
You’re not alone! Whether you’re a first-time gardener or a seasoned pro, propagation can feel tricky. Below, we’ve answered the most common questions to help you grow confidently—no digging required!
When is the best time to clone hydrangeas?
The ideal time is late spring to early summer (May–June), when hydrangeas are actively growing but haven’t yet flowered. This gives your cuttings enough warmth and moisture to root before winter. Avoid cloning in extreme heat or cold—think 60–75°F (15–24°C) for best results.
How long does it take for hydrangea cuttings to root?
Most hydrangea cuttings take 4–8 weeks to root, depending on conditions. Keep the soil moist and the cutting in bright, indirect light. You’ll know it’s working when you see new growth (tiny leaves or stems) or gently tug the cutting—if resistance meets your fingers, roots are forming!
Can I clone hydrangeas from store-bought flowers?
Unfortunately, no—hydrangeas sold in grocery stores or florists are often cut flowers, not live plants with viable stems. For cloning, stick to healthy hydrangeas in your garden or from a trusted nursery. Look for wooden but not woody stems (pencil-thick) for the best success.
Why did my hydrangea cutting rot instead of root?
Overwatering or poor airflow are the top culprits! Ensure your cutting sits in moist (not soggy) soil and use a clear plastic bag to trap humidity—just remove it daily for 10 minutes to prevent mold. Also, avoid cutting stems that are too old or mushy; fresh, firm growth roots best.
Do I need to fertilize hydrangea cuttings?
Not right away! Wait until your cuttings have rooted (4–6 weeks) and show new growth. Then, use a balanced, water-soluble fertilizer (like 10-10-10) diluted to half-strength. Over-fertilizing can burn tender roots—go easy until your clones are established.
Still stumped? Drop your question in the comments—we’re happy to help you grow!
Wrapping up and next steps
Cloning hydrangeas through stem layering is a rewarding way to expand your garden without the stress of digging or transplanting! By following these simple steps—selecting healthy stems, encouraging root growth, and gently separating new plants—you’ll soon enjoy lush, thriving hydrangeas that mirror your favorites. 🌿✨
Now that you’re armed with the know-how, give it a try this season! Start with just one or two plants, and soon you’ll have a hydrangea army ready to brighten up pots, borders, or even gifts for fellow plant lovers. Happy propagating!