
Succulent
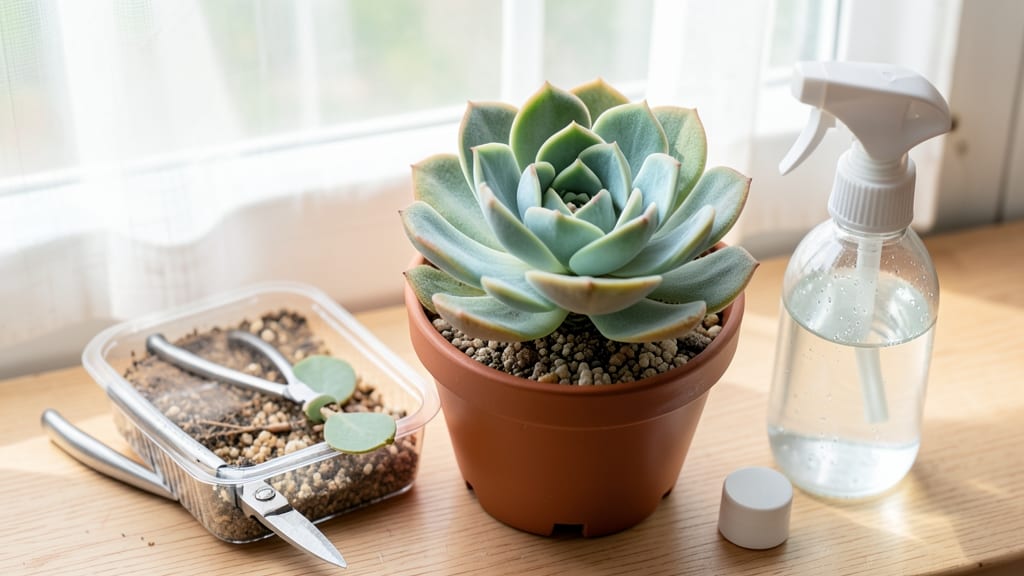
Cloning succulents lets you multiply your favorite plants for free—no seeds or nursery trips needed. ✨ I’ve turned a single jade cutting into a dozen thriving plants, and the process is simpler than you’d think, even for beginners with shaky hands.
The magic happens with just a few tools: sharp scissors, a well-draining soil mix (cactus/succulent blend works best), and patience. You’ll start with healthy leaves or stems, let them callus over for a day or two, then place them in soil—no fancy equipment required.
Within 4-6 weeks, you’ll see tiny roots forming, and by 8-12 weeks, you’ll have baby plants ready to replant. The best part? You preserve rare varieties, share cuttings with friends, and fill gaps in your collection without spending a dime.
Works year-round, but spring and summer give the fastest results. Let’s get those cuttings rooted!
📚 In This Guide
- What you need
- Instructions
- Tips and common mistakes
- Wrapping up and next steps
What you need
- ● Healthy succulent parent plant – Choose one with at least 2-3 leaves or a stem cutting (avoid overwatered or diseased plants).
- ● Sharp, sterile scissors or pruning shears – A clean cut prevents infection. Pro tip: Use rubbing alcohol (70% or higher) to sterilize blades before use! 💡
- ● Well-draining soil mix – A blend of cactus/succulent soil (60%) and perlite or coarse sand (40%) works best. Avoid regular potting soil—it retains too much moisture!
- ● Small pots or trays – Use 2-4 inch pots for individual cuttings or a shallow tray for multiple clones. Ensure they have drainage holes!
- ○ Optional propagation medium (for humidity control) – Perlite or pumice (for airflow and drainage), or
- ● Sphagnum moss (keeps cuttings humid; rehydrate before use).
- ○ Rooting hormone – Speeds up root growth (optional but great for tricky varieties like Haworthia or Echeveria).
- ● Spray bottle with water – For misting cuttings (use sparingly!).
- ● Heat mat or propagation station – Helps in cooler climates (70–75°F is ideal).
- ● Grow lights or sunny windowsill – Clones need bright, indirect light (4–6 hours daily).
- ● Twine or toothpicks – To secure cuttings in soil if needed.
Step-by-step instructions for cloning succulents
Here's the foolproof method I use to grow plump, thriving succulents from cuttings—no fancy tools required.
🌱 Step 1: Select and Prepare Healthy Mother Plants
Choose a succulent with at least 3-4 inches of stem and no signs of rot or pests. I like to pick stems that have 3-4 leaves—this gives the cutting enough energy to root. Use clean, sharp scissors or pruning shears to make a clean cut just below a leaf node (the bump where leaves attach).
Let the cuttings dry for 1-3 days in a warm, shaded spot. This callusing process prevents rot—you'll see the cut end form a slightly hardened, chalky layer. Don't skip this step (I learned the hard way when cuttings rotted overnight).
💧 Step 2: Choose Your Propagation Method
For fastest results, place the callused cuttings in a small container with 1-2 inches of well-draining soil (like cactus/succulent mix). Push each cutting ½ inch deep at a slight angle—this stabilizes it without burying too much. Water lightly only when the soil feels completely dry (succulents hate soggy roots).
For easiest care, try water propagation: Fill a jar with 1 inch of water and place the callused cuttings so their bases are submerged. Change the water every 5-7 days until roots form (usually 2-4 weeks). You'll see tiny white roots emerge first—this is your signal to transplant.
☀️ Step 3: Provide Ideal Growing Conditions
Place your cuttings in bright, indirect light (a south-facing window works best). Avoid direct sun for the first 2 weeks—young roots are sensitive to heat stress. If your home runs cool, a grow light keeps them happy. Watch for pale, stretched growth—this means they need more light.
Keep humidity moderate (succulents don't need high humidity like tropical plants). Mist the soil once a week or group cuttings together to create a mini greenhouse effect. After 4-6 weeks, you'll see new leaves forming—this means rooting is successful!
✂️ Step 4: Transplant and Care for New Plants
Once roots are 1-2 inches long (for soil method) or ½ inch long (for water method), transplant into individual pots with well-draining soil. Use pots with drainage holes—succulents despise soggy feet. Water only when the soil is bone dry (stick your finger in—if it's dry 1 inch down, it's time).
Wait 2 weeks before fertilizing (use a diluted succulent fertilizer at half strength). You'll know they're thriving when they grow compact, vibrant leaves and no longer look leggy. Avoid overwatering—this is the #1 killer of new succulent clones.
Tips & tricks for healthy succulent propagation
These little tricks will help you avoid the most common pitfalls and grow thriving succulent clones every time.
Selection Tip: Look for mother plants with thick, plump stems—these contain more stored energy for your cuttings. I always choose stems with at least 3-4 leaves because they've had time to build up reserves. Avoid stems with any signs of wrinkling or shriveled leaves, as these indicate stress or poor health in the mother plant.
Callusing Secret: The 1-3 day drying period is absolutely critical—don't rush it! Place your cuttings on a clean paper towel in a warm, shaded spot. You'll know they're ready when the cut end develops a slightly chalky appearance. This callus acts like a natural bandage, preventing rot when you plant. I've seen cuttings rot overnight when people skip this step.
Propagation Hack: For faster rooting in soil, try the "toothpick trick"—gently insert a toothpick next to each cutting before planting. This creates tiny air pockets around the base, improving drainage and preventing rot. In water propagation, change the water every 5-7 days to prevent bacterial growth, which can smother new roots before they form.
Lighting Tip: Those first 2 weeks of bright, indirect light are crucial for preventing leggy growth. If your home has limited natural light, a simple LED grow light on a timer (12-14 hours per day) works wonders. Watch for pale, stretched growth—this is your plant's way of reaching for more light. The moment you see new leaves forming after 4-6 weeks, you've got successful rooting!
Pro Tips for Clone Succulents
- These little tricks will help you avoid the most common pitfalls and grow thriving succulent clones every time.
- Selection Tip: Look for mother plants with thick, plump stems—these contain more stored energy for your cuttings.
- Callusing Secret: The 1-3 day drying period is absolutely critical—don't rush it!
Frequently asked questions
Got questions about cloning succulents? You’re not alone! Here are some of the most common queries—and their straightforward answers—to help you propagate like a pro.
How long does it take for a succulent cutting to root?
Most succulent cuttings take 2–6 weeks to root, depending on the species, humidity, and temperature. Leaf cuttings (like from echeverias) often root faster (1–3 weeks), while stem cuttings (like from snake plants) may take longer. Patience is key—keep them in bright, indirect light and avoid overwatering!
Can I clone succulents year-round, or is there a best time?
Succulents can technically be cloned anytime, but spring and early summer are ideal. Warmer temperatures and longer daylight hours speed up rooting. Avoid winter propagation in cold climates, as slow growth can lead to rot. If you must clone in winter, use a heat mat to encourage growth!
What do I do if my cutting is rotting instead of rooting?
Rotting is usually caused by too much moisture or poor airflow. If you spot mushy stems or black spots, act fast:
- Remove the cutting and let it dry for 1–2 days in a shady spot.
- Trim any rotten parts with clean scissors.
- Repot in fresh, well-draining soil (or perlite) and reduce watering.
- Ensure the container has drainage holes!
Can I clone succulents from leaves instead of stems?
Leaf propagation is perfect for succulents like haworthias or echeverias. Simply:
- Gently twist off a healthy leaf (don’t break the stem).
- Let it callus for 1–3 days.
- Place it on dry soil or a well-draining medium (like perlite).
- Wait for tiny "pups" to form—new plants in 2–4 weeks!
Do succulent cuttings need special light to root?
Yes! Cuttings thrive in bright, indirect light (like a sunny windowsill without harsh afternoon sun). Avoid deep shade, which slows rooting, but steer clear of direct midday sun, which can scorch tender cuttings. A grow light works great if natural light is limited—just keep it 6–12 inches away!
What’s the best soil mix for cloning succulents?
A fast-draining mix is critical. Try:
- 50% cactus/succulent soil + 50% perlite/pumice (for airflow).
- Add a handful of coarse sand or orchid bark to prevent compaction.
- Avoid garden soil—it holds too much moisture and causes rot!
Wrapping up and next steps
Cloning succulents is a rewarding way to expand your plant collection without breaking the bank! With just a few simple steps—like selecting healthy leaves, letting them callus, and rooting them in soil—you can grow thriving new plants.
The key is patience and consistency, but the results are worth every bit of effort.
Now that you’re armed with the know-how, why not give it a try? Start with one easy-to-propagate variety like a Haworthia or Echeveria, and soon you’ll have a whole garden of lush, low-maintenance greens. Happy propagating! 🌱✨