
Propagation
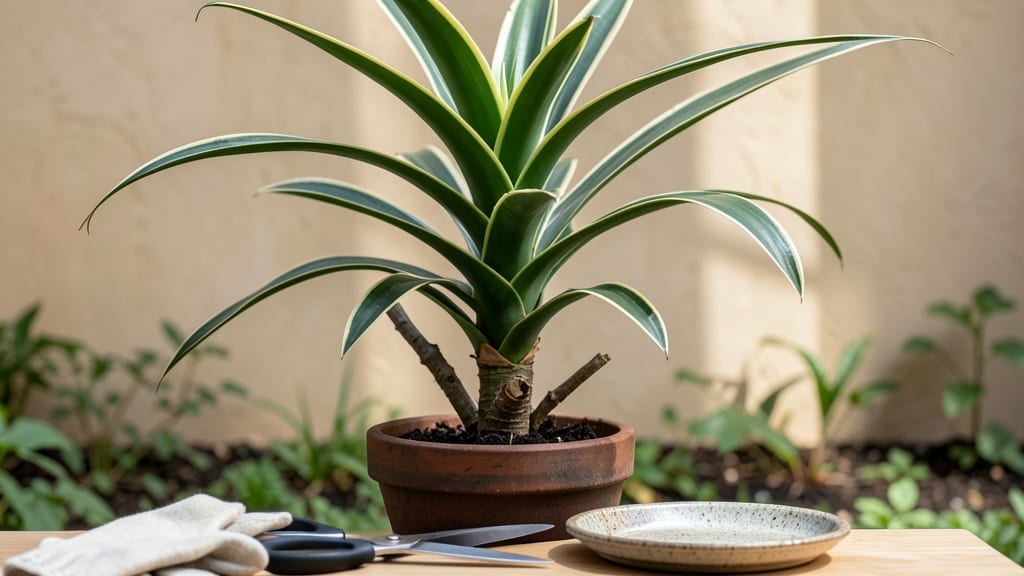
Your Dracaena marginata just got a second chance at life. ✂️ Cutting back this iconic Dragon Tree isn't just about aesthetics—it's how you grow new plants from old stems, revive leggy growth, and keep your houseplant thriving for years.
I've turned my overgrown Marginata into a lush, bushy specimen using these exact techniques, and you can too.
The best time to cut is spring or early summer when the plant's energy peaks. You'll need sharp pruners (sterilized with rubbing alcohol), a small pot for propagation, and rooting hormone—though I've had success without it.
Focus on cutting just above a leaf node when propagating stems, or simply trim brown tips to refresh the plant's appearance. The sap can irritate skin, so gloves are a must.
After cutting, let your stem pieces dry for an hour before planting in fresh potting mix. Keep new cuttings in bright, indirect light and water only when the top inch of soil feels dry.
Within 4-6 weeks, you'll see roots forming, and your original plant will sprout fresh growth from where you cut. The key is patience—rushing watering or light will stall progress.
Mistakes happen, especially with sap handling or over-pruning. If you cut too much at once, your Marginata might go dormant. Start small, and save larger cuts for next season.
The real magic? Every cutting becomes a potential new plant, so you'll soon have Dragon Trees gracing every room. Ready to transform your leggy plant into a thriving jungle?
📚 In This Guide
- What you need
- Instructions
- Tips and common mistakes
- Wrapping up and next steps
What you need
- ● Sharp, sterilized pruning shears or a clean knife – Choose tools with a blade length of at least 4-6 inches to make precise cuts. Sterilize with rubbing alcohol (70% or higher) to prevent bacterial infections.
- ● Healthy Dracaena marginata plant – Select a mature stem with at least 3-4 inches of length and visible leaf nodes (the bumps where leaves grow). Avoid stems with yellowing or diseased leaves.
- ● Well-draining potting mix – Use a blend of 50% peat moss or coco coir, 30% perlite, and 20% sand or orchid bark. This ensures aeration and prevents root rot.
- ● Small pots or propagation trays – Opt for 3-4 inch diameter pots or trays with drainage holes. Plastic or terracotta works, but ensure they’re clean.
- ○ Rooting hormone (optional but recommended) – A powder or gel formula with auxin (like 0.8% IBA) to boost root growth. Follow package instructions for application.
- ● Spray bottle with water – For misting cuts and keeping the environment humid during propagation.
- ● Plastic wrap or a clear plastic bag – To create a mini greenhouse effect and retain moisture around the cuttings.
- ● Rubber bands or twist ties – To secure plastic wrap around the cutting or pot.
- ○ Heat mat (optional) – If propagating in cooler climates (below 70°F/21°C), a seedling heat mat can speed up rooting.
- ● Grow lights or bright indirect sunlight – Place cuttings near a south-facing window or under LED grow lights (12-14 hours/day) for optimal growth.
- ● Charcoal granules – Mix a small amount into the potting soil to prevent fungal growth.
- ● Labeling tags – To track the date and type of cutting for future reference.
Step-by-Step instructions for cutting Dracaena marginata
Here's the simple method I use to propagate new plants from cuttings—no fancy tools needed.
🪴 Step 1: Gather Your Tools and Choose Healthy Stems
You'll need clean, sharp pruning shears (or a knife) and a small container of water. Look for a 4-6 inch section of stem with at least 2-3 healthy leaves—the lower leaves will help root growth. I always pick stems just below a leaf node where new roots will form.
Wash the shears with rubbing alcohol before cutting to prevent disease. The stem should feel firm, not mushy or discolored. If you see brown spots or soft areas, skip that section—it won't root well. Here's the thing: the thicker the stem, the better your success rate, so aim for pencil-thick or larger.
✂️ Step 2: Make the Clean Cut and Prepare the Stem
Cut the stem at a 45-degree angle just below a leaf node. This angled cut gives you more surface area for roots to emerge. I like to make the cut about ½ inch below the node—this ensures you capture the growth hormones stored there that encourage rooting.
Remove any lower leaves that will sit below the water line. You only need 2-3 leaves at the top to feed the cutting while roots develop. Strip away any yellow or damaged leaves too—they'll rot in water and invite bacterial growth. Once prepped, place the cutting in a glass of room-temperature water.
💧 Step 3: Root in Water and Monitor Progress
Change the water every 3-4 days to keep it fresh and prevent bacteria. Place the glass in bright, indirect light—direct sun will scorch the leaves. You'll see tiny white bumps appear at the cut end within 2-3 weeks, signaling root formation.
Roots typically appear in 4-6 weeks, but don't rush this process. If the water gets cloudy before then, dump it and rinse the cutting with fresh water. Real talk: some cuttings take longer, especially in cooler rooms. If no roots appear after 8 weeks, try a new cutting—sometimes the timing just isn't right.
🌱 Step 4: Plant the Rooted Cutting in Soil
Once roots reach 1-2 inches long, it's time to plant. Fill a 4-6 inch pot with well-draining potting mix. I like to dip the roots in a rooting hormone powder first—it gives them a confidence boost. Gently press the soil around the stem, leaving the top leaves above soil level.
Water lightly but thoroughly, letting excess drain away. Place the new plant in bright, indirect light for a week to help it adjust. Avoid fertilizing for 4-6 weeks—the plant needs time to establish roots before taking up nutrients. You'll know it's settling in when new leaves start forming at the top.
Tips & tricks for perfect Dracaena marginata propagation
These simple yet game-changing tips will help you maximize your success rate with Dracaena Marginata cuttings—no green thumb required.
Cutting Selection: Look for stems that are pencil-thick or thicker—thinner stems often struggle to root. I've found that stems with at least 2-3 healthy leaves (not counting the lower ones you'll remove) produce the most vigorous new plants. The key is choosing stems that are firm to the touch and free of any soft spots or brown areas, which can indicate disease or stress.
Angle Matters: That 45-degree angle cut in Step 2 isn't just for looks—it creates more surface area for roots to emerge. Use a ruler or protractor if you're not confident eyeballing it. The cut should be clean and sharp; a jagged cut can damage the stem's ability to form roots. I like to make the cut just below a leaf node, about ½ inch down, where those growth hormones are most concentrated.
Water Care: Changing the water every 3-4 days is critical to prevent bacterial growth, but don't overdo it. Too much disturbance can stress the cutting. I've found that using room-temperature water helps maintain consistency—cold water can shock the cutting while warm water can promote bacterial growth. Add a few drops of hydrogen peroxide to the water (just to clear it) if it starts looking cloudy before your scheduled change.
Lighting Strategy: Bright, indirect light is perfect, but don't place your cuttings in direct sunlight—it can scorch the leaves. A north-facing window or a grow light on a timer works best. I've noticed that cuttings in indirect light develop roots more evenly than those in low light. If your home is particularly dark, consider supplementing with a simple LED grow light for 12-14 hours a day to speed up root development.
Pro Tips for Cut Dracaena Marginata
- These simple yet game-changing tips will help you maximize your success rate with Dracaena Marginata cuttings—no green thumb required.
- Cutting Selection: Look for stems that are pencil-thick or thicker—thinner stems often struggle to root.
- Angle Matters: That 45-degree angle cut in Step 2 isn't just for looks—it creates more surface area for roots to emerge.
Frequently asked questions
Got questions about cutting and propagating your Dracaena marginata? You’re not alone! Here are some of the most common concerns—plus quick, practical answers to keep your dragon tree thriving.
Can I cut my Dracaena marginata at any time of year?
While you can propagate year-round, spring and summer (when growth is active) are ideal. Avoid winter cuts—your plant’s slower metabolism may delay rooting. If you must prune in cooler months, use a rooting hormone to boost success!
How do I know if my cutting will root successfully?
Healthy cuttings should be 3–6 inches long, have at least one node (where leaves grow), and look firm, not mushy. Yellow or wilted leaves mean the stem is stressed—trim those off before planting. A crisp, green cut signals readiness to root!
Why isn’t my cutting growing roots after 4–6 weeks?
Patience is key! Slow rooting often means low humidity or cool temps. Try these fixes:
- Mist daily or use a humidity dome.
- Move to a warmer spot (70–75°F is perfect).
- Check for rot—if the base smells funky, replant in fresh, dry perlite.
Can I propagate Dracaena marginata from just a leaf?
Nope! Leaves alone won’t root—they lack the meristem (growth cells) needed for new plants. Stick to stem cuttings with nodes. Pro tip: If your plant is leggy, take multiple small cuttings (even 2–3 inches) for better success rates!
What should I do if my cutting rots before rooting?
Don’t panic! Rot is usually from overwatering or poor drainage. If you spot black, mushy stems:
- Trim the rotten part above the healthy tissue with clean scissors.
- Dip the fresh cut in cinnamon powder (natural antifungal) or hydrogen peroxide.
- Repot in a dry mix of perlite/sand and skip watering for 3–5 days.
Wrapping up and next steps
Cutting and propagating your Dracaena marginata is a rewarding way to expand your plant collection—whether you’re a beginner or a seasoned green thumb! 🌱 With the right tools, clean cuts, and a little patience, you’ll soon have thriving new plants rooted and ready to thrive.
Remember, the key is consistency in moisture and light, so don’t rush the process.
Now that you’re armed with these stem propagation secrets, why not try it today? Grab those cuttings, follow the steps, and watch your garden grow—literally! Share your progress with fellow plant lovers or even gift your new babies to friends. Happy propagating! 🌿✨