
Planting
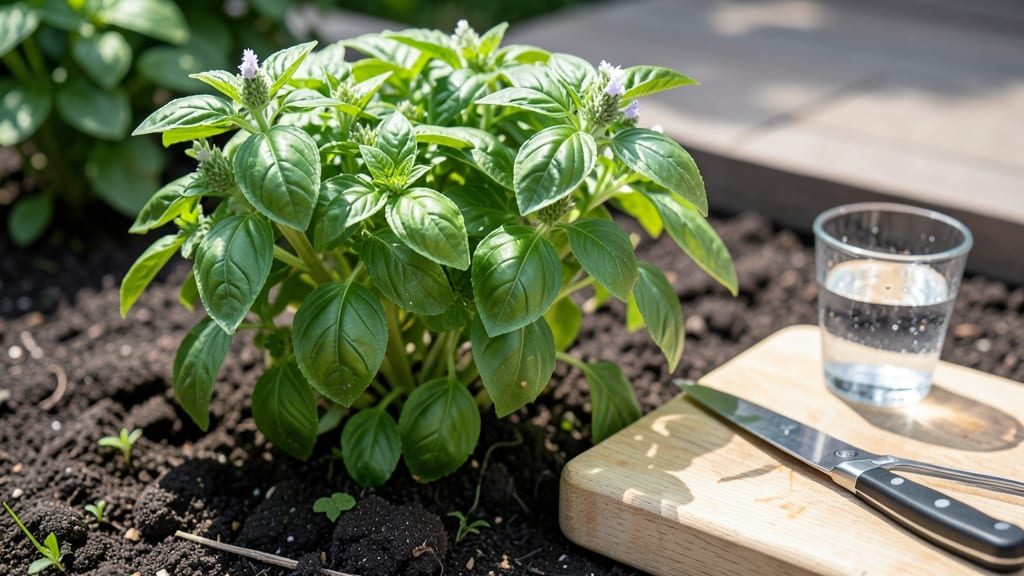
How to cut fresh basil off the plant right means more leaves for months. ✂️ I used to snip randomly—until my plants turned leggy and stopped producing. The secret is pruning at the right spots to trigger bushier regrowth while keeping the plant happy.
Start by harvesting stems just above a set of leaves where two leaves meet (the node). Avoid cutting the topmost set of leaves—this is where new growth begins. Use clean, sharp scissors or fingers to pinch stems about 3-4 inches long, leaving at least 4-6 leaves on each branch.
You’ll see new shoots sprouting from the nodes within 1-2 weeks, and the plant will stay compact and productive. Regular pruning (every 2-3 weeks) prevents flowering, which makes leaves bitter and slows growth.
This method works for both potted basil and garden plants. Just avoid cutting more than 1/3 of the plant at once—it needs energy to bounce back. Now go harvest like a pro!
📚 In This Guide
- What you need
- Instructions
- Tips and common mistakes
- Wrapping up and next steps
What you need
- ● Sharp pruning shears or kitchen scissors – Choose clean, sterilized tools (rubbing alcohol wipe works!) to avoid disease. A pair of bypass pruners (with 5-6 inch blades) is ideal for precision cuts.
- ● Basil plant (Genovese, Thai, or Purple varieties work great) – Ensure it’s at least 6-8 inches tall with 4-6 true leaves before harvesting.
- ● Small bowl or container – A wide, shallow dish (like a salad spinner or ramekin) to hold freshly cut leaves.
- ○ Water spray bottle (optional but helpful) – A 16 oz misting bottle to hydrate leaves post-harvest if storing for later.
- ● Plastic wrap or damp paper towel – For storing harvested basil in the fridge (wrap loosely around stems).
- ● Food-safe storage container – A glass or BPA-free plastic container with a lid for long-term storage.
- ● Gloves (nitrile or cotton) – Protects hands from sap (which can irritate skin) and keeps tools clean.
- ● Plant food or compost tea – A balanced liquid fertilizer (like 10-10-10) to revive the plant after heavy pruning.
Step-by-Step instructions for pruning basil for bushier growth and nonstop harvests
Here's how I keep my basil plants thriving with steady harvests—no overcrowding, no leggy stems.
✂️ Step 1: Identify the Right Leaves to Cut
Focus on harvesting leaves from the top third of the plant first. These are the newest, most flavorful leaves, and cutting them encourages the plant to branch out. Avoid cutting more than one-third of the plant at once—this prevents shock and keeps growth vigorous.
Look for leaves that are fully grown but not yet flowering. If you see tiny buds forming, snip those off immediately—they signal the plant is shifting energy from leaves to flowers, which makes the leaves bitter. I always cut just above a set of leaves where new growth is starting; this spot will sprout new stems.
✂️ Step 2: Use Sharp Pruners or Clean Scissors
Never tear leaves off—it damages the stem and invites disease. Grab a pair of clean, sharp pruners or kitchen scissors (rinse with rubbing alcohol afterward). Cut at a 45-degree angle just above a leaf node (the small bump where a leaf meets the stem). This angle helps water run off instead of pooling and rotting the stem.
If you're pinching off smaller leaves by hand, do it gently between your thumb and forefinger. I like to leave the top set of leaves intact unless the plant is overgrown—this ensures the basil keeps photosynthesizing while it recovers. Watch for new side shoots emerging within 3-5 days after pruning.
🌱 Step 3: Encourage Bushier Growth by Pinching
When your basil reaches about 6 inches tall, pinch off the very top set of leaves. This might seem counterintuitive, but it forces the plant to send out new branches from lower nodes. I do this every 4-6 weeks to keep the plant compact and productive.
After pinching, the plant will focus energy on lateral growth instead of stretching upward. You'll notice new side shoots forming within 1-2 weeks. These shoots will eventually grow into full stems, giving you more leaves to harvest. Avoid over-pinching—if you remove too much at once, the plant may struggle to recover.
💧 Step 4: Water and Fertilize After Pruning
Give your basil a deep watering after pruning to help it recover. Water at the base of the plant (not the leaves) to prevent fungal diseases like downy mildew. The soil should be moist but not soggy—stick your finger 1 inch deep; if it's dry, water again.
Feed the plant with a balanced liquid fertilizer (like 10-10-10) diluted to half strength. I apply it every 4-6 weeks during the growing season. Fertilizer helps the plant bounce back faster after pruning and keeps the leaves tender and flavorful. Avoid over-fertilizing—too much salt can burn the roots.
☀️ Step 5: Monitor Light and Harvest Regularly
Basil needs 6+ hours of sunlight daily for best growth. If your plant starts looking leggy again, it might need more light—move it to a sunnier spot or supplement with a grow light. Leggy growth means the plant is stretching toward light, which weakens the stems and reduces flavor.
Harvest leaves every 2-3 weeks to keep the plant productive. The more you prune and pinch, the bushier and more resilient the basil becomes. You'll know you're doing it right when the plant stays compact, green, and keeps producing new leaves instead of flowering.
Tips & tricks for pruning basil like a pro
Real talk: The difference between a basil plant that thrives and one that fizzles often comes down to how you prune it. These small details make all the difference.
Selection Tip: When choosing stems in Step 1, focus on the top 4-6 inches of the healthiest stems—these are the ones that will regrow most vigorously. I've found that stems with at least 3-4 mature leaves produce the best regrowth. If your plant has flower buds, cut them off immediately—they'll make your basil taste bitter and stop new leaf production. Look for stems that are bright green and feel firm when you gently squeeze them.
Cutting Technique: That 45-degree angle in Step 2 isn't just for looks—it's about the plant's health. The angled cut creates more surface area for water absorption, which helps the plant heal faster. I've ruined plants by cutting too close to the base—always leave that ½ inch of stem above the node. This tiny detail prevents rot and encourages new branches to grow from that exact spot. Use clean, sharp scissors or pruning shears to avoid crushing the stems, which can introduce disease.
Recovery Strategy: After pruning, the 3-5 days of bright, indirect light in Step 3 are crucial. I've learned this the hard way—direct sun during recovery can actually stress the plant further. Place your basil near an east-facing window or under a grow light if needed. The goal is to give it time to recover while still getting enough light to photosynthesize. You'll know it's working when you see tiny new leaves forming at the nodes within 7-10 days—that's your plant telling you it's happy and ready to grow again!
Pro Tips for Cut Fresh Basil Off Plant
- Real talk: The difference between a basil plant that thrives and one that fizzles often comes down to how you prune it.
- Selection Tip: When choosing stems in Step 1, focus on the top 4-6 inches of the healthiest stems—these are the ones that will regrow most vigorously.
- Cutting Technique: That 45-degree angle in Step 2 isn't just for looks—it's about the plant's health.
Frequently asked questions
Got questions about harvesting basil like a pro?
Here are the answers to the most common ones—so you can keep your plant thriving and your kitchen stocked with fresh leaves!
When is the best time to cut basil?
The ideal time to harvest basil is in the morning after the dew has dried but before the sun gets too intense. This ensures the leaves are fully hydrated and packed with flavor. Avoid cutting in the late afternoon or evening, as the plant may struggle to recover overnight.
How much of the plant should I cut at once?
Never remove more than one-third of the plant in a single harvest. For example, if your basil has 30 leaves, trim just 10 at a time. This prevents stress and allows the plant to regrow vigorously. Think of it like a haircut—you want to leave enough "roots" (or stems) to keep the plant healthy!
Can I cut basil from the bottom or only the top?
Always cut from the top to encourage bushier growth. Trimming the top leaves stimulates the plant to produce new branches, giving you a fuller, more productive basil bush. Avoid snipping lower leaves unless they’re yellowing or damaged—this can weaken the plant’s structure.
What should I do if my basil turns yellow after cutting?
Yellowing leaves after pruning usually mean the plant is over-pruned or underwatered. Give it a deep watering and avoid harvesting for a week or two to let it recover. If the yellowing persists, check for pests or nutrient deficiencies (like lack of nitrogen) and adjust care accordingly.
Can I harvest basil in winter or does it die back?
Basil is a tender annual, so it won’t survive frost. However, if you’re growing it in a pot, you can bring it indoors near a sunny window or under grow lights during winter. Reduce watering slightly, as the plant’s growth slows down. With proper care, you can keep harvesting small amounts even in cooler months!
What’s the difference between cutting and pinching basil?
Both methods encourage bushier growth, but they’re slightly different:
- Cutting: Use scissors or pruners to snip stems just above a leaf node (where leaves grow). Best for larger harvests.
- Pinching: Use your fingers to remove the top set of leaves (usually 2–3 inches down). Great for smaller adjustments or when you don’t have tools handy.
Wrapping up and next steps
Mastering the art of cutting fresh basil from your plant doesn’t just ensure a steady supply of flavorful leaves—it also helps your basil thrive! By following the right techniques, you’ll enjoy bushier growth, healthier plants, and endless harvests all season long.
Whether you’re a seasoned gardener or just starting out, these simple steps make pruning a breeze.
Now that you’re ready to snip, why not share your basil bounty? Gift fresh leaves to neighbors, freeze extras for winter cooking, or experiment with new recipes like pesto, caprese salads, or infused oils. Happy harvesting—and may your kitchen always smell like summer! 🌿✨