
Pruning
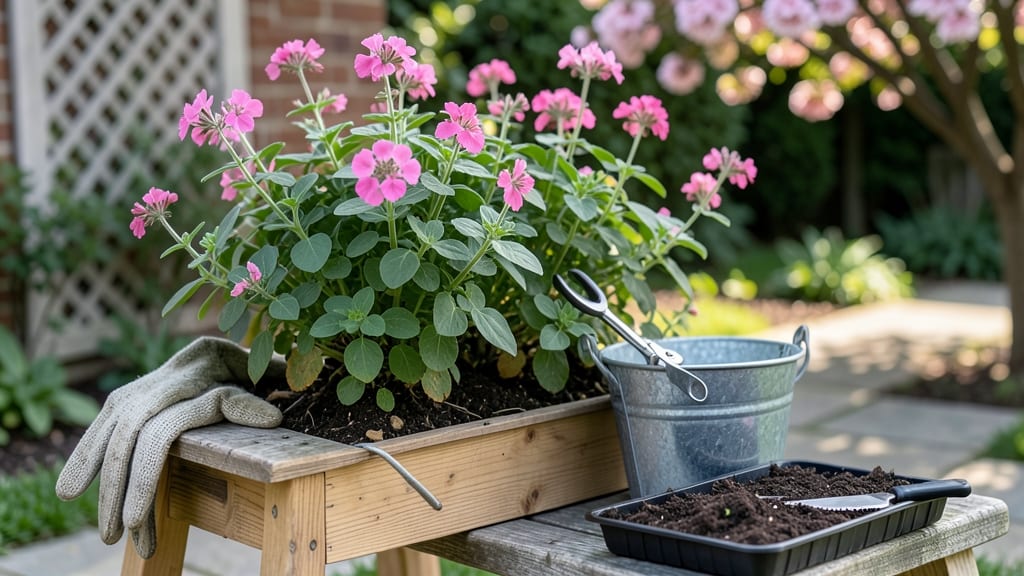
Geraniums refuse to die—if you prune them right. ✂️ The secret to winter survival and spring reblooms lies in strategic cuts that preserve the plant's hidden energy stores. I've revived geraniums that looked dead after frost by following this exact method, and now I never lose a plant to winter.
You'll need sharp pruners, a clean workspace, and a clear day before frost hits. The goal is to cut back hard but not brutally—aim for removing about half the plant, focusing on leggy stems and spent blooms.
Hardy varieties (like those rated for Zone 5) can go even shorter, while tender geraniums need just a light trim to encourage compact growth. After pruning, you'll have woody stems with dormant buds—these are your insurance policy for spring.
Store cuttings in dry peat moss or keep potted geraniums in a cool, dark place until temperatures rise. By late winter, you'll see fresh green shoots pushing through, ready to burst into bloom. This method works for both container and in-ground geraniums.
The key is timing—prune too early and you risk regrowth before frost; too late and you lose the plant. Get it right, and you'll have geraniums that outlast every winter.
📚 In This Guide
- What you need
- Instructions
- Tips and common mistakes
- Wrapping up and next steps
What you need
- ● Sharp pruning shears – Bypass or anvil-type (3-6" blades), sterilized with rubbing alcohol or a 10% bleach solution.
- ● Clean, heavy-duty gloves – Nitrile or leather to protect against thorns and sap.
- ○ Disposable pruning bags or bucket – 5-gallon capacity for clippings (optional: add a 10% bleach solution to prevent disease).
- ○ Ruler or measuring tape – 12" minimum for precise cuts (optional but helpful for layered stems).
- ○ Rooting hormone (optional but recommended) – Powder or gel formula (e.g., Clonex or Hormex) for propagating cuttings.
- ● Spray bottle with water – 8 oz or larger for misting cuttings post-harvest.
- ● Newspaper or cardboard – For a clean workspace and protecting surfaces.
- ● Horticultural oil or neem oil – For post-pruning treatment to deter pests on dormant plants.
- ● Plant labels & permanent marker – If propagating varieties (e.g., "Zonal Pelargonium – Red").
- ● Small fan or dehumidifier – For rooting cuttings indoors to prevent mold.
- ● Disinfectant wipes – For cleaning tools between cuts on multi-plant sessions.
Step-by-Step instructions for cutting geraniums for winter
Here’s how I prep geraniums for winter—layered stems ensure they bounce back stronger than ever.
🌿 Step 1: Choose Healthy Stems for Layering
Pick the sturdiest stems with at least 3-4 sets of leaves—these are your future plants. Avoid woody or brittle stems, as they won’t root well. I like to work on a mild afternoon when temps are between 55-70°F, so the plants aren’t stressed.
Gently pinch off the top 2-3 inches of growth to encourage bushier regrowth. This redirects energy downward, where the roots will form. If your geraniums are leggy, trim back even more—you’ll still get plenty of layered stems from the lower growth.
✂️ Step 2: Prepare Stems for Layering
Select stems that are 4-6 inches long with at least one strong leaf node (the bump where leaves attach). Make a small, clean cut just above a leaf node using sharp scissors or pruners—this prevents tearing. I dip the cut end in rooting hormone (optional but helpful) to speed things along.
Bend the stem downward until it touches the soil. Secure it with a U-shaped bent wire or a small stone—just enough to keep it in place without crushing it. The goal is to encourage roots to form at the node while the top of the plant stays above ground.
💧 Step 3: Encourage Root Formation
Keep the soil evenly moist but not soggy—geraniums rot easily if overwatered. I water at the base, avoiding the leaves to prevent fungal issues. Within 4-6 weeks, you’ll see tiny roots forming where the stem touches the soil. You’ll know it’s working when new growth appears at the top of the stem.
If your climate gets chilly, cover the layered stems with a lightweight row cover or a cloche to protect them. Once roots are 1-2 inches long, you can carefully sever the stem from the parent plant and pot it up for winter storage.
☀️ Step 4: Overwinter Layered Geraniums
Once rooted, transplant the new plants into 4-inch pots with fresh potting mix. Place them in a cool, bright spot (like a sunny windowsill or under grow lights) where temps stay between 40-55°F. Water sparingly—only when the top inch of soil feels dry.
In early spring, when nighttime temps stay above 50°F, you can transplant them back outside. The layered stems will grow into full, bushy geraniums faster than starting from seed—plus, they’re already proven performers!
⏰ Step 5: Prune and Prep for Spring Planting
Before moving them outside, trim back any leggy growth by one-third to encourage compact new shoots. Harden them off by placing them outside for 1-2 hours daily, gradually increasing exposure over 10-14 days. This prevents shock when they hit the garden.
Plant them in full sun with well-draining soil, and watch them thrive. I’ve done this for years—my geraniums come back bigger and more vibrant every season!
Tips & tricks for perfectly layered geranium stems
Real talk: I’ve tried every way to overwinter geraniums, but layered stems work best—here’s how to make it foolproof.
Timing is Everything: The 55-70°F temperature range in Step 1 isn’t just ideal—it’s critical. If your afternoon temps are cooler, wait until late morning when the sun warms the air. Geraniums handle stress poorly, so avoid working with cold stems. I’ve watched them wilt when cut too early in the day, so always check the forecast first.
Leaf Node Location: In Step 2, that leaf node is your golden ticket—it’s where roots will form. If you can’t see a clear node, trace the stem upward until you find the tiny bump. I’ve accidentally skipped nodes before, and those stems never rooted. Pro tip: Hold the stem against a bright window—nodes show up more clearly in natural light.
Rooting Hormone Hack: While rooting hormone is optional, I’ve found it cuts the 4-6 week rooting time by nearly half. If you skip it, make sure your stems stay consistently moist—geraniums are fussy about water. I keep a spray bottle nearby to mist the soil without oversaturating it.
Winter Protection: That lightweight row cover in Step 3 isn’t just for decoration—it’s a game-changer. When temps drop below 50°F at night, the cover traps just enough warmth to prevent frost damage. I’ve seen unprotected layered stems freeze solid overnight, so don’t skip this step if you live in a chilly climate.
Pro Tips for Cut Geraniums For Winter
- Real talk: I’ve tried every way to overwinter geraniums, but layered stems work best—here’s how to make it foolproof.
- Timing is Everything: The 55-70°F temperature range in Step 1 isn’t just ideal—it’s critical. If your afternoon temps...
- Leaf Node Location: In Step 2, that leaf node is your golden ticket—it’s where roots will form. If you can’t see a cl...
Frequently asked questions
Got questions about winterizing your geraniums? You’re not alone!
Here are the most common concerns—and simple solutions—to keep your plants thriving year-round.
When is the best time to cut geraniums for winter?
The ideal window is after the first frost but before hard freezes (late fall to early winter). This ensures the plant has time to heal before dormancy. In warmer climates, wait until temperatures drop below 40°F (4°C) for 2–3 weeks. Pro tip: If frost hits early, act fast—geraniums are tough but not frost-proof!
What if I miss the cutting window? Can I still save my geraniums?
Don’t panic! If you’ve already had a hard freeze, prune back dead or damaged stems immediately and bring potted geraniums indoors. For in-ground plants, mulch heavily (4–6 inches) to insulate roots. Troubleshoot: Trim only what’s necessary—healthy stems can regrow in spring, even if late.
Should I cut geraniums back all the way to the ground?
No—never cut to the soil level! Leave 2–3 inches of stem above the base (or 1–2 nodes on potted plants). This protects the crown from rot and ensures regrowth. Why it matters: Geraniums store energy in their lower stems, so drastic cuts can weaken the plant.
Can I propagate geraniums from winter cuttings?
Layered stems (like those from your winter pruning) root easily in water or soil. Dip cut ends in rooting hormone (optional) and place in a bright, warm spot. Success hack: Use a clear jar for water propagation to monitor root growth—you’ll see progress in 2–4 weeks!
How do I store cut geraniums over winter?
For potted geraniums, trim, pot in fresh soil, and move to a cool, dark place (50–60°F/10–15°C). Check monthly for rot or pests. In-ground plants? Mulch with straw or leaves and cover with burlap if temps drop below 20°F (-6°C). Remember: Avoid dampness—it’s the #1 enemy of dormant geraniums!
Wrapping up and next steps
Cutting your geraniums for winter doesn’t have to be stressful—it’s your chance to revive and rejuvenate these vibrant plants for next season! By mastering layered stems and proper pruning techniques, you’ll ensure lush, healthy regrowth when spring arrives.
With the right tools, timing, and care, your geraniums will bounce back stronger than ever.
Now that you’re equipped with the know-how, grab your shears and get pruning! Start small—even a few cuts can make a difference. And remember, patience and consistency are your best friends in gardening. Happy pruning, and may your geraniums thrive year after year! 🌱✨