
Pruning
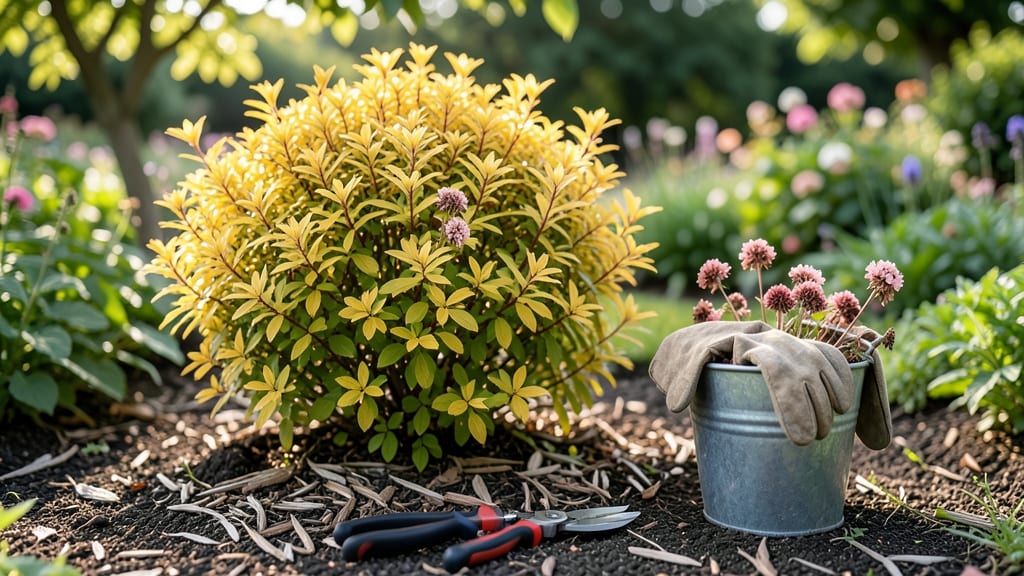
How to deadhead spirea keeps your shrubs bursting with color all summer—no gardening degree needed. ✂️ I’ve transformed my once-sparse spirea into fluffy clouds of blooms by mastering this simple trick. Deadheading isn’t just about looks; it tricks your spirea into producing fresh flowers instead of wasting energy on spent blooms.
The best time to prune is right after blooms fade, using clean, sharp pruners. You’ll only need 3 cuts per stem: snip just above a leaf set or side bud where new growth can sprout.
Overdoing it? No problem—spirea is forgiving. The goal is to encourage bushier growth, not perfect pruning.
By midseason, you’ll notice bold, continuous blooms where others see bare stems. The secret’s in timing: prune too late, and you’ll cut off next year’s flowers. Too early, and you’ll stunt current blooms. Strike that balance, and your spirea becomes the showstopper of the garden.
Works for all spirea varieties—from feathery Spiraea japonica to hardy Spiraea arguta. Even my first attempt looked better than store-bought plants. Let’s make yours thrive too.
📚 In This Guide
- What you need
- Instructions
- Tips and common mistakes
- Wrapping up and next steps
What you need
- ● Pruning shears – Sharp, bypass-style shears (for clean cuts without crushing stems). Recommended: Felco or Fiskars (5–8 inches).
- ● Hand pruners – For smaller stems or tight spaces (3–4 inches, ergonomic grip).
- ● Gloves – Garden gloves (nitrile-coated for grip and protection).
- ● Disposable pruning bags or bucket – To collect spent blooms (5–10 gallon capacity).
- ● Rubbing alcohol (70% or higher) – 1 small bottle (for sterilizing tools between cuts).
- ○ Sharpie or marker – Optional (to mark stems if needed).
- ● Knee pads – For comfort if you’re working close to the ground.
- ● Hose or spray bottle – To rinse tools or refresh tired plants.
- ● Compost bin access – For disposing of deadheaded blooms (or save for mulch!).
- ● Sunscreen & hat – Because even deadheading deserves sun protection! ☀️
Step-by-step instructions for deadheading spirea
Here's the foolproof method I've used for years to keep my spirea blooming all summer long.
✂️ Step 1: Identify the Right Time to Cut
Wait until after the first flush of blooms has fully faded but before the seed heads form. You'll know it's time when the flowers turn brown and the center stems look woody. This usually happens 4-6 weeks after initial bloom, but check weekly—spirea blooms fade fast in hot weather.
I always do this on a dry, overcast morning. Wet stems are harder to handle, and cutting in bright sun stresses the plant. Grab your pruners and work your way around the bush, moving from the outside inward so you don't accidentally cut healthy growth.
✂️ Step 2: Make the First Cut to Encourage New Blooms
Find the first set of healthy leaves below the faded blooms—this is your target. Make a clean cut just above this leaf pair at a 45-degree angle. This angled cut helps water run off the stem instead of pooling and rotting. For spirea, you're typically cutting back 1/3 to 1/2 of the current season's growth.
Don't worry about being perfect here. Spirea is forgiving—even if you cut slightly too far, it'll bounce back. The key is removing the entire spent bloom cluster down to fresh growth. If you leave any brown stems, the plant will focus energy there instead of producing new flowers.
✂️ Step 3: Shape the Bush for Continuous Blooming
After removing the first round of faded blooms, scan the entire plant for any other spent clusters. These often appear as small, dried-up puffballs along the stems. Cut these back to the nearest set of healthy leaves using the same 45-degree angle technique. This encourages the plant to produce new shoots from those leaf nodes.
Here's the thing—spirea often blooms in multiple flushes throughout summer. After your first deadheading, you'll likely see new buds forming within 3-4 weeks. When these bloom and fade, repeat the process. I've had spirea rebloom three times in one season using this method.
✂️ Step 4: Clean Up and Maintain Through the Season
After deadheading, remove all cuttings and place them in your compost bin or trash. Never leave spent blooms on the ground—they can harbor pests or diseases that might affect next year's growth. Once you've finished, give the plant a light drink of water to help it recover from the pruning stress.
Throughout the growing season, keep an eye out for any ragged or overgrown areas. Use your pruners to trim these back to maintain the bush's natural shape. Spirea responds well to light shaping prunes, so don't be afraid to give it a little haircut every few weeks. This keeps airflow circulating and prevents fungal issues.
Tips & tricks for perfect spirea deadheading
Common pitfalls—and how to sidestep every one—when it comes to keeping your spirea looking its best.
Timing Secret: The 4-6 week window after initial bloom is your sweet spot, but don't wait until the seed heads form. Those woody centers signal the plant has already shifted energy toward seed production instead of new blooms. I've seen spirea rebloom beautifully when deadheaded at the right moment, but once those seed heads appear, it's too late for that season's second flush. Mark your calendar based on your spirea's first bloom date—this is the single most important factor in successful deadheading.
Technique Tip: That 45-degree angle cut isn't just for show—it's a water management strategy. The angled cut prevents water from pooling at the stem junction, which could lead to rot. Think of it like creating a little roof over the cut area. And here's what nobody tells you: if you accidentally cut too far, don't panic. Spirea is incredibly resilient. Just trim back any ragged edges later in the season during your regular maintenance pruning. The plant will recover beautifully.
Seasonal Strategy: Spirea's multiple bloom cycles mean you'll need to repeat this process. After your first deadheading, watch for new buds forming within those 3-4 weeks. When these bloom and fade (they'll follow the same pattern), repeat the process. I've had spirea plants produce three distinct bloom cycles in one season using this method. The key is staying vigilant—those dried-up puffballs appear quickly in hot weather, so check weekly once you've done your first deadheading.
Equipment Wisdom: Your pruners are your most important tool, but don't overlook the quality of your blades. Dull pruners crush stems instead of making clean cuts, which can damage the plant. I recommend sharpening your pruners annually or whenever you notice they're not cutting cleanly. For larger spirea bushes, consider using loppers for the thicker stems—just make sure they're sharp too. And always clean your tools with rubbing alcohol between plants to prevent spreading diseases.
Pro Tips for Deadhead Spirea
- Common pitfalls—and how to sidestep every one—when it comes to keeping your spirea looking its best.
- Timing Secret: The 4-6 week window after initial bloom is your sweet spot, but don't wait until the seed heads form.
- Technique Tip: That 45-degree angle cut isn't just for show—it's a water management strategy.
Frequently asked questions
Got questions about deadheading spirea? You’re not alone! Here are answers to the most common ones—so you can keep those blooms coming all season long.
When is the best time to deadhead spirea?
Deadhead spirea right after blooms fade (usually late spring to early summer for most varieties). For repeat-blooming types like Spiraea japonica, trim spent flowers in early summer to encourage a second flush. Never deadhead in fall—this plant needs its seed heads for winter interest!
Do I need special tools to deadhead spirea?
Nope! A sharp pair of hand pruners or clean scissors works perfectly. Avoid dull tools—they crush stems and invite disease. For larger shrubs, bypass pruners make quick work of it. Pro tip: Disinfect tools with rubbing alcohol between cuts to prevent spreading pests.
What if I skip deadheading—will my spirea still bloom?
Yes, but not as abundantly! Deadheading redirects the plant’s energy toward new growth and flowers instead of seed production. Skipping it may lead to fewer blooms and a messier appearance. Think of it like trimming your hair—regular upkeep keeps things looking fresh!
Can I deadhead spirea in winter?
Nope! Wait until spring (after the last frost) to prune. Winter cuts can damage dormant buds or expose the plant to cold stress. If your spirea looks ragged in winter, leave the seed heads for texture—prune in early spring instead.
What if my spirea blooms but doesn’t rebloom?
Check the variety—some spireas (like Spiraea arguta) bloom once in spring and don’t rebloom. For repeat bloomers, ensure you’re deadheading promptly and fertilizing lightly in early summer. Over-pruning or poor soil can also stunt reblooming. Try a balanced 10-10-10 fertilizer for a boost!
Bonus Tip: How do I know if I’ve deadheaded too much?
If your spirea looks bare or leggy, you’ve likely pruned too aggressively. Aim to remove only the spent flowers—never more than 1/3 of the plant’s height in a single season. For heavy pruning, space it out over 2–3 years to avoid stressing the shrub.
Wrapping up and next steps
Deadheading spirea is a simple yet rewarding task that keeps your shrubs blooming beautifully all season! With just a few cuts and the right timing, you’ll encourage lush, vibrant flowers and maintain a tidy garden.
Now that you’re armed with the know-how, grab those pruners and get pruning—your spirea will thank you!
Ready for more? Explore our guide on full spirea pruning to keep your shrubs thriving year after year! 🌿✂️