
Landscaping
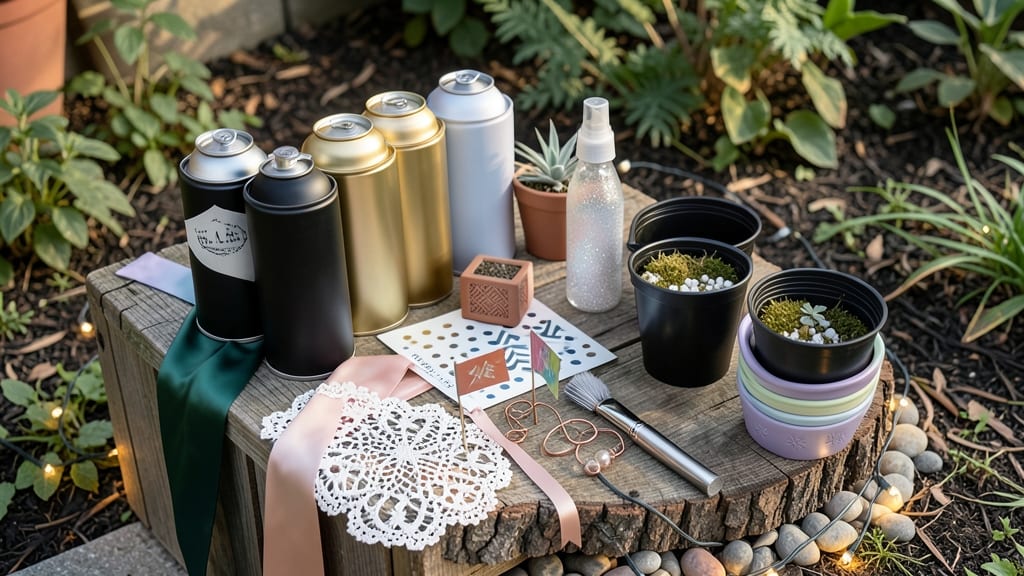
How to decorate the black plastic pots scream "basic"—until you transform them with paint. ✨ I’ve turned my drab nursery pots into statement pieces that match my garden’s bold aesthetic, and the best part? It only takes a few supplies and an afternoon. The key is choosing the right paint—look for weather-resistant acrylic or spray paint designed for outdoor use. A simple stencil or freehand design can elevate a plain pot into a focal point. Think geometric patterns, floral motifs, or even a faux terracotta finish for a rustic look. You’ll end up with pots that look custom-made but cost next to nothing. The painted designs hold up through rain and sun, and you can mix colors to complement your garden’s theme—whether it’s cottagecore, modern, or tropical. Best of all, this project works for any skill level. Grab your supplies, and let’s give those pots a makeover that’ll have neighbors asking where you bought them!
📚 In This Guide
- What you need
- Instructions
- Tips and common mistakes
- Wrapping up and next steps
What you need
- ● Black plastic pots – Any size or shape (1–5 gallons, depending on your project).
- ● Painter’s tape – 1–2 rolls (for clean lines and designs).
- ● Acrylic paint – 1–2 bottles (choose vibrant colors or metallic shades for bold impact).
- ● Paintbrushes – A mix of sizes (1/4"–1" flat brush for broad strokes, a fine-tip brush for details).
- ○ Spray paint (optional) – For a smooth, professional finish (matte or glossy).
- ○ Primer (optional but recommended) – 1 can (helps paint adhere better and prevents bleeding).
- ● Sandpaper (120–220 grit) – 1 sheet (to rough up the surface for better paint grip).
- ● Clear sealant or Mod Podge (outdoor-rated) – 1 bottle (to protect your design from weather).
- ○ Stencils (optional) – Pre-cut or DIY (for geometric patterns or motifs).
- ● Rubbing alcohol or acetone – Small bottle (for cleaning surfaces before painting).
- ● Clean your pots thoroughly with soapy water and rubbing alcohol to remove dirt or wax.
- ● Lightly sand the surface for better paint adhesion (especially if the pot is glossy).
- ● Test your paint on a small area first to check for colorfastness and adhesion.
Step-by-Step instructions for decorating black plastic pots
Transform those boring black pots into eye-catching statement pieces with these simple techniques.
🎨 Step 1: Gather Your Decorating Supplies
Start with the 4 black plastic pots you're transforming. You'll need acrylic paint (choose colors that pop against black), paintbrushes (including a small detail brush), painter's tape for crisp edges, clear acrylic sealer to protect your design, and sandpaper (120-grit) to rough up the surface for better paint adhesion. I like to work outside on a covered patio where drips won't ruin anything.
Rinse each pot thoroughly with soapy water to remove any dirt or residues. Let them dry completely before sanding—wet pots will take forever to dry and may warp slightly. Lightly sand the entire surface with the 120-grit paper, focusing on the outer walls. Wipe away all dust with a damp cloth before painting. This step ensures your paint won't peel later.
🎨 Step 2: Sketch and Paint Your Design
Use a pencil to lightly sketch your design directly onto the pot. For beginners, I recommend simple geometric patterns or bold stripes—these create the most dramatic contrast against black. Apply painter's tape to create clean lines if you're doing stripes or sharp angles. Dip your brush in paint and let excess drip off before applying to avoid thick globs.
Start with the background color if you're doing multi-color designs. Work in thin, even layers rather than thick coats—this prevents drips and gives a more professional finish. Let each layer dry completely before adding details. You'll know it's dry when you can lightly run your finger across the surface without leaving a mark. For intricate designs, use a toothpick to create fine details or remove excess paint.
🎨 Step 3: Seal and Protect Your Design
Once your design is completely dry, apply a thin layer of clear acrylic sealer using a wide brush. This protects your artwork from sun fading, rain, and general wear. Let the first coat dry completely—this usually takes about 1-2 hours. You'll see the surface look slightly dull when dry, which is normal. For extra durability, apply a second coat, especially if your pots will sit outside.
Let the sealer cure for at least 24 hours before using the pots. This gives the protective layer time to fully harden. If you're impatient, you can gently test with your fingernail—if it doesn't scratch easily, it's ready. For outdoor pots, consider adding a final layer of outdoor-rated sealant for extra protection against UV rays and moisture.
✨ Step 4: Add Finishing Touches (Optional)
For a professional look, add a final detail like a painted pot label or decorative sticker. Use a fine-tip marker to write the plant name or care instructions directly on the pot. I like to add a small dot of paint to the bottom of each pot to match the design—this makes the finished look cohesive when viewed from all angles.
Let your creativity shine here! You can add metallic accents, stencils, or even decoupage with fabric scraps for texture. The key is to keep your design balanced—since you're working with black pots, bold colors will always look stunning. Once you're happy with the design, let everything cure completely before planting or displaying your newly decorated pots.
Tips & tricks for decorating black plastic pots
These simple strategies will help you achieve professional-looking painted pots that last—without the frustration.
Surface Prep Secret: Don't rush the sanding in Step 1! Lightly sanding the pots creates tiny grooves that help the acrylic paint grip better. I like to use circular motions with the 120-grit sandpaper, focusing on the outer walls where most designs will go. After sanding, wipe away all dust with a damp cloth—any leftover particles can create texture issues in your paint. This step is what prevents your design from peeling later, so take your time.
Design Planning: Before sketching in Step 2, I recommend laying out your 4 pots side by side to visualize how the designs will look together. For cohesive patterns, use the same color scheme or complementary colors across all pots. If you're doing stripes, measure the pot circumference first—this ensures your stripes will align perfectly when viewed from all angles. A simple ruler or measuring tape works great for this. Trust me, this small step makes your finished project look intentional and polished.
Drying Time Hack: The 1-2 hours drying time for paint in Step 3 can feel endless, but there's a trick: Use a small fan on low setting to gently circulate air around your pots. This speeds up drying without creating drafts that could move your design. Just be careful not to blow directly on the wet paint. Also, I find that working in a slightly cooler room (around 68°F) helps paint dry more evenly than in hot, humid conditions. You'll know it's ready for the next layer when you can gently press your finger against the paint without leaving an imprint.
Sealer Application: When applying the clear acrylic sealer in Step 3, use a wide brush and work in thin, even strokes rather than thick globs. This prevents bubbles and ensures full coverage. For extra durability on outdoor pots, I recommend adding a second coat after the initial 1-2 hour dry time. The 24-hour curing period is crucial—don't skip it! If you're really impatient, you can test the sealer's readiness after 4 hours by gently pressing your fingernail against the surface. If it doesn't scratch easily, it's ready for use.
Pro Tips for Decorate Black Plastic Pots
- These simple strategies will help you achieve professional-looking painted pots that last—without the frustration.
- Surface Prep Secret: Don't rush the sanding in Step 1! Lightly sanding the pots creates tiny grooves that help the ac...
- Design Planning: Before sketching in Step 2, I recommend laying out your 4 pots side by side to visualize how the des...
Frequently asked questions
Got questions about transforming those plain black plastic pots into eye-catching statement pieces? Here are some of the most common concerns—and their easy solutions!
Can I use regular acrylic paint on black plastic pots?
Not without prep! Black plastic is slick and non-porous, so acrylic paint won’t stick well. Always start with a bonding primer (like Rust-Oleum Plastic Primer) or a light sanding (120-grit sandpaper) to create grip. Pro tip: Use heat-set paint for extra durability if your pots sit outside year-round.
How do I protect my painted pots from sun, rain, and fading?
Seal, seal, seal! After painting, apply 2-3 coats of outdoor polyurethane or a waterproof acrylic sealer. For extra toughness, try a mod podge outdoor spray. Avoid glossy finishes—they show scratches. Store pots in shade during extreme heat to prevent cracking.
What’s the best way to remove old paint before redecorating?
Start with rubbing alcohol or acetone on a cloth to dissolve glossy layers. For stubborn paint, use a plastic-safe stripper (like Krud Kutter) or heat with a hairdryer to soften it before scraping. Never use steel wool or harsh chemicals—they’ll scratch or melt plastic.
Can I decorate pots with fabric, wallpaper, or other materials?
For fabric, wrap and secure with hot glue or outdoor staples, then seal edges with clear tape. Wallpaper works too—use a peel-and-stick variety designed for plastic or metal. Just ensure everything’s UV-resistant and sealed to prevent water damage.
Why is my paint peeling after just a few weeks?
Peeling usually means poor adhesion or moisture trapped under paint. Always let paint dry 24 hours between coats, and avoid painting in humid or rainy conditions. If peeling happens, lightly sand the area, re-prime, and repaint with a flexible outdoor paint.
Still stumped? Drop your specific issue in the comments—we’re happy to help you troubleshoot!
Wrapping up and next steps
Decorating black plastic pots transforms them into eye-catching statement pieces that elevate any garden or patio! With just a few supplies and a splash of creativity, you can turn plain pots into vibrant works of art.
Whether you choose bold stripes, intricate designs, or metallic accents, the key is to experiment fearlessly—there’s no wrong way to make your pots shine.
Ready to bring your vision to life? Grab your brushes, gather your colors, and start decorating! 🎨✨ For extra inspiration, browse Pinterest or local garden centers to spark new ideas—your next masterpiece is just one stroke away.