
Tools
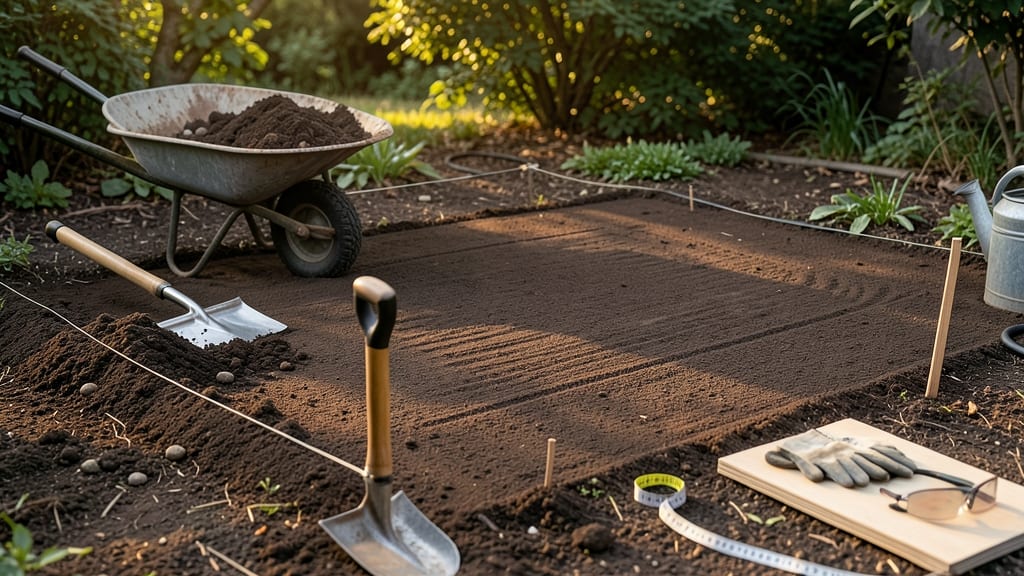
How to level ground for a garden bed turns even the trickiest plots into a thriving space. 🌱 I’ve seen raised beds lean like drunkards and in-ground plots turn into muddy messes—until I learned these three simple steps for a perfectly flat foundation. The difference between a thriving garden and a struggling one often starts here.
You’ll need just a few basic tools: a sturdy shovel, a leveling board (or even a scrap of plywood), a rake, and a 4-foot level (or a long, straight board with a bubble level). The real work?
Removing rocks, roots, and debris first—skipping this step means uneven spots hiding beneath the surface. Start by marking your bed’s edges with stakes, then dig down 6-12 inches to break up compacted soil.
Once the area is cleared, use the leveling board to create a smooth, even surface. Drag it back and forth like a sled, filling low spots with soil and scraping off high areas.
For slopes, work in 2-foot sections to avoid overloading the board. The goal? A surface so flat that water doesn’t pool—because soggy roots mean weak plants.
Pro tip: Walk over the bed after leveling—if you feel bumps, smooth them out before planting. This method works for raised beds, in-ground plots, and even container gardens. Skip the guesswork, and your garden will thank you with stronger roots and fewer headaches down the line.
📚 In This Guide
- What you need
- Instructions
- Tips and common mistakes
- Wrapping up and next steps
What you need
- ● Measuring tape (25–50 ft) – For precise layout and dimensions.
- ● String line & stakes (4–6 wooden or metal stakes + 50–100 ft of string) – Marks the garden bed’s perimeter.
- ● Shovel & spade (1 each) – For digging, removing sod, or breaking up soil.
- ● Rake (bow or leaf rake) (1) – Levels soil and removes debris.
- ● Wheelbarrow or bucket (1) – Hauls away excess dirt or sod.
- ● Level (4-ft carpenter’s level or digital level) (1) – Ensures perfect flatness.
- ○ Plate compactor or hand tamper (1) – Packs down soil for stability (optional but helpful for heavy clay or large beds).
- ○ Garden twine or landscape fabric (optional but recommended) – Suppresses weeds if planting perennials.
- ● Laser level – For extra precision on large or sloped areas.
- ● Soil amendment (compost, sand, or peat moss) – Improves drainage or fertility if your soil is poor.
- ● Knee pads or work gloves – Protects your joints and hands from rough terrain.
- ● Hose with spray nozzle – Helps settle soil and spot-check for uneven spots.
Step-by-step instructions for creating a flat garden foundation
Here's how I transform uneven ground into a perfectly level garden bed without backbreaking work.
🪴 Step 1: Mark and Clear the Garden Area
Use wooden stakes and string to outline your garden bed, creating a rectangle or custom shape that fits your space. I like to stake the corners first, then pull the string taut to visualize the final shape. For a 4-foot wide bed, I typically mark a length that matches my available space—usually 6-8 feet for most small gardens.
Remove all grass, weeds, and debris from within the marked area using a sharp spade or garden fork. Dig down about 4-6 inches to loosen the soil and expose the underlying terrain. You'll immediately see the high and low spots that need evening out. This is where the real work begins—don't skip clearing completely, or you'll have uneven settling later.
✂️ Step 2: Break Up and Level the Soil
Use a broadfork or digging fork to break up compacted soil without turning it over completely. I insert the fork 6-8 inches deep and rock it gently to loosen the soil in sections. This prevents creating a hardpan layer that will make future leveling difficult. Work in small sections—about 2 feet by 2 feet at a time—to maintain control over the terrain.
For noticeable high spots, use the flat side of your spade to scrape soil away and redistribute it to low areas. I like to use a 2x4 board as a makeshift level—place it across the bed and check for gaps. If one end sits lower, scrape soil from underneath until the board rests flat. This method gives you an instant visual reference for leveling without needing specialized tools.
🌱 Step 3: Refine with Topsoil and Compact
Spread a 2-inch layer of high-quality topsoil evenly across the bed, using a rake to smooth it out. Work in small sections to avoid creating ridges. I like to rake from one end to the other in straight lines, then turn the rake 90 degrees and repeat to catch any missed spots. This crosshatching motion creates a perfectly even surface.
Once the soil looks level, walk across the bed and press down firmly with your feet to compact it slightly. For larger areas, use a hand tamper or a 2x4 board to press down in even strokes. This step prevents future settling that could create dips in your garden bed. After compacting, give the soil a final check with your board level—if it's still flat, you're ready for planting.
Tips & tricks for perfect garden bed leveling
These pro techniques will help you create a perfectly flat foundation that lasts for seasons.
Precision Staking: When marking your 4-foot wide bed, use a level or string line to ensure your corner stakes are perfectly square. I like to measure diagonally between opposite corners—they should be equal in length. This prevents trapezoid-shaped beds that look uneven from above. For larger beds, consider using a garden laser level for perfect alignment.
Soil Redistribution Strategy: In Step 2, when scraping high spots, don't just pile soil to low areas—create small mounds beside them. This prevents creating new high spots as the soil settles. After redistributing, give everything 15-20 minutes to settle before your final level check with the 2x4 board. This extra time catches any immediate compaction issues.
Topsoil Application Technique: For that critical 2-inch layer in Step 3, use a straightedge (like a long board) to create a perfectly level reference point before spreading topsoil. Work from the center outward, then use your rake to feather the edges smoothly into the surrounding soil. This creates a seamless transition that prevents water pooling at the bed's edges.
Final Compaction Check: After compacting, walk across the bed one last time—your footprints should leave clean, flat impressions without sinking. If you notice any soft spots, add a thin layer of topsoil and compact again. This final check ensures your bed won't develop dips after planting, which is especially important for root vegetables that need consistent support.
Pro Tips for Level Ground For Garden Bed
- These pro techniques will help you create a perfectly flat foundation that lasts for seasons.
- Precision Staking: When marking your 4-foot wide bed, use a level or string line to ensure your corner stakes are per...
- Soil Redistribution Strategy: In Step 2, when scraping high spots, don't just pile soil to low areas—create small mou...
Frequently asked questions
Got questions about leveling your garden bed? You’re not alone! Here are some of the most common concerns—and straightforward answers—to help you tackle the job with confidence.
What’s the best time of year to level my garden bed?
Spring or early fall are ideal times to level your garden bed. The soil is workable, and you avoid extreme heat or frost. If you’re in a mild climate, you can level year-round—but avoid rainy seasons to prevent erosion or waterlogging.
Do I need special tools, or can I use household items?
While a laser level or spirit level makes the job easier, you can DIY with a long board (like a 2x4) and a carpenter’s level, or even a hose with water (fill it and let it overflow to find the highest points). A shovel, rake, and tamper are essential, though!
How do I fix uneven spots after leveling?
If you spot dips or bumps after leveling, use a soil tamper to compact low areas, then add a thin layer of topsoil or compost. For high spots, scrape off excess soil and redistribute it to lower areas. A final pass with a rake smooths out the surface.
Can I level a garden bed on a slope without digging it all out?
Use terraced gardening by creating flat sections along the slope, separated by low borders or rocks. This prevents erosion and allows water to drain properly. Alternatively, build raised beds on the slope to contain soil and plants.
What should I avoid when leveling my garden bed?
- Skipping soil prep: Don’t level without removing rocks, roots, or debris first—they’ll cause uneven settling.
- Over-compacting clay soil: Too much tampering can make clay soil impermeable. Mix in compost to improve drainage.
- Ignoring drainage: Ensure a slight slope (1-2%) away from structures to avoid water pooling.
Wrapping up and next steps
Leveling your garden bed might seem like a daunting task, but with the right tools and a little patience, you’ve got this! 🌱 A perfectly flat foundation ensures healthy plants, easier maintenance, and a stunning garden that’ll make your neighbors green with envy.
Now that you know the steps—from clearing debris to fine-tuning the slope—it’s time to roll up your sleeves and transform that uneven patch into a thriving garden oasis.
Ready to take the next step? Start small—pick a section of your garden bed, gather your tools, and practice your leveling skills. Once you’ve mastered the basics, you can expand to larger areas or even tackle that tricky slope. Happy gardening!