
Planting
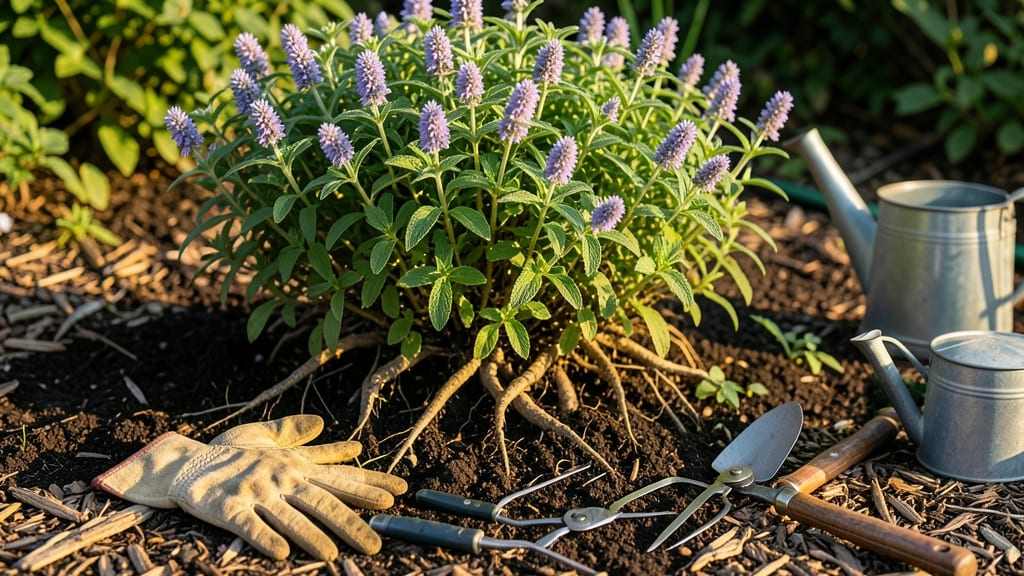
Dividing catmint doubles your blooms without buying new plants. ✨ The right timing—spring or early fall—makes all the difference, turning a single clump into two thriving bushes that flower from summer to frost.
You’ll need sharp pruners, a spade, and a hose for cleanup. The process takes about 30 minutes and works even for beginners—just dig carefully to avoid tearing roots. I’ve divided catmint for years, and the key is working when the soil is moist but not soggy.
After splitting, replant divisions with 12-18 inches between crowns and water deeply. Within weeks, you’ll see fresh growth, and by next season, both plants will burst with fragrant purple blooms. No more crowded clumps, just lush, airy plants that attract bees.
Pro tip: Prune spent flowers mid-season to encourage more blooms. This method works for both Nepeta varieties and catmint hybrids, giving you free plants for swapping with neighbors or filling gaps in your garden.
📚 In This Guide
- What you need
- Instructions
- Tips and common mistakes
- Wrapping up and next steps
What you need
- ● Sharp bypass pruners or clean garden shears – For clean cuts without crushing stems (sterilize with rubbing alcohol first!).
- ● Garden fork or trowel – A sturdy fork helps loosen roots without damaging them (opt for a 6-8 inch blade for precision).
- ○ Gloves (optional but recommended) – Protect your hands from thorns and soil-borne bacteria (nitrile or leather gloves work well).
- ● Watering can or hose with a gentle spray nozzle – Keep plants hydrated before, during, and after division.
- ○ Compost or well-aged manure – A small bag (5-10 lbs) to enrich the soil for replanting (optional but highly beneficial!).
- ● Mulch (straw, pine needles, or shredded bark) – Helps retain moisture and protect newly divided plants (1-2 inches thick).
- ● New planting location or containers (if propagating) – Ensure pots have drainage holes (6+ inches deep for root growth).
- ● Rooting hormone – Speeds up root growth if replanting cuttings (gel or powder form).
- ● Plant labels or markers – Track varieties if dividing multiple types (waterproof tags work best!).
- ● Disinfectant spray (10% bleach solution) – Spray tools between cuts to prevent disease spread.
- ● Wheelbarrow or large bucket – For transporting divided sections to new spots easily.
Step-by-Step instructions for dividing catmint plants
Here's my foolproof method for splitting catmint—it doubles your plants while keeping them healthy and blooming.
✂️ Step 1: Prune Back the Current Plant
Start by cutting back the entire plant with sharp pruners, reducing stems by about one-third. This removes old growth and redirects energy to root development, making the division process easier on the plant. I always prune in early spring just before new growth begins—this gives the roots time to recover before transplanting.
Remove any dead or diseased stems first. You'll see healthy stems have vibrant green color and firm texture, while dead ones are brown and brittle. This step also helps you assess the plant's size and structure, which is crucial for determining how many divisions you'll end up with.
🪴 Step 2: Dig Up and Prepare the Plant
Dig around the perimeter of the plant, working your shovel about 6-8 inches away from the crown to avoid damaging roots. Lift the plant carefully, shaking off excess soil to reveal the root system. Catmint forms dense clumps, so you'll see distinct sections with their own sets of roots and stems.
I like to lay the plant on a tarp or piece of cardboard to examine the root structure. Look for sections with 3-5 stems each and at least 4-6 inches of healthy roots. These will establish quickly in their new homes. Avoid dividing sections that look weak or have sparse roots—they won't survive well.
✂️ Step 3: Separate the Divisions
Using a clean, sharp knife or pruners, carefully divide the root ball into sections. Cut through the roots between the clumps, making clean slices rather than tearing. Each division should have its own set of stems and a good portion of roots—aim for at least 3-4 stems per section to ensure strong regrowth.
Here's where it gets tricky: I find it helpful to gently wiggle each section while pulling apart to avoid breaking stems. You'll feel resistance where roots are connected, and this gives you a sense of how cleanly the division can be made. Discard any small sections with fewer than 3 stems—they won't establish well.
💧 Step 4: Replant the Divisions
Dig holes for each division that are just slightly wider than the root ball. Space them 18-24 inches apart to allow for future growth. Place each division in its hole, making sure the crown sits at soil level—burying it too deep can cause rot, while leaving it exposed weakens the plant.
Backfill with native soil and water deeply to settle the roots. I like to add a 1-inch layer of mulch around each plant to retain moisture and suppress weeds. Water again after a few days to encourage root establishment. Avoid fertilizing immediately—new roots need time to adjust before taking up nutrients.
☀️ Step 5: Provide Aftercare for Establishment
Keep newly divided catmint well-watered for the first 2-3 weeks, allowing the soil to dry slightly between waterings. You'll see new growth emerge within 3-4 weeks if conditions are right. This is your signal that the roots have taken hold and the plant is recovering from the division.
After the first month, reduce watering to normal levels. Catmint is drought-tolerant once established, but newly divided plants need consistent moisture to develop strong root systems. Avoid pruning again until the following spring—this gives the plant time to rebuild its energy reserves.
Tips & tricks for perfect catmint division
Dividing catmint successfully comes down to timing, technique, and understanding what makes these hardy plants thrive. Here's what I've learned from years of splitting mine without losing a single plant.
Timing is Everything: The early spring timing in Step 1 is non-negotiable. This gives roots exactly 3-4 weeks of warm weather before summer heat arrives, which is when new growth emerges. If you must divide in late spring, choose a cooler day and provide afternoon shade for the first week to prevent stress. The plant's natural growth cycle works with you here—don't fight it.
Root Structure Assessment: When examining the root ball in Step 2, look for the classic "finger-like" root structure that catmint develops. Each division should have at least 4-6 inches of these healthy roots—this is your guarantee of survival. I've made the mistake of keeping divisions with sparse roots, and they always struggle. Think of it like giving each new plant its own strong foundation before it even leaves the ground.
Division Technique: The wiggle test in Step 3 is your secret weapon. When you feel resistance while pulling apart sections, you're cutting through the natural root connections. This creates cleaner divisions that heal faster. I recommend using a clean, sharp knife sterilized with rubbing alcohol—this prevents introducing pathogens to your fresh cuts. Discard any sections with fewer than 3 stems immediately; they won't have enough energy to establish.
Post-Planting Care: That first watering after replanting in Step 4 should be deep enough to moisten the soil 6-8 inches down. This encourages roots to grow downward rather than staying shallow. The mulch layer isn't just decorative—it creates a microclimate that maintains consistent moisture levels. I've seen divisions with mulch establish 2-3 weeks faster than those without, and they handle summer droughts better once mature.
Pro Tips for Divide Catmint Plant
- Dividing catmint successfully comes down to timing, technique, and understanding what makes these hardy plants thrive.
- Timing is Everything: The early spring timing in Step 1 is non-negotiable.
- Root Structure Assessment: When examining the root ball in Step 2, look for the classic "finger-like" root structure that catmint develops.
Frequently asked questions
Got questions about dividing your catmint? You’re not alone! Here are some of the most common concerns—and their answers—to help you tackle this task with confidence.
When is the best time to divide catmint?
Divide catmint in early spring (just as new growth starts) or early fall (before the first frost). Avoid dividing in summer—hot weather stresses the plant and slows recovery. If you must divide in winter, wait until temperatures are above freezing to prevent shock.
How do I know if my catmint is ready to be divided?
Your catmint is ready when it forms a dense clump with multiple stems (3+ years old) or if growth slows and flowers become sparse. Look for crowded roots or a woody center—these are clear signs it’s time to split. Younger plants (under 2 years) don’t need dividing yet!
Can I divide catmint in pots instead of the ground?
Container-grown catmint
can be divided just like ground plants, but use sterilized tools and fresh potting mix to prevent disease. Choose pots with drainage holes and repot divisions in well-draining soil. Water lightly after replanting to help roots establish without rotting.
What should I do if my divided catmint isn’t thriving?
If your divisions look wilting, yellow, or slow to grow, check these fixes:
- Overwatering: Let soil dry slightly between waterings—catmint hates soggy roots!
- Poor light: Move to full sun (6+ hours/day) for best recovery.
- Root damage: Trim any black or mushy roots before replanting.
- Fertilizer shock: Wait 4–6 weeks before adding fertilizer.
Will dividing catmint reduce its blooms next year?
Not if done right! Dividing rejuvenates the plant, often leading to more vigorous growth and even bigger blooms the following year. Just ensure you’re dividing healthy sections with roots and shoots, and keep them well-watered during recovery. Patience pays off—you’ll see lush flowers by next season!
Wrapping up and next steps
Dividing your catmint plants is a simple yet rewarding way to expand your garden while keeping these hardy perennials thriving. By following the right timing, tools, and techniques, you’ll enjoy year-round blooms and healthier plants—plus, you can share the love with fellow gardeners! 🌿✨
Ready to get started? Grab your gloves, pick a sunny day, and give your catmint the care it deserves. Next up: Watch your divided plants flourish and consider adding them to new spots in your garden for a burst of color!