
Propagation
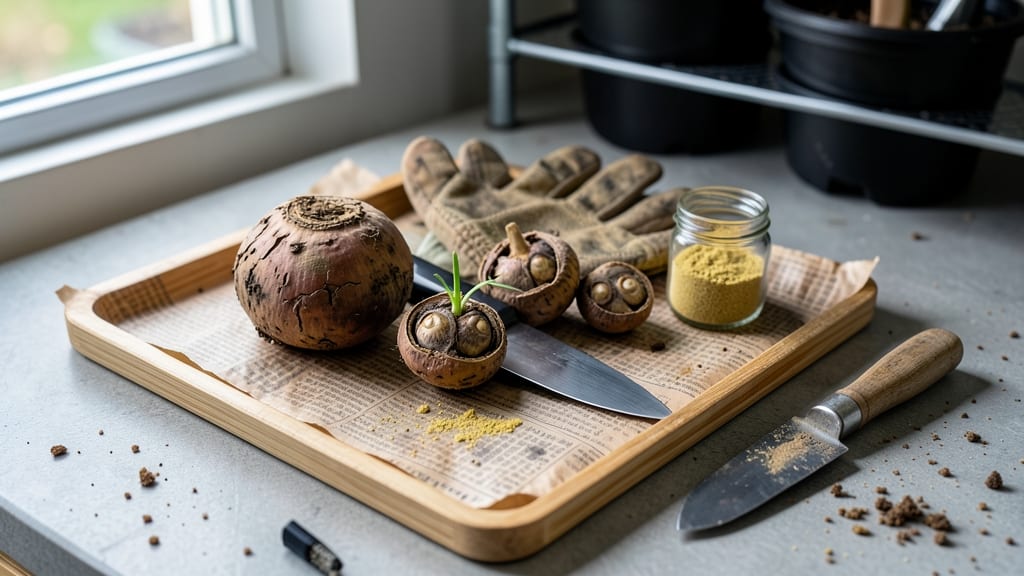
Spring’s the window to double your dahlias—wait until soil hits 60°F, or you’ll shock those tubers. 🌱 I’ve divided mine for years, and the secret isn’t just cutting: it’s timing, sharp tools, and knowing which eyes to keep.
One wrong move, and you’ll end up with stunted plants or no blooms at all.
The right setup makes all the difference: sterilized pruners, a clean work surface, and a mix of perlite and peat to keep roots happy post-division.
I’ve seen gardeners rush this step, only to watch their new tubers rot before they even sprout. Patience here means bigger blooms by summer—no shortcuts.
You’ll end up with 3-5 strong tubers per original, each packed with energy for a season of vibrant flowers. The key is clean cuts and proper drying time before replanting. Skip the mulch for the first two weeks—let those wounds heal, or you’ll risk rot.
Timing this right also ties into your summer care: fertilize lightly 4 weeks after division, then mulch when night temps stay above 50°F. The payoff? Dahlias that outperform store-bought plants—and neighbors who’ll ask for cuttings. Let’s get those tubers ready!
📚 In This Guide
- What you need
- Instructions
- Tips and common mistakes
- Wrapping up and next steps
What you need
- ● Dahlia tubers: Healthy, dormant tubers from last season (aim for at least 3-5 tubers per plant for optimal growth).
- ● Sharp, sterile knife or pruning shears: A clean, disinfected knife (or a horticultural saw for thicker tubers) to make precise cuts.
- ● Garden gloves: Protect your hands from dirt and sharp tools (opt for nitrile-coated gloves for grip and durability).
- ○ Horticultural chalk or cinnamon powder: 1-2 tablespoons to dust cuts and prevent rot (optional but highly recommended!).
- ● Well-draining potting mix or garden soil: A light, airy mix (e.g., 50% potting soil + 50% perlite or compost) for repotting.
- ● Containers or garden beds: Pots with drainage holes (6+ inches deep) or a prepared garden spot with loose, fertile soil.
- ● Watering can or spray bottle: For gentle hydration—avoid soaking the tubers!
- ● Labeling tags: Small stakes or tags to mark varieties (if dividing multiple types).
- ● Rooting hormone: Speeds up growth (follow package instructions).
- ● Disinfectant (rubbing alcohol or bleach solution): Wipe tools between cuts to prevent disease.
- ● Heat mat or propagator: For faster sprouting in cooler climates.
- ● Mulch: Straw or shredded leaves to retain moisture post-planting.
Step-by-Step instructions for dividing dahlia tubers in spring
Here's the method I've used for years to multiply my dahlias while ensuring each new plant thrives and blooms abundantly.
🌱 Step 1: Choose the Right Time and Prepare Your Workspace
Wait until after the last frost when soil temperatures reach at least 60°F—this is usually late April to early May depending on your zone. I like to check soil warmth by pressing my hand into the ground; if it feels comfortably warm to the touch, it's ready. Choose a bright, dry day to work, as damp conditions invite rot.
Clear a clean workspace with good airflow. Lay out your sharp pruning shears, sterilized knife, garden hose with spray nozzle, and gloves (dahlias have thorny stems). I always work on a tarp or old sheet to catch debris and make cleanup easier. This prevents lost tubers and keeps your workspace organized.
✂️ Step 2: Dig Up the Tubers and Inspect for Health
Use a garden fork to carefully lift the tubers from the ground, working in a circular motion around the base of the plant. You'll see brown, knobby tubers connected by a network of smaller "eyes" or growth points. Gently rinse off the soil with your hose to reveal the full structure—this helps you identify healthy sections to divide.
Look for tubers that are firm and plump, not shriveled or mushy. Discard any that show signs of rot, mold, or soft spots—these won't regrow. Healthy tubers should feel dense and have multiple eyes (small bumps or nodes) where new shoots will emerge. I like to soak the tubers in a 10% bleach solution for 10 minutes to sterilize them before dividing.
🪴 Step 3: Divide the Tubers with Precision Cuts
Separate the tubers into sections, ensuring each piece has at least 3-5 eyes—this guarantees strong growth. Use your sterilized knife to make clean cuts between the eyes, angling slightly to create a larger surface area for healing. Avoid jagged edges, which can invite disease. For larger tubers, I aim for 2-3 inch segments with at least one healthy eye per piece.
Here's the thing—don't rush this step. If a tuber has only one or two eyes, it'll produce a weak plant that may not bloom well. You'll know you've done it right when each piece looks balanced, with a good mix of eyes and tuber bulk. Set the divided pieces aside on your tarp to dry slightly while you prepare the planting area.
💧 Step 4: Plant the Divided Tubers for Strong Growth
Dig holes 6-8 inches deep and 12-18 inches apart, depending on your tuber size. The depth ensures stability and protects tubers from extreme temperature swings. Place each divided tuber in its hole with the eyes facing upward—this is critical for proper shoot emergence. Cover the tuber with 2-3 inches of soil, leaving the top visible.
Water deeply right after planting to settle the soil and encourage root growth. I like to add a slow-release fertilizer at this stage to give the new plants a nutrient boost. Mulch around the base with 2-3 inches of organic mulch to retain moisture and regulate soil temperature. Avoid overwatering now—dahlias are drought-tolerant once established, and soggy soil can rot fresh divisions.
☀️ Step 5: Provide Care for Robust Blooms
Keep the soil consistently moist but not waterlogged for the first 4-6 weeks—you'll see new shoots emerge from the eyes in 2-3 weeks if conditions are right. Once shoots reach 4-6 inches tall, they're ready for a light feeding with a balanced fertilizer. I use a 10-10-10 formula every 4-6 weeks to encourage lush foliage and abundant blooms.
Stake your dahlias early—even young plants benefit from support. I drive 5-6 foot stakes into the ground beside each plant and tie stems loosely with soft plant ties as they grow. This prevents flopping and keeps blooms upright. Deadhead spent flowers regularly to encourage more blooms and extend the flowering season well into fall.
Tips & tricks for perfect dahlia division
These simple strategies will help you maximize your dahlias' potential while avoiding common pitfalls that can ruin your divisions.
Timing is Everything: The 50°F temperature guideline in Step 1 is your golden window for dividing. If your spring arrives early, wait until nighttime temps dip below 50°F—this ensures tubers are fully dormant. I've learned the hard way that dividing too early can shock tubers still holding winter energy. For late winters, don't delay past early March unless you're in Zone 10+ where frost never comes.
The Cutting Technique: Sterilize your tools with rubbing alcohol before making cuts in Step 2—this prevents bacterial infections that can rot your divisions. For stubborn connections, score the tissue first with your knife, then twist gently while cutting. The goal is clean breaks, not jagged tears. I keep a small bowl of water nearby to rinse the knife between cuts and maintain sharpness.
Drying Strategy: The 1-2 days drying period in Step 3 is non-negotiable for preventing rot. If you're in a humid climate, extend this to 3 days and place tubers in front of a gentle fan. Test readiness by touching cut surfaces—if they feel damp, they're not ready. I mark each tuber with a pencil before drying to track which pieces belong together when planting.
Planting Depth Matters: The 4-6 inches deep guideline in Step 4 balances protection and airflow. In sandy soils, plant at the shallower end (4 inches) while clay soils benefit from the deeper 6 inches. I always mound soil slightly higher around the base to create a natural water catchment—this prevents the classic "soggy base" issue that leads to rot. Use a small stick to make a hole just wide enough for the tuber before planting.
Pro Tips for Divide Dahlia Tubers In Spring
- These simple strategies will help you maximize your dahlias' potential while avoiding common pitfalls that can ruin your divisions.
- Timing is Everything: The 50°F temperature guideline in Step 1 is your golden window for dividing.
- The Cutting Technique: Sterilize your tools with rubbing alcohol before making cuts in Step 2—this prevents bacterial infections that can rot your divisions.
Frequently asked questions
about dividing dahlia tubers in spring—because even experts need a little guidance!When is the exact best time to divide dahlia tubers?
Divide your tubers after the last frost but before new shoots reach 2–3 inches tall (typically late April–early May in most zones). If you wait too long, you risk damaging tender growth. Pro tip: Check your local frost dates—spring’s timing varies by region!
How many eyes (growth points) should each divided tuber have?
Each section should have 3–5 healthy eyes (the tiny buds on the tuber). Fewer than 3 may struggle to establish roots, while too many can overcrowd the new plant. Bonus: Larger tubers with more eyes = bigger blooms later!
What if my tubers are still dormant when I want to divide them?
No stress! Store tubers in a cool, dark place (like a garage) until they sprout (eyes turn green). Once active, divide them—just avoid temperatures above 60°F (15°C) or they’ll wake up too early. Patience pays off!
Can I divide dahlias in fall instead of spring?
Yes, but it’s trickier! Fall division works if you dig, divide, and replant immediately (before hard frosts). Alternatively, store tubers in dry peat moss over winter and divide in spring. Warning: Fall division risks rot or weak regrowth.
My divided tubers aren’t sprouting—what went wrong?
Check these culprits:
- Rot: Overwatered or stored in damp conditions? Trim mushy parts and replant.
- No eyes: Ensure each piece has at least 1–2 buds.
- Temperature shock: Dahlias need warmth (60°F+/15°C+) to wake up.
Wrapping up and next steps
Dividing your dahlia tubers in spring is a simple yet rewarding way to boost your garden’s beauty and share blooms with fellow enthusiasts! By following these steps—choosing healthy tubers, making clean cuts, and giving each division proper care—you’ll set the stage for vibrant, abundant flowers all season long. 🌸
Ready to transform a few tubers into a dahlia explosion? Grab your tools, roll up your sleeves, and start dividing—your future garden (and your neighbors!) will thank you. Next, learn how to plant your divisions for the best results!