
Companion Plants
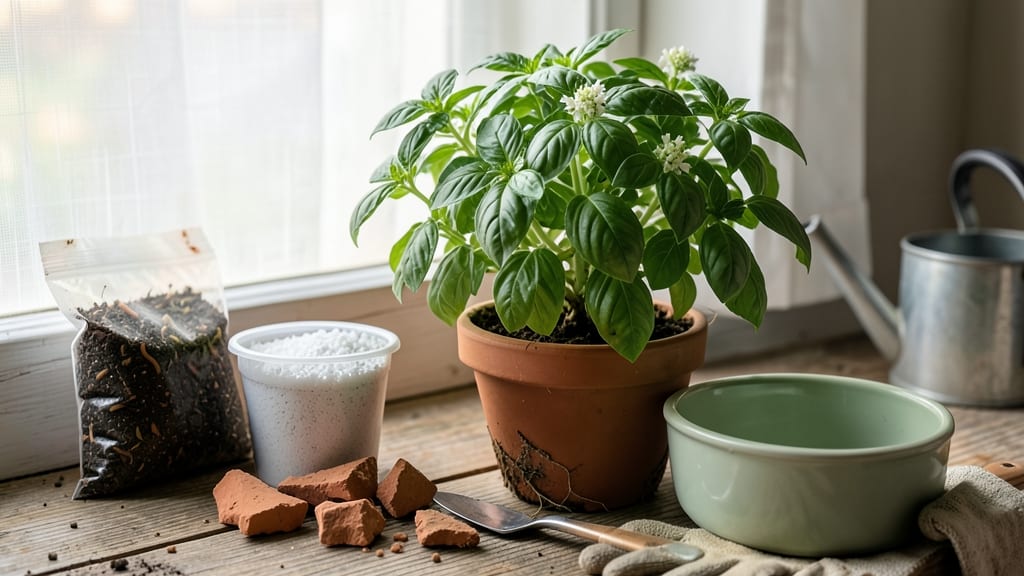
Filling a pot wrong can strangle your plants before they even sprout. 🌱 The secret lies in layers—drainage first, then soil that breathes, topped with amendments that feed roots exactly what they need. I’ve repotted dozens of plants, and this method keeps them thriving for years.
Start with 2-3 inches of gravel or broken pottery at the bottom—this prevents soggy roots and rot. Next, add a 2-inch layer of lightweight potting mix (never garden soil) to separate roots from the drainage layer. For heavy feeders like tomatoes, mix in compost or worm castings here.
The top layer should be 1-2 inches of fresh potting mix, fluffed and loose. Press it gently—just enough to hold the plant upright, but not so tight that roots can’t spread. Succulents need extra grit (like perlite), while herbs prefer moisture-retentive mix with a touch of sand.
Repotting isn’t just about filling space—it’s about creating a root-friendly ecosystem. Too much packing? Roots suffocate. Too little? Plants lean like drunkards. Master this, and your containers will grow stronger, faster, and longer than anything from the nursery.
📚 In This Guide
- What you need
- Instructions
- Tips and common mistakes
- Wrapping up and next steps
What you need
- ● Pot or container: Choose one with drainage holes (if planting in a pot without holes, ensure the soil mix is well-aerated). Size depends on plant type—small pots (6-12 inches) for herbs/succulents, larger pots (12+ inches) for shrubs or trees.
- ● Drainage layer: Small pebbles, gravel, or broken pottery shards (1-2 inches deep).
- ○ Optional but recommended: A layer of landscape fabric or mesh to prevent soil from clogging the drainage holes.
- ● Soil mix: Potting soil (sterile, well-draining blend). Quantity: Fill the pot 2/3 full after adding drainage.
- ● Customize for your plant: Perennials/vegetables: Add 20-30% compost or worm castings.
- ● Succulents/cacti: Mix in perlite or coarse sand (20-30%) for extra drainage.
- ● Acid-loving plants (e.g., azaleas): Use peat moss or pine bark fines (10-20%).
- ● Mulch (top layer): Organic mulch like bark chips, straw, or coconut coir (1/2 inch thick) to retain moisture and suppress weeds.
- ● Gloves: Protect your hands from dirt and sharp edges (e.g., gravel or broken pottery).
- ● Trowel or small shovel: For scooping and leveling soil.
- ● Watering can or hose with a gentle spray nozzle: To moisten layers as you go.
- ○ pH testing kit (optional): If your plant has specific soil pH needs (e.g., blueberries prefer acidic soil).
- ○ Slow-release fertilizer (optional): Mix 1-2 tablespoons per gallon of soil for a nutrient boost.
- ● 🌡️ Check soil moisture: If repotting, water the plant 1-2 days before to reduce stress.
- ● ✨ Sterilize tools: Rinse or wipe down tools with rubbing alcohol to avoid introducing pathogens.
- ● 🎯 Label your pots: Use a marker or tag to note plant type and care instructions.
Step-by-step guide to filling pots for healthy plant growth
Here's how I create the perfect foundation for strong roots and vibrant growth.
🪴 Step 1: Choose the Right Pot and Drainage
Select a pot with drainage holes—this is non-negotiable. Without them, roots suffocate from excess moisture. I like terra cotta because it breathes, but plastic works too if you drill extra holes. For every 6-inch pot, aim for at least 3 drainage holes spaced evenly around the base. Cover each hole with a small piece of mesh or broken pottery to prevent soil from washing out while still allowing water to escape.
Place your pot on a saucer or tray to catch drainage. This keeps your workspace clean and prevents root rot from sitting water. If you're using a decorative pot without holes, line it with a plastic nursery pot that does have drainage—just make sure it fits snugly inside.
🌱 Step 2: Add a Drainage Layer First
Start with a 1-2 inch layer of coarse material at the bottom. I use clean, quartered pumice or perlite because it prevents compaction and improves aeration. This layer ensures water flows freely without clogging the drainage holes. If you're using gravel, skip it—it compacts over time and defeats the purpose.
Spread the material evenly across the pot's base. For 8-inch pots, I use about ½ cup of this drainage medium. Press it down lightly so it stays in place but doesn't create air pockets that could trap moisture against the roots. This step is what keeps your plants' roots from sitting in soggy conditions.
🌿 Step 3: Layer High-Quality Potting Mix
Fill the pot about ⅔ full with a lightweight potting mix designed for containers. I avoid garden soil—it compacts and suffocates roots. Instead, I use a blend that includes peat moss, perlite, and compost for ideal drainage and nutrient retention. Scoop the mix into the pot and spread it evenly, leaving about 1 inch from the rim for watering and top dressing.
Gently press the soil down with your fingers to remove air pockets, but don’t pack it tightly. The mix should feel like a damp sponge—firm enough to hold shape but still loose enough for roots to penetrate easily. If you press too hard, you’ll create a dense layer that restricts root growth and water flow.
✂️ Step 4: Add Optional Amendments for Specific Needs
For heavy feeders like tomatoes or peppers, mix in a slow-release fertilizer at planting time. I sprinkle about 1 tablespoon per gallon of potting mix and work it in gently. For acid-loving plants like blueberries or azaleas, add a handful of sulfur or pine bark fines to lower the pH. Always follow the package instructions for amendments—overdoing it can harm your plants.
If your potting mix feels too dense, top it with a ½-inch layer of orchid bark or coconut coir. This adds extra aeration for root systems that need it, like succulents or epiphytes. For moisture-retentive plants like ferns, skip this step and focus on keeping the soil consistently damp instead.
💧 Step 5: Water and Settle Before Planting
Give the pot a thorough watering until water runs freely from the drainage holes. This helps the soil settle and removes any remaining air pockets. Let it drain completely, then add a final ½-inch layer of mulch or compost on top. This top dressing helps retain moisture and prevents soil from crusting over when you water.
Wait until the top inch of soil feels slightly dry before planting. This ensures your plants start with roots in moist but not waterlogged conditions. If the soil feels soggy, let it dry out a bit longer—overwatering at this stage can lead to root rot before your plants even have a chance to establish.
Tips & tricks for perfect pot filling
These insider secrets will help you create the ideal growing environment for your plants—no guesswork required.
Drainage Layer Precision: The 1-2 inch drainage layer isn't just about drainage—it's about creating an oxygen-rich zone at the base where roots can breathe. I've found that using pumice works better than gravel because it maintains its structure over time. For 8-inch pots, that ½ cup measurement is crucial—too little and water pools, too much and you reduce planting space. Press it down just enough to eliminate gaps, but don't compact it like soil.
Soil Layer Technique: When filling to ⅔ full with potting mix, use the "finger test" to check consistency. Your mix should crumble easily between fingers when lightly pressed—like a damp sponge. If it sticks together, add more perlite to lighten it. The 1-inch headspace from the rim is essential for watering without overflow, but don't skip it—this prevents soil from splashing out when you water.
Amendment Strategy: For heavy feeders, that 1 tablespoon per gallon of slow-release fertilizer is the perfect baseline. I like to mix it into the bottom third of the potting mix where new roots will first establish. For acid-loving plants, a handful of sulfur (about 2 tablespoons per pot) is plenty—too much can actually harm your plants by creating toxic levels. Always work amendments into the soil rather than just sprinkling on top.
Final Watering Wisdom: That thorough watering until water runs freely isn't just about settling the soil—it's about testing your drainage system. If water pools on top after 10 minutes, you need more drainage material or larger holes. The ½-inch mulch layer on top serves two purposes: it prevents soil crusting and slows evaporation, but don't make it thicker—this can create a waterproof barrier that prevents oxygen from reaching the soil surface.
Pro Tips for Fill A Pot For Plants
- These insider secrets will help you create the ideal growing environment for your plants—no guesswork required.
- Drainage Layer Precision: The 1-2 inch drainage layer isn't just about drainage—it's about creating an oxygen-rich zone at the base where roots can breathe.
- Soil Layer Technique: When filling to ⅔ full with potting mix, use the "finger test" to check consistency.
Frequently asked questions
Got questions about filling pots like a pro? You’re not alone! Here are answers to the most common queries—so you can give your plants the perfect foundation for growth.
What’s the best order for layering soil in a pot?
Start with drainage at the bottom (gravel, rocks, or broken pottery), then add a layer of organic matter (like compost), followed by a mix of potting soil and perlite or sand. Top with a thin layer of mulch or bark chips to retain moisture. Pro tip: Adjust ratios based on your plant’s needs—succulents love gritty mixes, while ferns thrive in moisture-retentive blends!
How often should I refill or adjust the soil in a pot?
Check soil every 6–12 months for compaction or nutrient depletion. Top-dress with fresh compost annually, and replace the entire soil mix if roots are circling the pot or growth slows. Signs it’s time: Water drains too slowly, leaves yellow, or roots peek through drainage holes.
Can I use regular garden soil instead of potting mix?
Nope! Garden soil compacts easily, blocks drainage, and lacks the air pockets roots need. Potting mix is lighter, sterile, and formulated to prevent soggy roots. Exception: Amend garden soil with perlite and compost (50/50) for raised beds—but never for containers.
What if my pot doesn’t have drainage holes? Can I still use it?
Yes, but with caution! Line the pot with a thick layer of gravel (2–3 inches) and use a soil mix with high perlite content. Monitor moisture closely—overwatering is a risk. For long-term use, consider drilling holes or switching to a pot with drainage.
How do I fix a pot where the soil has settled unevenly?
Gently loosen the top 2–3 inches of soil with a fork or your fingers, then fluff it up. Add fresh potting mix to fill gaps, and water lightly to settle it naturally. For stubborn compaction, mix in a handful of perlite or vermiculite to improve aeration.
What’s the worst mistake beginners make when filling pots?
Skipping the drainage layer or overpacking soil, which suffocates roots. Remember: Loose layers = happy roots! Also, avoid using clay or garden soil—it’s a fast track to root rot. Quick fix: If you’ve already packed soil too tightly, score it vertically with a knife to create air channels.
Wrapping up and next steps
Filling a pot with the right soil layers is like giving your plants a cozy, nutrient-packed home—they’ll thank you with lush growth! 🌱 Whether you’re layering drainage rocks, mixing compost, or balancing textures, each step ensures strong roots and vibrant blooms.
Now that you’re armed with the secrets, it’s time to roll up your sleeves and create the perfect foundation for your green companions.
💡 Next step: Grab your pot, gather your supplies, and start layering! Watch your plants thrive as their roots dive into their new, happy habitat. Happy gardening! 🌿