
Flowers
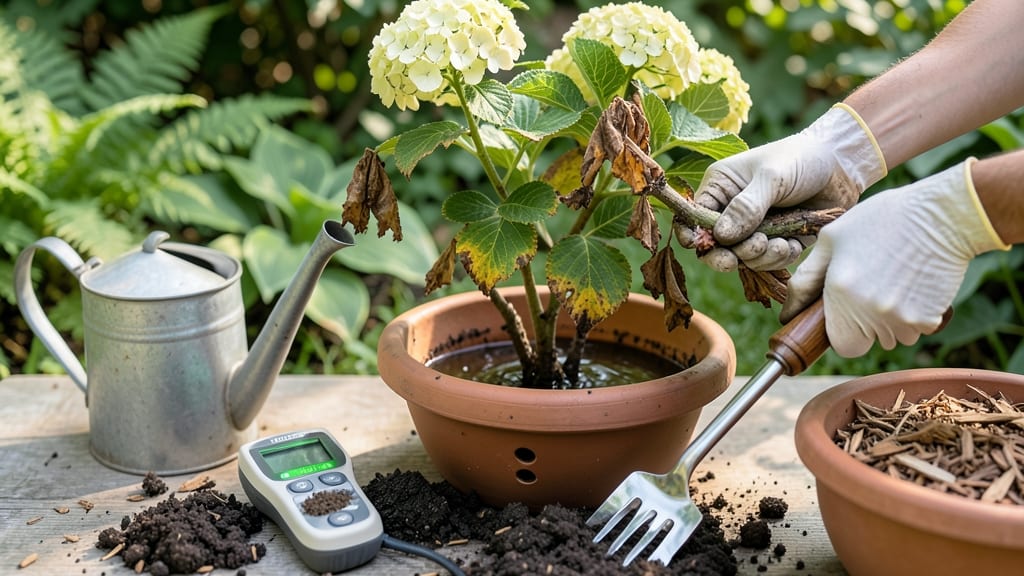
Your hydrangeas look like they’ve been through a monsoon—drooping, yellowing, and refusing to bounce back. 🌿 Here’s how to fix an overwatered hydrangea: The good news is that it’s reversible, and I’ve nursed more than a few back to life with these same steps.
The first sign of trouble is usually soggy soil that smells like a swamp, not the fresh, earthy scent you expect. Start by checking the roots—healthy ones should be firm and white, while rotten roots are mushy and dark.
Gently loosen compacted soil around the base and add a 2-inch layer of compost mixed with perlite to improve drainage. This combo breathes new life into roots while preventing future soggy soil.
Within 2-3 weeks, you’ll see new green growth pushing through, and those once-wilted blooms will perk up again. The key is watering only when the top inch of soil feels dry—hydrangeas hate soggy feet but thrive with consistent moisture. This method works for both in-ground plants and container-grown hydrangeas.
Once your plant recovers, keep a garden journal to track watering habits—it’s the best way to avoid a repeat performance next season.
📚 In This Guide
- What you need
- Instructions
- Tips and common mistakes
- Wrapping up and next steps
What you need
- ● Well-draining potting mix or garden soil (at least 5 gallons for repotting, or enough to amend existing soil in the garden bed). Opt for a mix with perlite, vermiculite, or sand (20-30% by volume) to improve aeration.
- ● Large container or pot (1-2 sizes bigger than the current one, with drainage holes). 10-15 gallon capacity is ideal for mature hydrangeas.
- ● Gloves (gardening or rubber gloves to protect your hands from wet soil and potential root rot).
- ● Pruning shears or sharp bypass pruners (sterilized with rubbing alcohol to prevent disease spread).
- ● Trowel or garden fork (for gently loosening compacted or waterlogged soil).
- ● Watering can with a rose attachment (for controlled, deep watering—avoid overhead sprinklers).
- ○ Mulch (optional but helpful) (2-3 inches of pine bark, straw, or shredded leaves to retain moisture without suffocating roots).
- ○ Fungicide (optional but recommended) (copper-based or neem oil solution to treat potential fungal issues from overwatering).
- ● Choose the right time: Revive your hydrangea on a cloudy day or late afternoon to reduce stress from direct sunlight.
- ● Assess the damage: Gently check the roots—healthy roots are white or light tan, while rotten roots are mushy, brown, or black.
- ● Drainage check: If repotting, ensure the new container has 3-4 drainage holes at the bottom.
- ● Patience: Hydrangeas may take 2-4 weeks to show signs of recovery after proper care.
Step-by-Step instructions for reviving overwatered hydrangeas
Here’s how to nurse your soggy hydrangeas back to health—no drama, just science-backed care.
🌱 Step 1: Stop Watering and Check the Roots
First, halt all watering immediately. Hydrangeas can’t recover if you keep drowning them. Grab a trowel and gently loosen the soil around the base—you’re looking for roots. Healthy roots should be white or pale tan, but overwatered ones will be mushy, gray, or black. If you see slimy roots or a foul smell, that’s your warning to act fast.
If the roots are still firm but the soil feels waterlogged (like a sponge that won’t drain), dig a small trench around the plant to improve airflow. This helps excess moisture evaporate. I like to add a handful of coarse sand or perlite to the trench—it won’t fix the damage overnight, but it’ll prevent future rot.
💧 Step 2: Adjust Soil Drainage and Watering Habits
Overwatered hydrangeas need soil that drains like a well-oiled sieve, not a swamp. Mix 2-3 inches of organic mulch (like shredded bark or pine needles) around the base, but keep it 6 inches away from the stem to avoid trapping moisture. This mimics their natural woodland habitat while preventing soggy roots.
Water only when the top 2-3 inches of soil feel dry—stick your finger in to check. If it’s damp, wait. Hydrangeas thrive with 1-1.5 inches of water per week, including rain. If your soil stays wet longer than 48 hours after watering, you’ve got drainage issues that need fixing—consider raised beds or amended soil for next season.
☀️ Step 3: Prune Damaged Foliage and Boost Recovery
Snip off any yellow, brown, or mushy leaves with clean pruners—these are energy drains. Focus on the outer edges first, then work inward. You’ll see new growth emerge from the center as the plant redirects energy. Don’t worry if the plant looks skeletal at first; hydrangeas are tougher than they appear.
Give your hydrangea a balanced fertilizer (like 10-10-10) once new leaves appear—this jumpstarts recovery. I avoid high-nitrogen feeds right away; they encourage leafy growth at the expense of roots, which are still healing. Instead, opt for a root-stimulating tonic to rebuild strength from the ground up.
⏰ Step 4: Monitor and Prevent Future Overwatering
Keep an eye on your hydrangea for 2-3 weeks. You’ll know it’s recovering when new shoots appear and leaves stay firm and green. If you see wilting again, it’s a sign the soil is still too wet—adjust your watering schedule or upgrade your drainage.
Here’s the thing—hydrangeas hate soggy feet but love consistent moisture. Next time, water deeply once or twice a week (depending on your climate) and let the soil dry slightly between sessions. A moisture meter or simple finger test is your best friend. With patience, your hydrangea will bounce back—and next season, you’ll be the proud owner of lush, blooming beauty.
Tips & tricks for perfect hydrangea recovery
Between us, these small adjustments make all the difference when bringing hydrangeas back from the brink. The key is patience—don't rush the process.
Root Inspection Tip: When checking for root rot in Step 1, look for a clear color contrast between healthy roots (firm and white) and damaged ones (mushy and gray). I've seen gardeners mistake slightly discolored but still firm roots for rot—don't trim unless it's truly mushy. Also, sterilize your pruners with rubbing alcohol between cuts to prevent spreading any potential pathogens.
Soil Mix Secret: For Step 2, if you don't have perlite, coarse horticultural sand works just as well. The critical ratio is 2 parts native soil to 1 part amendment—this maintains structure while improving drainage. I've found that adding a handful of worm castings to this mix gives plants a gentle nutrient boost during recovery. Press the amended soil firmly around the roots to eliminate air pockets that could trap moisture.
Light Adjustment Strategy: Moving your hydrangea to a sunnier spot in Step 3 doesn't mean full sun exposure. Aim for 4-6 hours of morning sun and afternoon shade, especially in hot climates. I've watched hydrangeas scorch when moved directly to full sun after being in shade—gradual adjustment is key. If you can't move the plant, simply prune nearby shade trees to increase light exposure.
Recovery Timeline: The 2-3 week window for new growth in Step 3 can vary based on your climate. In cooler spring weather, expect growth at the 3-week mark, while summer heat might delay it to 4 weeks. Watch for tiny new leaves at the stem base—they're your first sign of recovery. If you see no growth after 4 weeks, gently scratch the bark with your fingernail to check for moisture—if it's still damp, you're overwatering still.
Pro Tips for Fix Overwatered Hydrangea
- Between us, these small adjustments make all the difference when bringing hydrangeas back from the brink. The key is ...
- Root Inspection Tip: When checking for root rot in Step 1, look for a clear color contrast between healthy roots (fir...
- Soil Mix Secret: For Step 2, if you don't have perlite, coarse horticultural sand works just as well. The critical ra...
Frequently asked questions
Got more questions about saving your soggy hydrangeas? Here are answers to the most common concerns—plus a few pro tips to keep your plants thriving after the rescue!
How do I know if my hydrangea is overwatered vs. underwatered?
Check the soil first: Overwatered hydrangeas have soggy, mushy roots and yellowing leaves with a foul odor. Underwatered plants have dry, crispy edges and droop even when soil is dry. Tap the soil—if it stays clumped, it’s too wet!
How long does it take to revive an overwatered hydrangea?
With proper care (draining soil, pruning dead foliage, and adjusted watering), you’ll see improvement in 3–7 days. New growth may take 2–4 weeks, but patience pays off—hydrangeas are resilient! Monitor closely for signs of stress.
Can I use hydrogen peroxide or vinegar to fix overwatered hydrangeas?
Yes! 1 part 3% hydrogen peroxide to 10 parts water (spray roots) fights fungus and bacteria. For vinegar, mix 1 tbsp white vinegar per gallon of water to lower soil pH and deter pests. Use sparingly—both can burn roots if overused.
Should I repot my hydrangea if it’s overwatered?
Only if the roots are rotten or the soil is compacted. If repotting, use a well-draining mix (50% peat moss, 30% perlite, 20% compost) and a pot with drainage holes. Wait until roots recover (2–3 weeks) before repotting.
Will my hydrangea bloom again after overwatering?
Prune dead blooms and foliage to redirect energy. Old wood hydrangeas (like macrophylla) may rebloom in 6–8 weeks with proper care. New wood types (like paniculata) often bloom on current season’s growth.
Pro Tip: Mulch matters!
After fixing overwatering, add 2–3 inches of organic mulch (like pine bark) to retain moisture without suffocating roots. Keep mulch 2 inches away from the stem to prevent rot.
Wrapping up and next steps
Reviving an overwatered hydrangea isn’t as tricky as it seems—just drain, adjust, and monitor with patience! 🌱 By following these steps, you’ll help your plant bounce back to its vibrant, blooming self in no time.
The key is consistency: water wisely, amend the soil, and prune thoughtfully to prevent future soggy roots.
Now that you’re armed with the know-how, take action today! Start with one small step—like checking the soil moisture or trimming dead branches—and watch your hydrangea thrive. Happy gardening! 🌸