
How To
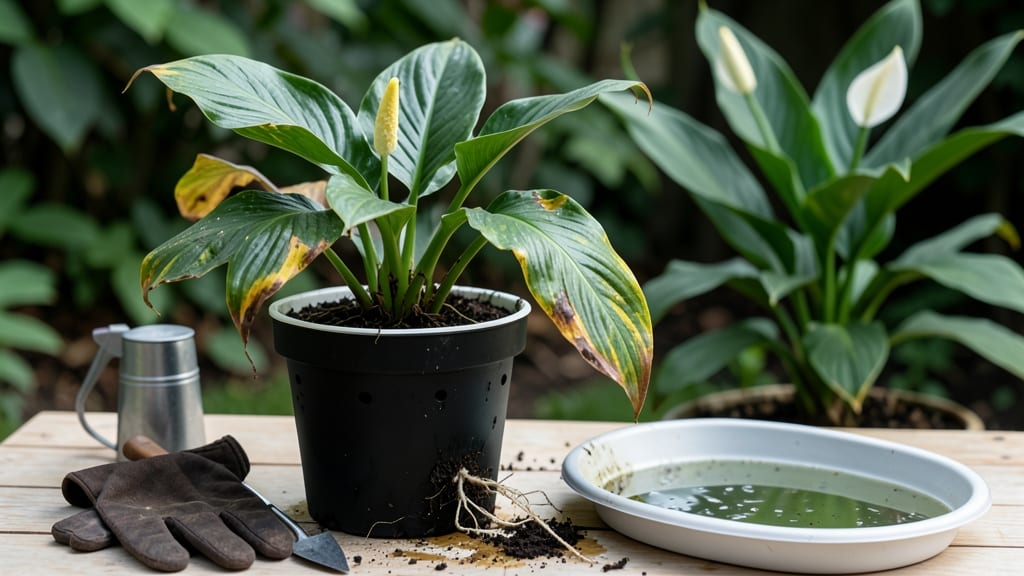
Your peace lily’s droopy leaves might look hopeless, but they’re just asking for how to fix an overwatered peace lily—and the solution is simpler than you think. 🌱 I’ve nursed back more soggy roots than I’d like to admit—and the secret isn’t complicated.
Overwatering turns soil into a swamp, suffocating roots and turning vibrant leaves yellow. But within 72 hours, you can reverse the damage with the right moves.
Start by checking the soil: if it’s damp 1 inch down, hold off on watering. Gently remove the plant from its pot (careful—roots may be mushy) and trim any black, slimy roots with clean scissors.
Repot in fresh, well-draining mix—one-third perlite or orchid bark helps aerate. Place the plant in bright, indirect light (no direct sun yet) and skip watering for 3–5 days to let roots recover.
Within a week, you’ll see new signs of life: firmer stems, perky leaves, and maybe even a few fresh shoots. The key is patience—peace lilies bounce back faster than you’d expect, but they need time to dry out.
Keep the soil lightly moist (not soggy) moving forward, and your plant will reward you with glossy leaves and that signature white bloom.
Here’s the thing—most people overwater because they’re afraid of underwatering. Check soil moisture with your finger before watering (yes, really), and adjust your schedule based on your home’s humidity.
Peace lilies are tougher than they look—they’ll forgive occasional slip-ups if you catch them early. Now grab those shears and let’s get to work!
📚 In This Guide
- What you need
- Instructions
- Tips and common mistakes
- Wrapping up and next steps
What you need
- ● Well-draining potting mix: A high-quality, peat-based or orchid mix (avoid heavy garden soil). Quantity: Enough to refill the pot (typically 1–2 bags, depending on pot size).
- ● Clean, sterile pot: Ensure it has drainage holes (if repotting). Size: 1–2 inches larger than the current pot for mature plants.
- ● Watering can or spray bottle: For gentle hydration (avoid heavy streams). Tip: A spray bottle works best for misting.
- ● Pruning shears or sharp scissors: Sterilized with rubbing alcohol to avoid infection. Specs: Clean, sharp blades (avoid dull tools!).
- ● Rubbing alcohol (70% isopropyl): For sterilizing tools and trimming cuts. Quantity: Small bottle (4 oz).
- ● Newspaper or tray: To catch excess water during repotting. Size: Large enough to fit under the pot.
- ○ Hydrogen peroxide (3% solution): Optional but helpful for root rot prevention. Quantity: 1–2 tbsp per gallon of water.
- ● Rooting hormone: To encourage healthy regrowth if roots are severely damaged.
- ● Fertilizer (balanced, water-soluble): Diluted to half-strength for post-recovery care.
- ● Humidity tray or pebbles: To maintain moisture levels in dry environments.
- ● Grow lights or bright, indirect sunlight: If your peace lily needs extra light during recovery.
Step-by-Step instructions for reviving an overwatered peace lily
Here’s how I rescue peace lilies when they’ve been drowned—it works every time.
💧 Step 1: Stop Watering and Remove the Plant From Its Pot
First, stop watering immediately. Peace lilies can’t recover if you keep adding water—the roots need air to heal. Gently squeeze the pot to check moisture—if water drips out, it’s still too wet. Remove the plant by turning the pot sideways and tapping the root ball until it slides free.
Inspect the roots. Healthy roots are firm and white, but overwatered roots will be mushy, brown, or smell foul. If the root ball is completely saturated, wrap it loosely in a dry towel to absorb excess moisture while you work. Don’t rush this—let it sit for 10-15 minutes to drain.
✂️ Step 2: Trim Damaged Roots and Loosen Compacted Soil
Use clean, sharp scissors to snip away any mushy, black, or slimy roots. Cut back to firm, white tissue—this encourages new growth. I always disinfect my scissors with rubbing alcohol between cuts to prevent spreading rot. If more than half the roots are damaged, the plant may need extra time to recover.
Gently tease apart the root ball with your fingers to loosen compacted soil. This helps air circulate and prevents future waterlogging. If the soil smells sour or looks like mud, it’s still too wet—rinse it under lukewarm water until it runs clear, then let it drain completely.
🪴 Step 3: Repot in Fresh, Well-Draining Soil
Choose a pot with drainage holes—terracotta is ideal because it breathes. Fill the bottom with a layer of fresh, lightweight potting mix (avoid garden soil—it compacts and holds too much moisture). Place the plant in the pot and add more mix around the roots, pressing lightly to secure it without compacting.
Leave at least 1 inch of space between the soil surface and the pot’s rim—this prevents overflow when you water. Water just enough to moisten the soil, then wait. You’ll know it’s right when water drips from the drainage hole but the surface stays slightly dry to the touch.
☀️ Step 4: Adjust Light and Humidity for Recovery
Move the plant to bright, indirect light—no direct sun yet. A north or east-facing window is perfect. Peace lilies wilt when stressed, but they’ll perk up within 24-48 hours if the roots are healthy. If leaves stay droopy after 3 days, trim them back to encourage new growth.
Increase humidity by placing the pot on a tray of pebbles filled with water (keep the pot elevated so roots don’t sit in water). Mist the leaves lightly daily, but avoid soggy soil. Within 3-7 days, you’ll see new leaves unfurling—a sign the plant is healing.
⏰ Step 5: Resume Watering Only When Soil Is Dry
Wait until the top 1-2 inches of soil feel dry before watering again. Stick your finger in—if it’s damp past your first knuckle, wait longer. Water deeply until it runs from the drainage hole, then empty the saucer to prevent root rot.
Real talk: Overwatering is the #1 killer of peace lilies, but this method works even if the plant looks dead. I’ve revived plants with no leaves left—just follow the steps, and new growth will surprise you.
Tips & tricks for reviving an overwatered peace lily
Here’s what I’ve learned from bringing peace lilies back from the brink—these tricks make all the difference.
Root Inspection Secret: In Step 1, when you’re checking those roots, look for the texture test: healthy roots should feel like firm spaghetti strands. If they crumble or smell like rotting fruit, you’ve got serious damage. I’ve seen plants with only 20% good roots bounce back completely—don’t give up too soon! The 10-15 minute drying time is crucial here, so resist the urge to rush through this step.
Pruning Precision: During Step 2, when trimming damaged roots, cut at a 45-degree angle just above a healthy node. This creates more surface area for new root growth. I keep a small bowl of rubbing alcohol handy to wipe my scissors between cuts—this prevents cross-contamination that can spread rot. If you’re unsure about which roots to keep, remember: better to err on the side of caution and save more than you think you need.
Soil Revival Strategy: For Step 3, if your soil looks like wet cement after rinsing, mix in a handful of perlite or orchid bark to improve drainage. I like to use a 60/40 mix of fresh potting soil and perlite for peace lilies—this prevents future waterlogging. That 1-inch space at the top isn’t just for looks; it gives you room to water thoroughly without overflowing, which is especially important during recovery.
Recovery Timeline: The 24-48 hour perk-up window in Step 4 is your first sign things are working. If you don’t see improvement by day 3, that’s when you know you might need to be more aggressive with trimming or adjusting light conditions. I’ve had plants that took 5 days to show new growth—patience is key. That pebble tray method works wonders for humidity, but make sure the pot stays elevated so roots don’t sit in standing water.
Pro Tips for Fix Overwatered Peace Lily
- Here’s what I’ve learned from bringing peace lilies back from the brink—these tricks make all the difference.
- Root Inspection Secret: In Step 1, when you’re checking those roots, look for the texture test: healthy roots should feel like firm spaghetti strands.
- Pruning Precision: During Step 2, when trimming damaged roots, cut at a 45-degree angle just above a healthy node.
Frequently asked questions
How do I know if my peace lily is overwatered vs. underwatered?
Check the soil first: Overwatered peace lilies have soggy, mushy roots and yellowing leaves with brown edges. Underwatered plants have crispy, dry edges and droop even after watering. Stick your finger 1–2 inches into the soil—if it’s damp, hold off on watering!
How long does it take for an overwatered peace lily to recover?
With proper care, you’ll see improvement in 3–7 days. Focus on draining excess water, trimming damaged leaves, and adjusting your watering routine. Patience is key—roots need time to heal!
Can I save a peace lily with root rot?
Yes, but act fast! Prune black/mushy roots with sterilized scissors, repot in fresh, well-draining soil, and avoid watering for 5–7 days. Add a fungicide (like neem oil) to prevent further rot. If >50% of roots are dead, propagation may be your best bet.
How often should I water a peace lily after fixing overwatering?
Let the top 1–2 inches of soil dry out between waterings (usually 1–2 times per week, depending on humidity/climate). Use a moisture meter or the finger test—if it’s dry, it’s time! Avoid saucers that trap water.
What if my peace lily’s leaves turn black after fixing overwatering?
Black leaves often signal fungal infection or severe root damage. Trim affected leaves below the black spot with clean scissors. Boost airflow, reduce humidity near the plant, and consider a spray of hydrogen peroxide (1:4 ratio with water) to disinfect.
Can I propagate my peace lily if it’s overwatered?
If the plant is beyond saving, cut healthy stems (with at least 2 leaves) and root them in water or moist perlite. Avoid overwatering the cuttings—keep them in bright, indirect light until roots form (2–4 weeks). It’s a great way to revive your collection!
Wrapping up and next steps
Don’t let a soggy peace lily stress you out—your plant is tougher than you think! 🌿 With the right care, you can bounce back droopy leaves and restore vibrancy in just days. Start by adjusting your watering routine and giving those roots a chance to breathe.
Your next step? Monitor progress daily and celebrate small wins—like perky leaves or new growth. Soon, your peace lily will thrive again, proving that even "oops" moments can lead to stronger plants. Happy gardening! 🌱