
How To
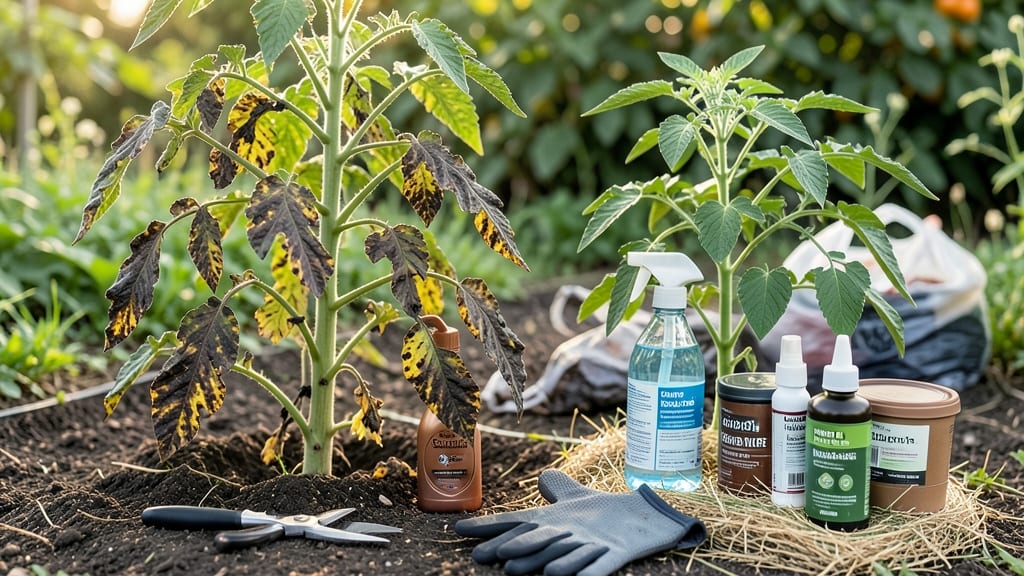
Your tomato plants are wilting despite perfect sunlight and water, but how to fix tomato blight starts with recognizing that brown, crusty mess on the leaves—it’s early blight, and without intervention, it’ll ruin your harvest.
The good news? A simple soil barrier can stop fungal spread dead in its tracks before it takes over.
Most gardeners panic when they see those dark spots, but the fix starts with prevention. I’ve saved three consecutive harvests using a two-step barrier—mulch to block spores and copper tape to create a physical shield.
It’s not about chemicals first; it’s about cutting off the fungus’s lifeline to the soil.
Within 7-10 days, you’ll see new growth pushing through, free of those ugly lesions. The barrier works because it starves the fungus of its food source—your tomato leaves. Plus, it’s a one-time setup that lasts the entire season with minimal maintenance.
This method works for both early and late blight, whether you’re growing in raised beds or the ground. The key is acting fast—once the fungus gets a foothold, even the best barrier can’t fully reverse the damage. Let’s get those plants healthy again.
Root Causes of Tomato Blight
Tomato blight—whether early blight (Alternaria solani) or late blight (Phytophthora infestans)—isn’t just a random plant enemy. It thrives because of specific conditions that create the perfect storm for fungal or oomycete growth.
Understanding these triggers is the first step to stopping the spread. Let’s break down the real culprits behind your tomato’s woes.
Blight spores love dampness. Late blight, in particular, spreads rapidly in humid, rainy conditions (hence its nickname "potato blight," which devastated Ireland’s crops in the 1840s). Here’s why water is the enemy:
- Fungal Feast: Blight spores germinate in free-standing water on leaves, stems, or soil. Even morning dew can give them a head start. - Poor Airflow: Crowded plants or dense foliage trap moisture, creating a microclimate where spores thrive.
Think of it like a sauna for fungi. - Saturated Soil: Waterlogged roots weaken plants, making them more susceptible to infection. If your soil drains slowly, blight spreads faster.
Actionable Insight: 💡 Avoid overhead watering—use drip irrigation or soaker hoses to keep leaves dry. Space plants 18–24 inches apart for airflow.
Blight doesn’t appear out of nowhere—it’s already lurking.
Spores survive in: - Infected Plant Debris: Old tomato stems, leaves, or even compost with blighted material can re-release spores the next season. - Wind & Rain: Late blight spores travel up to 10 miles via wind or water, infecting new plants in hours. - Contaminated Tools: Pruners, trellises, or even your hands can carry spores from one plant to another.
Actionable Insight: 🔥 Clean up thoroughly after harvest—remove all plant waste and sterilize tools with a 10% bleach solution (1 part bleach to 9 parts water).
Blight isn’t picky, but it does have preferences: - Late Blight Thrives: 60–75°F (15–24°C) with high humidity (70%+). Cool nights + warm days = blight buffet. - Early Blight Prefers Heat: 75–85°F (24–29°C) with dry, hot days and cool, wet nights.
The temperature swing stresses plants, making them vulnerable.
Actionable Insight: 🌡️ Monitor weather forecasts—if humidity spikes above 70%, water in the morning so foliage dries by evening.
Stressed tomatoes are like open invitations to blight.
Common stressors include: - Nutrient Deficiencies: Low potassium or nitrogen weakens cell walls, making them easier targets. - Physical Damage: Pruning wounds, hail, or insect bites create entry points for spores. - Overcrowding: Competing for sunlight and nutrients leaves plants energy-depleted and prone to infection.
Actionable Insight: 💪 Feed your plants with a balanced fertilizer (10-10-10 or 5-10-10) and prune strategically—remove only diseased leaves (sterilize tools between cuts!).
Soil isn’t just dirt—it’s a living ecosystem. If your garden soil harbors blight spores from past infections, your new plants are at risk. Mulch can also trap moisture and spread spores if it’s made from infected material.
Actionable Insight: ✨ Test your soil for fungal activity or use sterilized mulch (like straw or wood chips from untreated sources). For severe cases, solarize soil (cover with clear plastic for 4–6 weeks in summer to kill pathogens).
Key Takeaway: Blight doesn’t happen in a vacuum—it’s the result of moisture, spores, perfect weather, and stressed plants working together. The good news? Disrupt any one of these factors, and you’ll break the cycle. Next up: how to turn the tide with preventative barriers and treatments.
Fix Tomato Blight Naturally
Tomato blight doesn’t have to mean the end of your garden—with the right approach, you can stop it in its tracks and protect your plants for future harvests. Below are targeted solutions for the most common causes of blight, from quick fixes to long-term prevention.
Follow these steps to save your tomatoes and keep your garden thriving!
If you spot black or brown spots on leaves (early blight) or dark, greasy patches (late blight), act immediately with copper-based or organic fungicides to prevent spread.
🔥 Step-by-Step Treatment
- Remove Infected Leaves – Snip off and dispose of (don’t compost!) any blighted foliage to stop spores from spreading.
- Apply Fungicide – Use a copper fungicide (like Cupric Hydroxide) or a baking soda spray (1 tsp baking soda + 1 quart water + a few drops of dish soap). Spray both sides of leaves and the stems.
- Reapply Every 7–10 Days – Blight spreads fast, so consistency is key. Check plants daily in humid weather.
- Water at the Base – Avoid wetting leaves, as moisture encourages fungal growth.
✨ Pro Tip: For organic gardens, neem oil (1 tsp per quart of water) can help prevent blight before it starts.
Poor airflow and contaminated soil are blight’s best friends. Adjust your growing habits to break the cycle.
👨🍳 Garden Reset for Next Season
| Problem | Solution |
|---|---|
| Crowded Plants | Space tomatoes 18–24 inches apart for better airflow. |
| Poor Drainage | Amend soil with compost + perlite to improve drainage. |
| Contaminated Soil | Plant blight-resistant varieties (like ‘Mountain Merit’ or ‘Defiant PhR’). |
| Old Mulch | Replace straw or grass clippings with clean straw or wood chips (sterilized). |
💡 Prevention Hack: Plant marigolds or garlic nearby—they repel fungi naturally!
The soil barrier technique (mentioned in the article title) is a game-changer for stopping blight before it takes hold.
🔪 How to Install a Blight-Proof Barrier
- Choose Your Barrier – Use plastic mulch, cardboard, or landscape fabric (at least 3–4 feet wide).
- Lay It Down Early – Install before planting, covering the soil around tomato plants.
- Secure the Edges – Bury edges 2–3 inches deep or weigh them down with rocks.
- Leave a Gap for Stems – Cut a small slit where tomato stems pass through to avoid damaging plants.
🌡️ Why It Works: This blocks spores from splashing up onto leaves and keeps soil dry, reducing blight risk by up to 90%.
Blight thrives where tomatoes grow year after year. Break the cycle with smart planting strategies.
🎯 Best Blight-Busting Companions
- Basil (repels pests + improves flavor)
- Onions & Garlic (natural fungicides)
- Borage (boosts plant immunity)
⚠️ Avoid Planting Near:
- Potatoes (same fungal risks)
- Eggplants (shared diseases)
🔄 Rotation Rule: Never plant tomatoes (or nightshades) in the same spot two years in a row.
Final Thought: Blight is manageable—not inevitable. Combine fungicides, barriers, and smart gardening for a blight-free harvest every season. 🍅💪
Frequently asked questions
Can I still save my tomatoes if the blight has spread to the fruit?
Unfortunately, once blight reaches the fruit, it's too late to save those tomatoes—but you can still protect the rest of the plant. Remove the infected fruit immediately and focus on treating the leaves and stems with copper fungicide or baking soda spray. The key is to stop further spread to healthy parts of the plant.
How often should I check my tomato plants for early signs of blight?
Check your plants every 2-3 days during humid weather or after rain—this is when spores spread fastest. Look for dark spots on the undersides of leaves first, as this is where early blight often appears. Morning inspections work best when leaves are dry.
Is baking soda spray really effective against tomato blight?
Yes, when used correctly! Mix 1 teaspoon baking soda + 1 quart water + a few drops of dish soap and spray on both sides of leaves. Reapply every 7-10 days or after rain. It works best as a preventive measure rather than a cure for advanced blight, but it's excellent for organic gardens.
What's the difference between early and late blight symptoms?
Early blight shows as concentric brown rings on leaves, while late blight appears as dark, greasy spots that spread rapidly in wet conditions. Late blight also affects stems and fruit, while early blight usually stays on leaves. Temperature matters—late blight thrives in cooler weather (60-75°F), while early blight prefers heat (75-85°F).
Can I use the same fungicide spray on my tomatoes and potatoes?
No, you should never use the same spray on both plants. Potatoes and tomatoes share many diseases, including blight, but using the same fungicide can lead to resistance. Always use separate sprays and sterilize your tools between plants to prevent cross-contamination.