
Planting
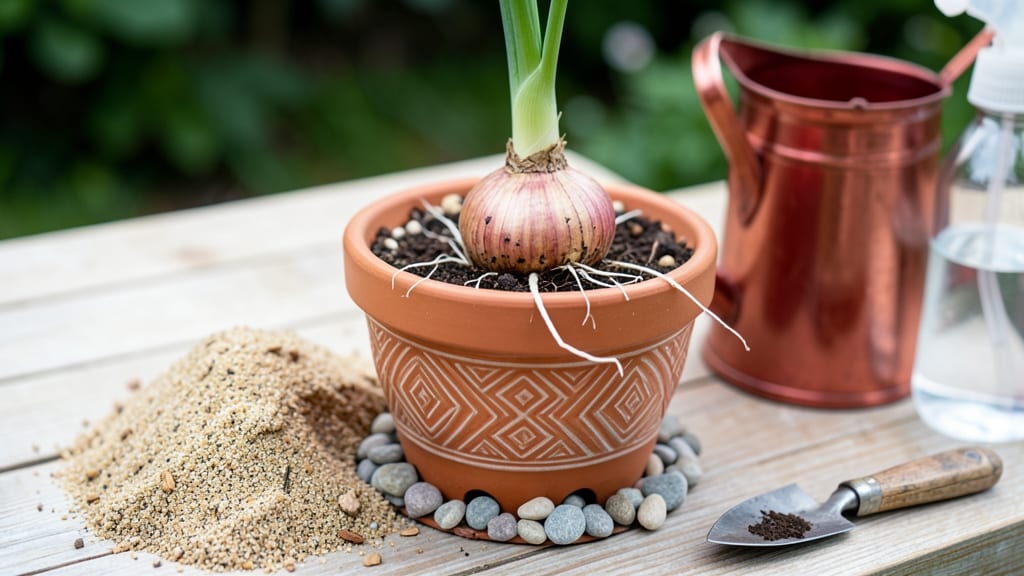
How to force amaryllis bulbs delivers stunning holiday blooms when nothing else is in season. 🌸 I’ve forced these dramatic flowers for Christmas gifts for years, and the secret isn’t complicated—just patience and the right conditions. What starts as a dormant bulb transforms into a 6-foot-tall showstopper in just six weeks.
The trick begins with choosing a healthy bulb and giving it bright, indirect light—no fancy grow lights needed. You’ll need a pot, well-draining soil, and a steady watering routine that keeps the soil moist but never soggy.
Most people overwater, which causes rot, but amaryllis bulbs are surprisingly forgiving once you get the rhythm right.
By week 6, you’ll be rewarded with bold, trumpet-shaped blooms that last for weeks. The best part? These same bulbs can be replanted outdoors after flowering, giving you years of future displays. Even my first attempt—with a bulb I bought on sale—produced 12 perfect blooms that brightened my entire home.
This method works year-round, but forcing for holidays (like Thanksgiving or Christmas) makes them extra special. Whether you’re a beginner or a seasoned grower, this is the easiest way to add drama to your winter decor without spending a fortune on cut flowers.
📚 In This Guide
- What you need
- Instructions
- Tips and common mistakes
- Wrapping up and next steps
What you need
- ● 1–3 amaryllis bulbs – Choose healthy, firm bulbs (4–6 inches in diameter) with a smooth, papery skin. Pro tip: Look for bulbs with no soft spots or mold! 🌡️
- ○ 1 shallow container – A pot with drainage holes (6–8 inches wide) or a decorative cachepot (for forcing). Optional: Use a glass vase for a trendy, low-maintenance look! ✨
- ● Potting mix – Well-draining soil blend (e.g., cactus/succulent mix or add perlite/vermiculite to regular potting soil). Skip garden soil—it’s too dense!
- ● Watering can or spray bottle – For gentle hydration (avoid soggy soil!).
- ● Bright, indirect light source – A sunny windowsill (east or south-facing) or a grow light (12+ hours/day).
- ● Room-temperature water – Lukewarm is ideal for soaking bulbs.
- ● Decorative stones or moss – For a polished cachepot display.
- ● Fertilizer (balanced, 10-10-10) – Diluted to half-strength for post-bloom care.
- ● Humidity tray – If your home is dry (place pebbles + water under the pot).
- ● Twine or floral tape – To secure bulbs in a vase (if forcing in water).
Step-by-Step instructions for forcing amaryllis bulbs
Here's my foolproof method to coax vibrant blooms from dormant bulbs in just six weeks.
🪴 Step 1: Select and Prepare Healthy Bulbs
Choose firm, plump amaryllis bulbs that weigh at least 8 ounces—smaller ones often produce fewer blooms. Gently remove any dried skin with your fingers, but don't cut into the flesh. This ensures the bulb isn't already compromised by rot or pests.
I like to soak the bulbs in a 10% hydrogen peroxide solution (1 part peroxide to 9 parts water) for 15 minutes before planting. This sterilizes the surface and prevents fungal infections during forcing. Let them dry completely afterward on a paper towel.
🌱 Step 2: Plant the Bulb in Moistened Gritty Soil
Use a well-draining mix of one-third perlite or coarse sand and two-thirds potting soil. Fill a pot with drainage holes that's just 1-2 inches wider than the bulb's diameter—this prevents root binding. Moisten the mix until it's damp but not soggy.
Position the bulb with its base (the flat side) resting on the soil. About half the bulb should sit above the soil line—this mimics its natural growth pattern. Gently press the soil around it so it stays upright but doesn't get compacted.
☀️ Step 3: Provide Warmth and Indirect Light
Place the pot in a spot with bright, indirect light (like an east-facing window) and maintain temperatures between 65-75°F. Avoid direct sunlight initially—it can scorch the bulb before roots establish. I use a small grow light on a timer for 12 hours daily if natural light is insufficient.
Water sparingly at first—just enough to keep the soil lightly moist. Overwatering at this stage causes rot. After 2-3 weeks, when you see 1-2 inch green shoots, increase watering to once weekly. Watch for the first roots curling around the pot edges—that's your signal the bulb is actively growing.
💧 Step 4: Encourage Blooming with Strategic Watering
When the shoot reaches 6 inches tall, start fertilizing with a balanced liquid fertilizer (10-10-10) diluted to half-strength. I apply it every 2 weeks along with watering. This nutrient boost triggers the flower stalk to form within 3-4 weeks.
Here's the trick: once the flower stalk appears, move the pot to a cooler spot (55-60°F) for 6-8 hours daily. This temperature shift mimics seasonal changes and encourages bud development. You'll see the first flower buds form within 2 weeks of this treatment.
⏰ Step 5: Maintain Conditions for Full Bloom
When buds are 1 inch in diameter, return the pot to its warm spot and increase watering to every 5 days. Keep the soil evenly moist but never waterlogged—the roots are delicate at this stage. The blooms will open fully in 7-10 days.
To prolong the display, remove spent blooms but leave the stalk intact. With proper care, your amaryllis may produce a second round of flowers in 4-6 weeks. After blooming, reduce watering and move it to a bright, cool spot to encourage dormancy for next year's cycle.
Tips & tricks for forcing amaryllis bulbs
Real talk: Forcing amaryllis bulbs reveals how small adjustments make all the difference between a sad, sparse bloom and a showstopping floral display.
Selection Tip: The 8-ounce minimum weight matters more than you think. Bulbs under 6 ounces often produce just one or two small blooms, while heavier ones can yield 6-8 flowers per stalk. I've found that bulbs with visible "eyes" (growth points) on the sides tend to produce multiple stalks—look for these when selecting.
Temperature Matters: Those 65-75°F guidelines in Step 3 aren't arbitrary—they trigger the bulb's metabolic shift from dormancy. If your home runs cooler, place the pot on a seedling mat set to 70°F during daylight hours. Conversely, if you notice the shoots growing too slowly after 3 weeks, move to a warmer spot with indirect light. The key is consistency—sudden temperature swings stress the bulb.
Lighting Strategy: The 12-hour grow light recommendation is non-negotiable for winter forcing. Without sufficient light, your amaryllis will produce long, leggy shoots with tiny buds. I use a full-spectrum LED bulb positioned 6 inches above the pot—closer than most instructions suggest. Rotate the pot daily so all sides receive equal light exposure, preventing uneven growth.
Pro Tips for Force Amaryllis Bulbs
- Real talk: Forcing amaryllis bulbs reveals how small adjustments make all the difference between a sad, sparse bloom ...
- Selection Tip: The 8-ounce minimum weight matters more than you think. Bulbs under 6 ounces often produce just one or...
- Temperature Matters: Those 65-75°F guidelines in Step 3 aren't arbitrary—they trigger the bulb's metabolic shift from...
Frequently asked questions
Got questions about forcing amaryllis bulbs? You’re not alone!
Here are answers to the most common concerns—from timing to troubleshooting—so you can confidently grow stunning blooms indoors.
How long does it take for amaryllis bulbs to bloom after forcing?
With proper care, your amaryllis bulb will typically sprout within 2–4 weeks and bloom in 6–8 weeks after starting the forcing process. Patience is key—consistent warmth (around 65–75°F) and bright, indirect light speed up the process. If your bulb takes longer, check for adequate moisture and light exposure.
Can I force an amaryllis bulb at any time of year?
While amaryllis bulbs can technically be forced year-round, late summer to early fall (August–October) is ideal for holiday blooms (like Christmas!). Forcing them too early (e.g., spring) may result in smaller flowers or weaker growth. If you’re late, just adjust your watering and light schedule to match the 6–8 week timeline.
What do I do if my amaryllis bulb isn’t sprouting?
If your bulb sits dormant for weeks without sprouting, try these fixes:
- Check moisture: Ensure the potting mix is barely moist (not soggy). Stick your finger 1 inch deep—if dry, water gently.
- Warmth matters: Move the pot to a warmer spot (70°F+), like near a sunny window or under a grow light.
- Patience pays: Some bulbs need up to 10 weeks to sprout. Avoid repotting or disturbing it.
Can I reuse an amaryllis bulb after forcing?
After blooming, keep your amaryllis in bright light and water it regularly to encourage foliage growth. Once the leaves yellow (late spring/summer), reduce watering and let the bulb rest for 8–10 weeks in a cool, dark place. Repeat the forcing process the following year for another stunning display!
What if my amaryllis flowers flop or droop?
Floppy blooms are often due to overwatering or lack of support. Try these quick fixes:
- Trim 1–2 inches off the flower stalk to redirect energy to the bulb.
- Use a toothpick or small stake to gently prop up heavy stems.
- Ensure the pot has drainage holes to prevent root rot.
Wrapping up and next steps
Forcing amaryllis bulbs is your ticket to stunning, indoor blooms—no greenhouse needed! 🌸 With the right prep, patience, and a little sunlight, you’ll enjoy vibrant flowers in just 6 weeks. Remember, consistency is key: keep them cozy, water wisely, and watch as your bulbs transform into a showstopper.
Ready to level up your indoor garden? Grab your bulbs, follow these steps, and soon, you’ll be the proud host of a dramatic floral display. Next, share your progress—or your blooms—with fellow plant lovers for extra inspiration! 🌱✨