
Propagation
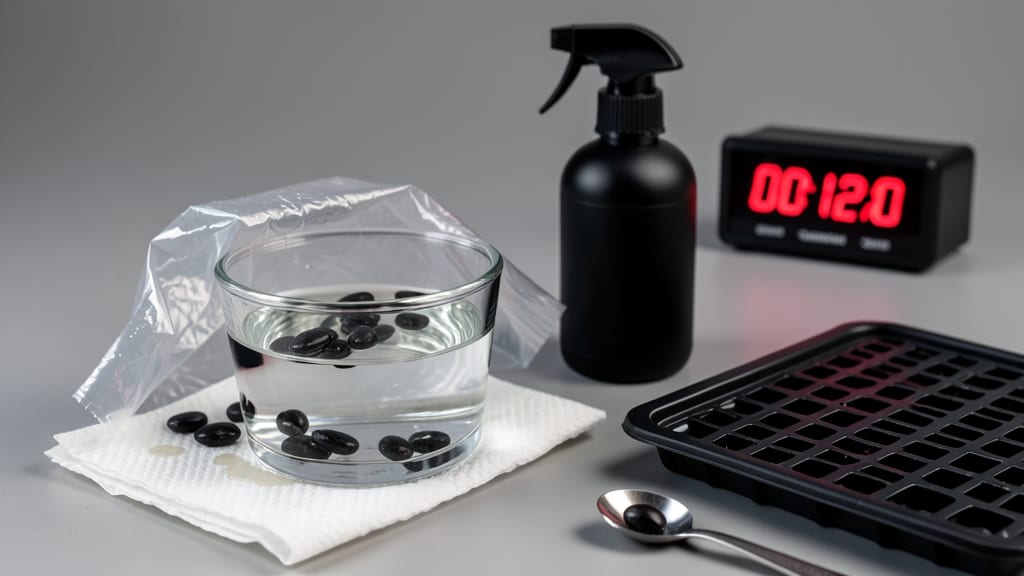
Germinating papaya seeds faster in three days instead of weeks feels like magic—but it’s all about breaking their stubborn outer shell. 🌱 I’ve tested every trick, and the soak-and-sprout method cuts waiting time dramatically while boosting success rates.
The secret? Mimicking the tropical conditions these seeds need to wake up fast.
Most gardeners overlook the pre-soak step, which softens the hard seed coat and kickstarts germination. You’ll need warm water, a damp paper towel, and a plastic bag to create a humid microclimate—no fancy equipment required.
Papayas thrive in heat, so aim for 75-85°F and keep the seeds consistently moist (not soggy).
Within 24-48 hours, you’ll spot tiny white roots breaking through—proof the seeds are alive and ready to sprout. By day three, seedlings will stretch toward light, giving you a head start on growing a tropical fruit tree. The payoff? Faster harvests and fewer lost seeds from slow starts.
This method works for both indoor starts and outdoor plantings, though container-grown seedlings need extra care during transplant. Fair warning: papaya seeds germinate best fresh, so use seeds straight from ripe fruit for the fastest results. Let’s get those roots growing!
📚 In This Guide
- What you need
- Instructions
- Tips and common mistakes
- Wrapping up and next steps
What you need
- ● Papaya seeds: 5–10 fresh, plump seeds (harvested from ripe papaya within 24 hours for best results).
- ● Water: Room-temperature or lukewarm water (avoid cold or chlorinated tap water—let it sit out for 24 hours if treated).
- ● Container: Small bowl or glass (for soaking seeds).
- ● Paper towels, damp sponge, or coffee filter (for wrapping seeds).
- ● Plastic wrap or ziplock bag: To create a humid, seed-friendly environment.
- ○ Spray bottle (optional but helpful): For misting seeds to maintain moisture.
- ● Seedling tray or small pots: 2–3 inch pots with drainage holes (or a shallow tray lined with paper towels).
- ● Potting mix: Lightweight, well-draining mix (e.g., 50% peat moss + 50% perlite or coconut coir).
- ○ Heat source (optional but speedy!): Seedling heat mat (70–85°F / 21–29°C).
- ● Or place near a sunny window/south-facing wall.
- ● Hydrogen peroxide (3% solution): 1–2 drops in soaking water to prevent mold and speed up germination.
- ● Gel seed starter: Pre-moistened gel to keep seeds hydrated without overwatering.
- ● Grow lights: If natural light is limited (12–16 hours/day for consistent warmth).
- ● Humidity dome: Clear plastic cover for trays to trap moisture.
Step-by-step instructions for germinating papaya seeds faster
Here's the proven method I use to get papaya seeds sprouting in days instead of weeks.
🌱 Step 1: Extract and Prepare the Seeds
Cut open a ripe papaya and scoop out the seeds with their surrounding mucilaginous gel. Rinse them thoroughly under running water to remove any fruit residue—this prevents mold and speeds up the soaking process. I like to use a fine-mesh strainer to collect them without damaging the seed coats.
Place the cleaned seeds in a small bowl and cover them with warm water (around 85°F) for 12-24 hours. The gel helps, but the warm water is what softens the hard outer shell and kickstarts metabolic activity. You'll see the seeds swell noticeably—this is your first sign they're ready for planting.
💧 Step 2: Soak and Scarify for Faster Germination
After soaking, gently rub the seeds between two layers of sandpaper or a clean towel to lightly scarify the outer shell. This mimics natural weathering and helps water penetrate faster. Don't overdo it—just enough to rough up the surface slightly. I usually do this for about 30 seconds per seed.
Rinse the seeds again and transfer them to a clean, damp paper towel. Fold the towel to create a cozy, humid environment and place it inside a sealed plastic bag. Store this setup in a warm spot—75-85°F is ideal. Check daily for moisture; if the towel feels dry, mist it lightly with water.
☀️ Step 3: Monitor for Sprouting and Prepare Growing Medium
Within 3-5 days, you should see tiny white roots emerge from the seeds—that's your signal to prepare the growing medium. I use a mix of 50% peat moss and 50% perlite to create a lightweight, well-draining mix. Fill small pots or seed trays with this mixture and moisten it until damp but not soggy.
Make small indentations in the soil—about ½ inch deep—and place one seed in each hole, root-side down. Cover lightly with soil, just enough to hold the seed in place. Press gently to ensure good soil contact, which helps stabilize the seedling once it emerges. Keep the pots in a warm, shaded area until sprouts appear.
🌿 Step 4: Transplant and Provide Optimal Growing Conditions
Once the seedlings reach 2-3 inches tall and develop their first true leaves (not the initial seed leaves), it's time to transplant them into individual pots. Use a slightly larger container with a well-draining potting mix. Handle the seedlings carefully—they're delicate at this stage.
Place the pots in a location with bright, indirect light for the first week. Avoid direct sunlight, which can scorch young papaya seedlings. Gradually introduce them to more sunlight over the next 7-10 days. Maintain consistent moisture—keep the soil evenly damp but never waterlogged. You'll know you're doing it right when the seedlings grow steadily and develop vibrant green leaves.
Tips & tricks for faster papaya seed germination
Want to cut weeks off your papaya seed sprouting timeline? These insider tips will help you maximize your chances of success with the proven soak-and-sprout method.
Warm Water Precision: That 85°F warm water isn't just a suggestion—it's the magic number that activates the seed's metabolic processes. Use a thermometer to check your water temperature, especially if you're working in cooler environments. I've found that water straight from the tap can be too cold (below 75°F), which slows down germination. If you don't have a thermometer, let tap water sit for 10-15 minutes to reach room temperature before using it.
The Scarification Secret: When scarifying your seeds for those 30 seconds, think "gentle abrasion" not "sanding paper aggression." The goal is to create microscopic cracks in the seed coat to allow water penetration, not to remove the outer shell entirely. I've ruined seeds by overdoing this step—just enough to feel slight resistance when rubbing. For larger batches, consider using a dedicated seed scarifier tool if you're serious about papaya growing.
Humidity Control: The sealed plastic bag creates a mini greenhouse effect, but you'll need to monitor it closely. Check daily for condensation on the bag's interior—this is your sign that humidity levels are perfect. If you notice water droplets forming on the seeds themselves, that's too much moisture. In this case, open the bag for 30 minutes to let excess humidity escape before resealing. This balance is crucial for preventing mold while maintaining optimal germination conditions.
Light Transition Strategy: That first week of bright, indirect light is critical, but don't be tempted to rush the seedlings into direct sunlight. I've seen many growers make this mistake and end up with scorched seedlings. Instead, place your seedlings near an east-facing window where they'll receive gentle morning light. If you're using artificial grow lights, position them 6-8 inches above the seedlings and use a timer for 12-14 hours of light per day to simulate natural daylight cycles.
Pro Tips for Germinate Papaya Seeds Faster
- Want to cut weeks off your papaya seed sprouting timeline?
- Warm Water Precision: That 85°F warm water isn't just a suggestion—it's the magic number that activates the seed's metabolic processes.
- The Scarification Secret: When scarifying your seeds for those 30 seconds, think "gentle abrasion" not "sanding paper aggression."
Frequently asked questions
Got questions about speeding up papaya seed germination? You’re not alone! Here are some of the most common queries—and their answers—to help you troubleshoot and optimize your process.
How long should I soak papaya seeds before planting?
Soak your seeds for 12–24 hours in warm water (70–80°F) to soften the outer shell and kickstart germination. Avoid over-soaking—beyond 24 hours, seeds may absorb too much water, leading to rot or mold. Rinse them gently before planting to remove excess moisture.
Why are my papaya seeds taking so long to sprout?
Papaya seeds are slow starters—it can take 2–4 weeks for germination, depending on temperature and moisture. If your seeds aren’t sprouting, check these factors:
- Temperature: Ideal range is 75–85°F. Use a seedling heat mat if your home is cooler.
- Moisture: Keep the soil consistently damp (not soggy) to prevent drying out.
- Depth: Plant seeds ½ inch deep—too deep slows germination.
Can I reuse papaya seeds from store-bought fruit?
Store-bought papaya seeds work just as well as seeds from homegrown fruit. Just rinse and dry them thoroughly before soaking. Pro tip: Save seeds from organic papayas to avoid potential chemical residues from non-organic produce.
What’s the best soil mix for fast papaya seed germination?
Use a light, well-draining mix like:
- 50% peat moss or coco coir (for moisture retention)
- 30% perlite or vermiculite (for aeration)
- 20% sand or compost (for nutrients)
What should I do if my seeds mold or rot?
Mold or rot usually means too much moisture or poor airflow. Here’s how to fix it:
- Stop watering immediately and let the soil dry slightly.
- Improve ventilation by moving the container to a bright, airy spot (but avoid direct sunlight).
- Replant healthy seeds in fresh, sterile soil if mold spreads.
Wrapping up and next steps
Germinating papaya seeds faster isn’t just possible—it’s easy with the right techniques!
By soaking seeds overnight, using warm water, and maintaining a cozy, moist environment, you’ll see those little sprouts emerge in record time. 🌱 Whether you’re a seasoned gardener or just starting out, these steps make the process simple and rewarding.
Now that you’re armed with the know-how, give it a try—your future papaya tree is just a few days away! Once your seeds sprout, transplant them carefully into soil and watch your garden thrive. Happy growing! 🌟