
Pests
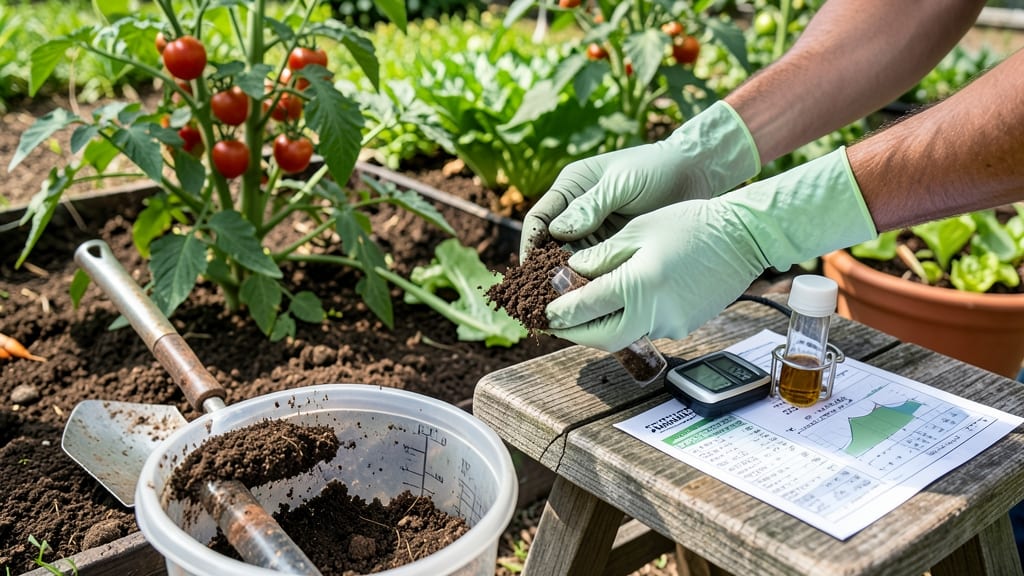
Your garden’s secret language is hiding in plain sight—how to get a soil test reveals what your plants are really hungry for. I’ve seen gardens transform after testing, from sad, stunted veggies to lush, thriving crops in just one season.
The key? Knowing how to get accurate results without guesswork.
You’ve got two main routes: DIY home test kits (fast and cheap) or professional lab analysis (detailed and precise). I started with a $20 kit from my local garden center—it gave me a rough idea, but the lab test later showed I’d been over-fertilizing with phosphorus.
The difference? One told me my soil was "okay," the other gave me a roadmap to fix it.
Collect samples from 5-10 spots in your garden, about 6 inches deep, mixing them in a clean bucket. Avoid fresh manure or mulch—you want the raw truth about your soil’s natural state.
Most labs need 1-2 cups of this mix, and results arrive in 1-2 weeks. That’s the time between frustration and a garden that finally works.
Once you’ve got the numbers, focus on pH first—most veggies thrive between 6.0 and 7.0. Then adjust nitrogen, phosphorus, and potassium based on what’s missing. My zucchini patch went from three tiny fruits to a dozen after I stopped guessing and started testing.
The best part? You’ll save money by only adding what your soil actually needs.
📚 In This Guide
- What you need
- Instructions
- Tips and common mistakes
- Wrapping up and next steps
What you need
- ● Soil sampling kit (or a clean, sturdy container like a plastic bucket or bag—at least 1-gallon capacity per sample).
- ● Trowel, shovel, or soil auger (for digging deep—aim for 4–6 inches below the surface).
- ● Disposable gloves (to keep your samples clean and avoid contamination).
- ● Permanent marker or labels (to mark sample locations and dates).
- ● Plastic bags or airtight containers (for storing samples—avoid metal or treated wood to prevent reactions).
- ● Mapping tool (a sketchpad, GPS app, or even a photo of your garden layout to track sample spots).
- ● Soil test kit or lab submission form (check your local Cooperative Extension office or private lab for requirements).
- ● pH test strips (for a quick preliminary check—not a substitute for a full lab test).
- ● Sieve or fine mesh screen (to remove rocks/debris before testing).
- ● Moisture meter (to ensure samples are dry enough for shipping).
- ● Notebook (to log observations like soil texture, color, or plant health).
- ● Know your garden’s layout (divide into zones if needed—e.g., veggie beds vs. flower beds).
- ● Check the lab’s turnaround time (some tests take 1–2 weeks; plan ahead!).
- ● Confirm sample submission deadlines (many labs have seasonal rushes).
- ● Have your payment method ready (costs vary by lab; budget $20–$50 typically).
Step-by-Step instructions for conducting a soil test
Your garden’s success starts with knowing what’s already in the soil. Here’s how to get accurate results without guesswork.
Collect Soil Samples Strategically
Grab a clean trowel or shovel and dig 4-6 inches deep in multiple spots across your garden—at least 5-10 samples total. Avoid areas near compost piles or where you’ve recently fertilized, as those readings skew high. For lawns, take samples in a grid pattern every 10-15 feet. Place each sample in a clean bucket or container, then mix them thoroughly. This composite sample gives you an average reading of your entire plot.
Use a sterile container—plastic bags or dirty tools can contaminate the sample. If testing a raised bed, sample the center and edges separately, as nutrients often vary. The goal is to represent the whole growing area, not just one high- or low-performing spot. Label your container with the date and location to avoid confusion later.
Prepare the Sample for Testing
Remove any large debris like rocks, roots, or plant fragments from the mixed soil. You want only the topsoil—the crumbly, organic-rich layer where roots grow. If your sample feels dry, moisten it slightly with distilled water (tap water can alter results). Pack the soil into a sealed plastic bag or airtight container, leaving 1-2 inches of space at the top to prevent spills during transit.
Don’t let the sample dry out completely before testing—moisture loss can change nutrient availability readings. If you can’t test immediately, store the bag in a cool, dark place (like a fridge) for up to 2 weeks. Label it clearly with the garden’s name or section, as results vary dramatically between sun-drenched borders and shady corners.
Choose and Submit to a Reliable Testing Lab
University extension offices often offer affordable, accurate soil tests for around $15–$30. Look for labs accredited by the American Society of Agronomy or your state’s agricultural department. Avoid mail-order kits that promise "instant results"—they’re often less precise. Fill out the lab’s form completely, noting whether you’re growing vegetables, flowers, or lawn, as nutrient needs differ.
Follow the lab’s instructions for sample size—most require 1-2 cups of soil per test. If testing multiple garden sections, submit them separately. Some labs include pH testing by default; if not, request it explicitly. Results typically arrive in 1-2 weeks, detailing nitrogen, phosphorus, potassium (NPK), organic matter, and pH levels.
Interpret Results and Adjust Your Plan
Your report will show whether nutrients are deficient, adequate, or excessive. For example, a pH below 6.0 signals acidity, while levels above 7.5 mean alkalinity—both can lock out essential nutrients. If phosphorus is low, you’ll need bone meal or compost; for nitrogen, switch to blood meal or fish emulsion. Never overcorrect—excessive fertilizer harms plants and leaches into waterways.
Use the results to tailor your amendments. For instance, if organic matter is below 3%, mix in 2-3 inches of compost before planting. If potassium is deficient, add wood ash (for alkaline soils) or greensand (for acidic soils). Re-test every 2-3 years to track changes, especially after heavy use or new plantings.
Tips & tricks for perfect soil testing
To get the most accurate soil analysis, these insights will help you avoid common pitfalls and maximize the value of your results.
Sampling Strategy: When collecting your 5-10 soil samples in Step 1, focus on the active root zone—typically the top 4-6 inches. For vegetable gardens, prioritize areas where you plan to plant heavy feeders like tomatoes or corn, as these crops have higher nutrient demands. I’ve found that skipping the perimeter (where grass or weeds often dominate) gives a clearer picture of your planting zones. Remember, the goal is to represent the whole growing area, not just the most obvious spots.
Sample Preservation: In Step 2, the 2-week storage window in a cool, dark place is critical for maintaining nutrient integrity. If you’re testing multiple garden sections, use separate containers and label each with the location—results can vary dramatically between sunlit beds and shady corners. Pro tip: Place a damp paper towel in the bag with your sample to maintain consistent moisture levels, especially if testing won’t happen immediately.
Lab Selection Wisdom: The $15–$30 price range for university extension labs is worth it for accuracy, but don’t overlook local agricultural cooperatives that sometimes offer discounted testing. In Step 3, when filling out the lab form, be specific about your crop type—vegetables, flowers, or lawn—since nutrient recommendations differ significantly. I always request the full panel including pH, even if it’s not default, as soil acidity or alkalinity can completely alter how plants access nutrients.
Interpretation Insight: When your results arrive in Step 4, pay special attention to the "available" nutrient levels rather than just the total amounts. For example, phosphorus might show as adequate, but if the pH is off, your plants still won’t be able to access it. The organic matter percentage below 3% is a red flag that calls for immediate compost amendments—this is the foundation of soil fertility that no fertilizer can replace.
Pro Tips for Get A Soil Test
- To get the most accurate soil analysis, these insights will help you avoid common pitfalls and maximize the value of your results.
- Sampling Strategy: When collecting your 5-10 soil samples in Step 1, focus on the active root zone—typically the top 4-6 inches.
- Sample Preservation: In Step 2, the 2-week storage window in a cool, dark place is critical for maintaining nutrient integrity.
Frequently asked questions
How often should I get a soil test?
A soil test is recommended every 1-3 years, depending on your gardening intensity. Test annually if you grow heavy feeders like tomatoes or peppers, or after major changes like composting or pesticide use. Healthy lawns may only need testing every 3 years. Rotate test sites to track long-term soil health.
Are DIY soil test kits as accurate as lab tests?
DIY kits (like those from Luster Leaf or MySoil) give quick results but focus on basic pH and nutrient levels. For precise data—especially for micronutrients or organic matter—lab tests (from University Extension offices or private labs) are more reliable. Labs also provide tailored fertilizer recommendations.
How long does it take to get lab soil test results?
Most labs return results in 1-2 weeks, though some offer express services (3–5 days) for a fee. University Extension programs often take slightly longer (2–3 weeks) but are cost-effective. Check the lab’s website for turnaround times—some even offer email updates when results are ready!
What if my soil test shows high pH? Can I fix it naturally?
Yes! To lower high pH (alkaline soil), add sulfur, peat moss, or pine needles (acidifying amendments). For quick fixes, use vinegar (1 cup per 10 sq ft) or coffee grounds. Avoid overdoing it—test again in 3–6 months. Pro tip: Plant blueberries or azaleas to naturally acidify soil over time!
Do I need to test soil in every part of my garden?
Test multiple spots if your garden has varied conditions (sun/shade, different plant types, or past amendments). For large areas, divide into zones (e.g., veggie beds vs. lawn). Focus on areas with poor plant health or nutrient deficiencies. A grid sampling method (testing every 10–20 feet) ensures accuracy for big properties.
Wrapping up and next steps
You’ve got everything you need to unlock the secrets of your soil—whether you’re a seasoned gardener or just starting out! A soil test is your first step toward healthier plants, fewer pests, and a thriving garden.
Now that you know how to get a soil test, take that sample, send it off, and let the results guide your next moves.
Ready to transform your garden? Start by adjusting your soil based on the test results—whether it’s adding compost, lime, or fertilizer. Your green thumb (and your plants!) will thank you. 🌱✨