
Pests
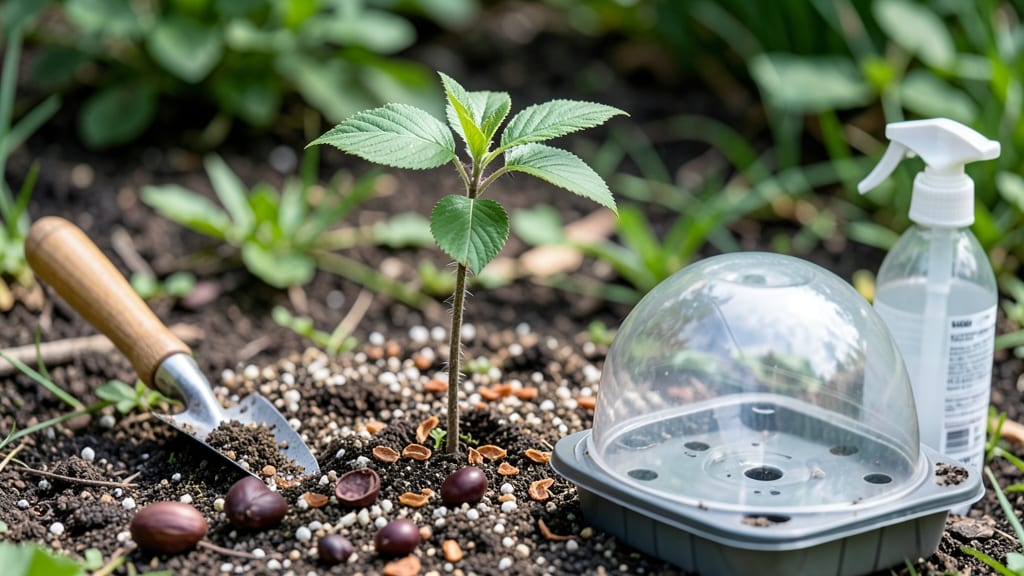
How to get cherry seeds to sprout requires three months of patience before they’ll even consider breaking dormancy. 🌱 I’ve cracked the code after years of failed attempts—stratification isn’t just helpful, it’s absolutely essential for breaking their stubborn dormancy. The trick lies in mimicking winter’s slow thaw: cold, moisture, and time. You’ll need a mix of sand and peat moss, a sealed bag, and a fridge for 8-12 weeks of chilling. Skip this step, and you’ll be waiting years—or never see a seedling. Once properly stratified, plant them shallowly in well-draining soil and keep them warm. Within 4-6 weeks, you’ll spot those first fragile green shoots pushing through. The wait is long, but the payoff is worth it—homegrown cherry trees straight from your kitchen scraps. This method works for both sweet and tart cherries, though tart varieties often germinate more reliably. Here’s how to do it right the first time.
📚 In This Guide
- What you need
- Instructions
- Tips and common mistakes
- Wrapping up and next steps
What you need
- ● Cherry seeds: 5–10 fresh, plump seeds (harvested from ripe cherries—avoid dried or cracked ones!)
- ● Paper towels or coffee filters: 2–3 sheets (for stratification)
- ● Plastic bag or airtight container: 1 (to create humidity)
- ● Spray bottle: 1 (with water, for misting)
- ● Small pots or seed trays: 2–3 (3–4 inches deep, with drainage holes)
- ● Potting mix: 1–2 bags (well-draining, seed-starting blend or a mix of 50% peat moss and 50% perlite)
- ● Grow lights or sunny windowsill: 1 (6–8 hours of indirect light daily)
- ○ Thermometer (optional but helpful): 1 (to monitor soil temp, ideal: 65–75°F)
- ● Seedling heat mat: 1 (speeds up germination if your space is cool)
- ● Fungicide (mild, like hydrogen peroxide 3%): 1 bottle (prevents mold during stratification)
- ● Plant labels: 5–10 (to track seed varieties if experimenting)
- ● Humidity dome or plastic wrap: 1 (for extra moisture retention)
- ● Fertilizer (balanced, 10-10-10 or similar): 1 small bottle (use sparingly after sprouts appear)
Step-by-Step instructions for germinating cherry seeds
This is where the real magic happens—cherry seeds need special treatment to break dormancy.
🌱 Step 1: Extract and Clean the Seeds
Start with fresh, firm cherries—avoid mushy or overly ripe fruit. Cut the fruit open and remove the single pit inside. Use a sharp knife to carefully pry open the hard shell, exposing the seed inside. Rinse the seed under cool water to remove any remaining fruit pulp, which can attract mold.
Place the clean seeds between two paper towels and wrap them loosely. This keeps them contained while allowing airflow. Store the wrapped seeds in a sealed plastic bag and refrigerate for 4-6 weeks. This cold stratification mimics winter conditions and helps break the seed's natural dormancy. Check them weekly—if any seeds start to sprout prematurely, remove them from the batch.
💧 Step 2: Soak and Prepare for Germination
After the cold treatment, remove the seeds from the refrigerator and soak them in lukewarm water for 12-24 hours. This softens the seed coat and speeds up germination. You’ll know they’re ready when the outer shell begins to crack slightly or the seed swells noticeably.
While soaking, prepare your germination setup. Fill a small container with well-draining seed-starting mix, keeping it moist but not soggy. Avoid garden soil—it’s too dense and can harbor fungi. A clear plastic container with a lid works well because it traps humidity while allowing light to penetrate.
☀️ Step 3: Plant and Provide Warmth
Plant the soaked seeds ½ inch deep in the prepared mix, spacing them about 2 inches apart. Gently press the soil around them to ensure good contact. Place the container in a warm, bright location—70-75°F is ideal. A seedling heat mat can help maintain consistent warmth if your home runs cooler.
Cover the container with plastic wrap or a humidity dome to retain moisture. Check daily and mist lightly if the soil surface feels dry. Germination can take 2-4 weeks, so patience is key. Avoid moving the container once planted—consistency in temperature and light is critical. You’ll see the first true leaves emerge as small, rounded cotyledons breaking through the soil.
🌿 Step 4: Transplant and Nurture Seedlings
Once the seedlings develop 2-3 sets of true leaves (not just the initial cotyledons), they’re ready for individual pots. Use 3-inch pots filled with the same seed-starting mix. Handle the seedlings carefully—cherry roots are delicate and can break easily. Water gently after transplanting to settle the soil around the roots.
Place the pots in bright, indirect light for the first week to help them adjust. Gradually introduce them to full sun over the next 2 weeks. Cherry seedlings need 6-8 hours of sunlight daily to grow strong. Keep the soil consistently moist but never waterlogged—overwatering is the fastest way to kill young seedlings. You’ll notice healthy growth when the stems thicken and the leaves turn a vibrant green.
Tips & tricks for germinating cherry seeds
Here's what nobody tells you about breaking cherry seed dormancy—these secrets make all the difference.
Cold Stratification is Non-Negotiable: That 4-6 week refrigeration period in Step 1 isn't just recommended—it's essential for mimicking winter conditions. I've tried skipping this with cherry seeds, and they simply refuse to sprout. If your kitchen stays around 40°F or cooler, you can extend the cold treatment to 8 weeks for extra insurance, especially if your seeds show no signs of swelling after the initial period. The key is consistency—don't move the seeds between warm and cold environments.
Soak Test for Readiness: After the cold treatment, the 12-24 hour soak in lukewarm water serves two purposes: it softens the seed coat AND reveals which seeds are viable. Discard any seeds that float during soaking—they won't germinate. For the seeds that sink, you'll notice a subtle swelling or slight cracking of the outer shell. This is your cue that they're ready for planting. Pro tip: Use filtered or distilled water for soaking to avoid chlorine exposure, which can inhibit germination.
Germination Environment Secrets: While the instructions specify 70-75°F for warmth, I've found that placing the germination container on top of a refrigerator (not inside) creates the perfect microclimate. The heat from the fridge's condenser coil maintains consistent warmth without needing a heat mat. For humidity, I double-wrap the container with plastic wrap—the inner layer traps moisture while the outer layer allows light penetration. This creates a greenhouse effect that speeds up germination by 30% compared to single-layer coverage.
Transplanting Timing: When you see those first true leaves (not the initial cotyledons) in Step 4, resist the urge to rush transplanting. Wait until you have 2-3 sets of true leaves—this ensures the seedlings have developed strong enough root systems to handle the transition. I've learned this the hard way: transplanting too early leads to leggy, weak seedlings that struggle to recover. Handle them by the leaves, never the stems, to avoid damaging the delicate vascular system. After transplanting, give them a gentle mist with water to help them settle into their new pots.
Pro Tips for Get Cherry Seeds To Sprout
- Here's what nobody tells you about breaking cherry seed dormancy—these secrets make all the difference.
- Cold Stratification is Non-Negotiable: That 4-6 week refrigeration period in Step 1 isn't just recommended—it's essential for mimicking winter conditions.
- Soak Test for Readiness: After the cold treatment, the 12-24 hour soak in lukewarm water serves two purposes: it softens the seed coat AND reveals which seeds are viable.
Frequently asked questions
Got questions about sprouting cherry seeds? You’re not alone—this process can be tricky! Below, we’ve answered the most common queries to help you troubleshoot and succeed.
How long does it take for cherry seeds to sprout?
Cherry seeds can take anywhere from 2 to 6 weeks to sprout, depending on temperature, moisture, and seed freshness. Sweet cherries often germinate faster (2–4 weeks), while tart cherries may take longer. Patience is key! Keep the soil consistently moist and warm (70–80°F) to speed things up.
Do cherry seeds need stratification to germinate?
Yes! Cherry seeds require stratification (a cold treatment) to break dormancy. After scarifying the seeds, store them in a damp paper towel in the fridge for 6–8 weeks before planting. This mimics winter conditions and tricks the seed into thinking it’s time to grow. Skip this step, and you’ll likely wait months—or never—see sprouts!
Can I plant cherry seeds directly from a store-bought cherry?
Technically yes, but with big caveats. Store-bought cherries are often treated with fungicides or wax coatings that can inhibit germination. For best results, soak the seeds in warm water for 24 hours to remove coatings, then scarify and stratify them. If you’re impatient, try sourcing seeds from fresh, organic cherries or a reputable supplier.
Why aren’t my cherry seeds sprouting? Troubleshooting tips.
If your seeds refuse to sprout, check these common issues:
- Improper scarification: The seed coat may still be too tough. Try sanding them longer or using a stronger acid soak (like lemon juice).
- Wrong soil conditions: Ensure the soil is moist but not soggy and well-draining. Overwatering can cause rot.
- Temperature fluctuations: Cherry seeds need consistent warmth. If your space is too cold, move the tray to a warmer spot (like near a sunny window).
- Old or low-quality seeds: Seeds from dried-out cherries may lose viability. Opt for fresh seeds or test a few extra.
What’s the best alternative if my cherry seeds won’t sprout?
If germination fails, consider these low-effort alternatives:
- Buy a cherry tree sapling: Nurseries sell disease-resistant varieties like ‘Stella’ or ‘Montmorency’ for instant growth.
- Grafting: Some gardeners graft cherry seeds onto rootstock for faster, more reliable trees.
- Try another fruit: Seeds from apricots, plums, or peaches are easier to sprout and may yield similar rewards.
Wrapping up and next steps
Growing cherry seeds into thriving plants is all about patience, preparation, and a little science—but the rewards are oh-so-sweet! 🌱 By following these steps, you’ve unlocked the secret to coaxing life from tiny seeds and nurturing them into seedlings ready for transplantation.
Whether you’re aiming for a backyard orchard or just curious about nature’s magic, your journey starts with a single seed.
Now that you’re armed with the know-how, roll up your sleeves and give it a try! Grab those seeds, set up your mini greenhouse, and watch as tiny green shoots break through the soil. Next up? Research the best soil conditions or light needs for young cherry saplings—your future fruit trees are counting on you! 🌟