
Picking
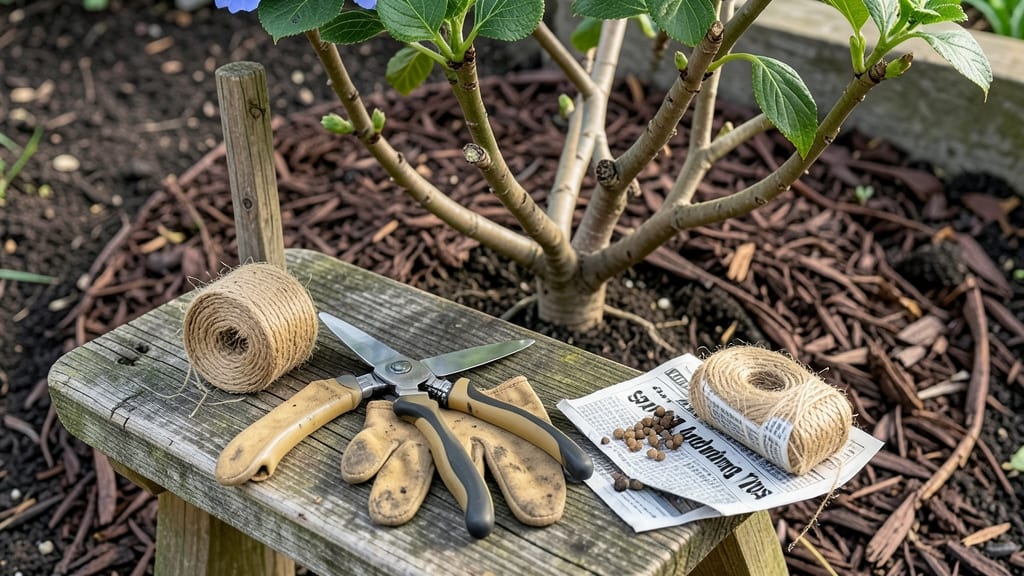
How to get hydrangeas ready for spring—now it's time to give them a head start. ✨ The difference between last year's sad blooms and this year's lush, vibrant clusters starts with just a few key steps done at the right time. Start by pruning those leggy stems back by one-third in early spring, right after the last frost but before new growth appears. This isn't about drastic cuts—think of it as giving your plants a fresh start while preserving next year's flower buds. Then feed them with a balanced fertilizer to kickstart growth, and check for any winter damage hiding under the leaves. By summer, you'll be rewarded with bold, healthy blooms that last longer and stand out in your garden. The secret is timing: too early and you risk frost damage; too late and you miss the growth window. Let's get those hydrangeas thriving!
You'll need just a few simple tools: sharp pruners (dull blades tear stems), gloves (hydrangeas can be prickly), and a 10-10-10 fertilizer or slow-release granules. If your soil looks tired, mix in some compost—hydrangeas love rich, moist soil that drains well.
And don't forget to water deeply after pruning to help them recover. The real magic happens when you combine pruning with the right care. Healthy stems mean better blooms, and proper feeding ensures those clusters stay big and bright all season.
Even if you missed the perfect pruning window, don't stress—hydrangeas are forgiving as long as you act before the leaves fully unfurl.
Here's where regional timing comes in: in warmer zones (7-9), you can prune as early as February; in colder areas (3-6), wait until April or May when frost is a distant memory. Watch for new growth—those tiny green shoots are your signal to start.
And if you see any mushy stems or brown spots, trim those out immediately to prevent disease. Once you've done the basics, keep an eye out for pests like aphids or spider mites. A quick spray of soapy water usually does the trick.
With these steps, your hydrangeas will be bursting with color by midsummer, and you'll have the confidence to tackle next year's prep even sooner.
📚 In This Guide
- What you need
- Instructions
- Tips and common mistakes
- Wrapping up and next steps
What you need
- ● Pruning shears: Sharp, clean, and sterilized (1 pair). Avoid dull blades—they crush stems instead of cutting cleanly.
- ● Garden gloves: Heavy-duty (1 pair) to protect your hands from thorns and dirt.
- ● Fertilizer: Balanced granular fertilizer (e.g., 10-10-10) – 1 cup per plant.
- ○ Slow-release fertilizer (optional but ideal for steady nourishment).
- ● Mulch: Organic (e.g., shredded bark or compost) – 2-3 inches to retain moisture and regulate soil temp.
- ● Watering can or hose: With a gentle spray nozzle for post-pruning hydration.
- ● Rubbing alcohol (70%+) or bleach solution: (1:9 bleach-to-water ratio) for sterilizing tools between cuts.
- ● Plant food: Hydrangea-specific acid-loving plant food to boost bloom color (e.g., aluminum sulfate for blue blooms or lime for pink).
- ● Pruning sealant: (Not always needed, but can help large cuts heal faster—use sparingly!)
- ● Garden twine or stakes: If your hydrangeas need support after pruning.
- ● Soil pH test kit: To check if your hydrangeas need a soil pH adjustment (aim for 5.5–6.0 for optimal blooms).
Step-by-Step instructions for revitalizing hydrangeas before spring
Here’s how I prep my hydrangeas for bold blooms—pruning, feeding, and protecting them just right.
✂️ Step 1: Prune at the Right Time and Technique
Wait until late winter or early spring when buds begin to swell—this is your cue to prune. For most hydrangeas, cut back old wood (last year’s growth) by ⅓ to ½ of their height. Look for woody stems with brown, peeling bark; these are ready for trimming. I always use clean, sharp pruners to avoid tearing stems, which invites disease.
If you have panicle or cone-shaped hydrangeas, prune them in late winter too, but focus on cutting back dead or crossing branches to improve airflow. Never prune for blooms—these types flower on new wood, so heavy pruning won’t hurt. For bigleaf or oakleaf types, prune just after blooming in summer, but this step is for spring prep, so skip that now.
💧 Step 2: Feed with Balanced Fertilizer for Strong Growth
Once pruning is done, feed your hydrangeas with a balanced, slow-release fertilizer (10-10-10 or 20-20-20). I scatter ½ cup of granules around the base of each plant, then water deeply to help it sink into the soil. This gives roots a steady supply of nutrients without burning them—hydrangeas are sensitive to over-fertilizing, so less is more.
For blue blooms, add a handful of hydrated lime (calcium sulfate) to the soil—this raises pH slightly. If you want pink blooms, skip the lime and use sulfur to lower pH. Test soil pH first if unsure; hydrangeas are fussy about soil chemistry, and color shifts depend on it.
☀️ Step 3: Protect from Late Frost and Pests
After feeding, cover young shoots with frost cloth if nighttime temperatures dip below 32°F. Hydrangeas are tender in early spring, and frost can scorch new growth. I secure the cloth loosely—tight wraps trap moisture and rot stems. Remove it during the day to let sunlight through.
Check for aphids or scale on stems and leaves. I spray stems with neem oil (mixed 1 tbsp per quart of water) as a preventative. These pests love new growth, and a single treatment now saves weeks of damage later. Avoid chemical sprays—they can linger and harm bees when flowers open.
🪴 Step 4: Mulch and Water for Consistent Moisture
Spread 2-3 inches of organic mulch (like shredded bark) around the base, keeping it 3 inches away from the stem. This locks in moisture and regulates soil temperature. Hydrangeas hate dry spells, so water deeply once a week—aim for 1 inch of water per week. You’ll know it’s enough when soil feels damp 6 inches down.
Mulch also suppresses weeds, which compete for nutrients. I top off mulch in midsummer if it breaks down, but for now, focus on keeping the soil cool and moist. Overwatering is worse than underwatering—hydrangeas rot faster than they wilt.
⏰ Step 5: Monitor for New Growth and Adjust Care
Within 2-3 weeks, you’ll see new buds forming—this is your signal that the prep worked. If growth stalls, check for yellowing leaves (overwatering) or crispy edges (underwatering). Adjust watering immediately; hydrangeas are dramatic about moisture.
Once buds swell to pea size, reduce watering slightly to encourage blooms. Too much water now leads to lush foliage but fewer flowers. I also watch for spider mites—they thrive in dry conditions, so a light misting of leaves keeps them away without chemicals.
Tips & tricks for perfect spring hydrangea prep
Here's what nobody tells you about getting your hydrangeas ready for spring—these little details make all the difference.
Pruning Precision: When cutting back old wood by ⅓ to ½ in Step 1, make your cuts just above a leaf node or bud. This ensures new growth will sprout from the right spot. I always look for that little bump where the leaf meets the stem—it's your target. Also, clean your pruners with rubbing alcohol between cuts to prevent spreading disease from old, potentially infected stems.
Fertilizer Timing: The ½ cup of balanced fertilizer in Step 2 should be applied right after pruning but before any new shoots emerge. This gives roots a head start on absorbing nutrients while they're actively growing. I've learned the hard way that waiting too long means the fertilizer just sits there, waiting for next year's growth. For extra insurance, mix a little bone meal into the soil—it adds phosphorus for stronger roots.
Frost Protection: If you're using frost cloth in Step 3, don't leave it on during sunny days—it can cook the tender new growth underneath. Instead, remove it during daylight hours and secure it loosely at dusk. I also recommend using hoops or a frame to keep the cloth elevated, which prevents it from touching and potentially damaging the stems. And remember, 32°F is your threshold—if the forecast drops below that, it's time to cover up.
Watering Wisdom: That 1 inch of water per week in Step 4 is a guideline, but check your soil first. Stick your finger 6 inches down—if it's dry, water deeply. If it's still moist, hold off. I've seen hydrangeas drown just as quickly as they wilt, especially in heavy clay soils. A moisture meter is worth the investment if you're serious about these plants.
Pro Tips for Get Hydrangeas Ready For Spring
- Here's what nobody tells you about getting your hydrangeas ready for spring—these little details make all the difference.
- Pruning Precision: When cutting back old wood by ⅓ to ½ in Step 1, make your cuts just above a leaf node or bud.
- Fertilizer Timing: The ½ cup of balanced fertilizer in Step 2 should be applied right after pruning but before any new shoots emerge.
Frequently asked questions
Got questions about prepping your hydrangeas for spring? You’re not alone! Here are some of the most common concerns—and straightforward answers—to help you get those blooms ready for a showstopping season.
When is the best time to prune hydrangeas for spring?
Timing depends on your hydrangea type! For bigleaf and oakleaf varieties, prune in late winter or early spring (just before new growth starts). Panicle and smooth hydrangeas can be pruned in late winter to early spring—but wait until after the worst frost has passed. Pro tip: Avoid pruning in fall, as it can leave them vulnerable to winter damage.
Do I need to prune dead or damaged branches, or can I skip it?
Never skip it!
Always remove dead, diseased, or crossing branches first—this improves airflow and prevents pests. Use clean, sharp pruners to cut back to a healthy bud or joint. If you’re unsure whether a branch is dead, scratch the bark: green underneath? It’s alive! Brown or mushy? Prune it out.
How much water do hydrangeas need after pruning?
After pruning, hydrangeas need consistent moisture to recover. Water deeply once a week (or more in hot/dry climates), aiming for 1–1.5 inches of water per week. Mulch around the base (2–3 inches deep) to retain moisture and regulate soil temperature. Avoid soggy soil—hydrangeas hate "wet feet."
Can I use last year’s mulch, or should I replace it?
If last year’s mulch is still 2–3 inches thick, intact, and free of debris, you can top it up instead of replacing it entirely. However, if it’s broken down or mixed with weeds, refresh it with 2–3 inches of fresh mulch (like shredded bark or pine straw). This helps insulate roots and locks in moisture for spring growth.
What should I do if my hydrangeas had pests last year?
Start with preventative care: Remove fallen leaves/debris where pests hide, and apply a neem oil spray or insecticidal soap in early spring. For severe infestations, use systemic granules (like imidacloprid) following label instructions. Monitor for aphids, spider mites, or scale insects regularly—early action is key!
Wrapping up and next steps
Getting your hydrangeas ready for spring is all about a little prep work—pruning, feeding, and protecting them to ensure those stunning blooms you’ve been dreaming of! 🌸 With the right timing and care, you’ll be rewarded with lush, vibrant plants that steal the show in your garden.
Now that you’re armed with the know-how, there’s only one step left: roll up your sleeves and make it happen!
Start by checking your hydrangea type (old or new wood bloomers) and tackle the task on a clear, mild day. Before you know it, your garden will be bursting with color—and you’ll be the proud gardener behind it! Happy planting! 🌿