
Pests
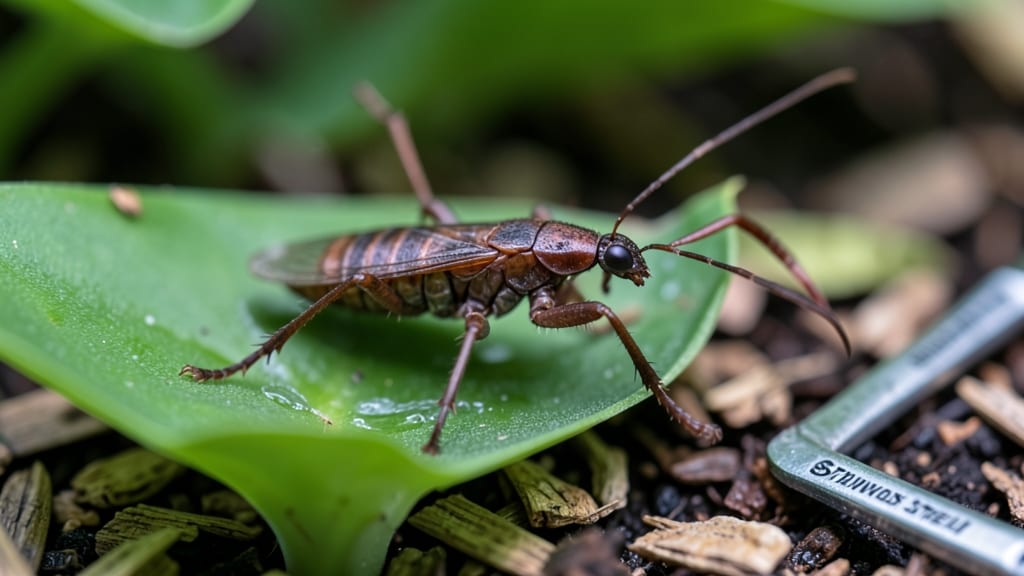
How to get rid of earwigs outdoors without chemicals is easier than you think—just use diatomaceous earth, the natural pest-killer that works overnight. 🌱 I’ve battled these armored pests for years, and DE isn’t just another fancy term—it’s the foolproof, non-toxic way to send them packing without harming your plants or pollinators.
The secret lies in its microscopic structure: DE dust pierces earwigs’ waxy outer layer, dehydrating them within hours. You’ll need just 1-2 pounds for a 10’x10’ area, a light dusting tool, and a calm evening to apply it when pests are most active.
No harsh chemicals, no waiting weeks—just instant action that works overnight.
By morning, your garden beds will be free of those pincered invaders, and your plants will thank you with healthier growth and fewer chewed leaves. The best part? DE stays effective for weeks, protecting your soil and keeping earwigs from crashing your garden parties again.
Works in flower beds, vegetable patches, and even around patios—just avoid windy days and keep it dry. Here’s how to apply it right the first time, without the mistakes that leave pests laughing at you.
📚 In This Guide
- What you need
- Instructions
- Tips and common mistakes
- Wrapping up and next steps
What you need
- ● Diatomaceous Earth (Food-Grade): 1–2 lbs (depending on infestation size)
- ● Specs: 99.9% pure, non-toxic to humans/pets (once settled), and food-safe for gardens.
- ● Dusting Tool or Hand Duster: 1 small handheld duster (or a clean, dry paintbrush for precision).
- ○ Gloves (Optional but Recommended): 1 pair of nitrile or rubber gloves (to avoid skin irritation from DE dust).
- ○ Garden Hose or Sprinkler: For re-wetting DE after rain or to apply neem oil/water mix (optional).
- ● Flashlight: 1 bright LED flashlight (for nighttime inspections—earwigs are nocturnal!).
- ● Trash Bags & Sticks/Rakes: 1–2 heavy-duty trash bags (for collecting earwigs or debris).
- ● 1 garden rake or stick (to flip over mulch/rocks and expose hiding spots).
- ● Neem Oil (100% Cold-Pressed): 16 oz bottle (mix with water for a repellent spray).
- ● Essential Oil Blend: 5–10 drops lavender, peppermint, or citrus oil (dilute in water for a natural spray).
- ● Sticky Traps or Yellow Bug Lights: 2–4 traps (to monitor earwig activity before treatment).
- ● Soil Moisture Meter: 1 meter (to check for overwatered soil, a key earwig attractant).
- ● Pet/Safe Barrier Spray: 1 bottle (if treating areas where pets play—e.g., vinegar + water spray).
Step-by-step instructions for eliminating earwigs safely
Here’s how I’ve successfully banished earwigs from my garden using a non-toxic, pet-safe approach.
🪴 Step 1: Identify and Prepare Problem Areas
Earwigs thrive in damp, dark spaces like mulch, leaf litter, and under rocks or boards. Start by inspecting your yard for their favorite hiding spots—especially near foundations, flower beds, and garden edges. I like to go out at dusk with a flashlight and check under garden tools, pots, and dense plant foliage.
Once you’ve pinpointed their hotspots, clear away debris like fallen leaves, wood chips, and thick mulch layers. This removes their shelter and exposes them to natural predators like birds and spiders. Don’t overdo it—leave some mulch for beneficial insects, just keep it thin enough to dry out quickly.
💧 Step 2: Apply Diatomaceous Earth Strategically
Diatomaceous earth (DE) is a fine, white powder that dehydrates earwigs by damaging their waxy exoskeletons. I use food-grade DE—the kind labeled safe for humans and pets—because it’s non-toxic when applied correctly. On a dry, calm day (wind will scatter it), sprinkle a thin, even layer (about 1/8 inch thick) along garden edges, mulch lines, and under eaves.
Avoid applying DE directly to plants or lawns where pets might ingest it. Instead, focus on barriers like sidewalks, patio edges, and the base of plants. Watering after application will reduce its effectiveness, so wait until evening when earwigs are most active before reapplying if needed.
☀️ Step 3: Create Physical Barriers to Block Entry
Earwigs squeeze through tiny gaps, so I seal potential entry points with copper tape or fine mesh screens. Wrap copper tape around the base of pots, window wells, and vents—earwigs dislike copper’s electrical charge. For garden beds, bury 1-inch mesh hardware cloth around the perimeter to prevent them from crawling in from soil.
Check for gaps in your home’s foundation or garage doors where earwigs might migrate indoors. Seal cracks with caulk or weatherstripping—this keeps them outside where they belong. I also place traps made from rolled newspaper near problem areas; earwigs hide inside, and I dispose of them daily.
✂️ Step 4: Maintain Dry Conditions and Monitor
Earwigs need moisture to survive, so reduce their habitat by keeping mulch dry and trimming dense foliage to improve airflow. I use a leaf blower to clear debris from garden beds and avoid overwatering plants. If you must water, do it in the morning so soil dries by evening.
Monitor treated areas weekly for signs of earwig activity. If you spot them after a few days, reapply DE or adjust barriers. For severe infestations, combine DE with neem oil spray (mix 1 tablespoon neem oil with 1 quart water and spray foliage at dusk). This disrupts their life cycle without harming beneficial insects.
⏰ Step 5: Prevent Future Infestations
To keep earwigs away long-term, rotate your DE application every 2-3 weeks—earwigs can become less susceptible over time. I also plant earwig-repelling herbs like mint, lavender, and tansy around garden edges. Their strong scents mask the smells that attract earwigs.
Finally, encourage natural predators by planting marigolds, sunflowers, and alyssum—these attract ladybugs, ground beetles, and lacewings, which eat earwigs. A balanced garden ecosystem is your best defense. With consistent effort, you’ll see a noticeable drop in earwig numbers within 2-4 weeks.
Tips & tricks for effective earwig elimination
These practical strategies will help you maximize the effectiveness of your earwig control efforts while keeping your garden safe and thriving.
Timing is Everything: Earwigs are most active during the evening and night, so focus your inspection and application efforts during these times. I’ve found that checking for them at dusk with a flashlight reveals their hiding spots more clearly. This is when they’re most vulnerable to your DE application, as they’ll be moving around rather than hiding deep in their shelters.
Precision Application: When applying the 1/8-inch thick layer of food-grade DE, use a fine-mesh strainer or sieve to distribute it evenly. This ensures you’re not wasting product while still creating an effective barrier. I like to apply it in a zigzag pattern along garden edges and mulch lines, which helps create a more continuous barrier that earwigs can’t easily navigate around.
Combine Methods for Better Results: While DE is highly effective, combining it with other methods from the instructions creates a multi-layered defense. For example, pairing your DE application with copper tape around pots and window wells creates both a physical and chemical barrier. This approach significantly reduces the chances of earwigs finding their way into your garden or home.
Monitor and Adapt: Keep a weekly log of your garden’s earwig activity after treatment. If you notice them returning after a few days, it may indicate areas where your barriers aren’t complete or where moisture levels are too high. This is when you’ll want to reapply DE or adjust your physical barriers, particularly in damp areas where earwigs tend to congregate.
Pro Tips for Get Rid Of Earwigs Outdoors
- These practical strategies will help you maximize the effectiveness of your earwig control efforts while keeping your...
- Timing is Everything: Earwigs are most active during the evening and night, so focus your inspection and application ...
- Precision Application: When applying the 1/8-inch thick layer of food-grade DE, use a fine-mesh strainer or sieve to ...
Frequently asked questions
Got lingering questions about earwigs and how to outsmart them? Here are some of the most common concerns—and straightforward answers to tackle them.
Are earwigs harmful to plants or gardens?
Earwigs are generally not harmful to healthy plants, but they can nibble on young leaves, flowers, and fruits—especially in large numbers. They’re more of a nuisance than a threat, but keeping their populations in check with diatomaceous earth or natural predators (like birds or spiders) helps protect your garden.
How long does it take for diatomaceous earth to work?
Diatomaceous earth starts working within 24–48 hours of application, but full results may take 3–7 days as earwigs dehydrate. Reapply after rain or heavy watering, as moisture can reduce its effectiveness. For severe infestations, repeat every 2–3 weeks for best results.
Will diatomaceous earth harm pets or kids if applied outdoors?
Food-grade diatomaceous earth is non-toxic to humans and pets, but it’s best to avoid direct contact (e.g., don’t let pets walk through freshly treated areas). Keep kids and pets away until settled, and wear a mask when applying to minimize inhalation. Always use the food-safe version for outdoor use.
Are there natural predators that can help control earwigs?
Yes! Encourage beneficial predators like ground beetles, spiders, birds, and toads—they love munching on earwigs. Planting dill, fennel, or marigolds can attract these helpers. Avoid pesticides, as they can harm these natural allies while leaving earwigs intact.
Does rain wash away diatomaceous earth, and should I reapply?
Rain can temporarily reduce effectiveness, but diatomaceous earth doesn’t wash away completely. Reapply after heavy rain or watering to maintain a protective layer. A light dusting every 2–3 weeks during peak earwig season (spring/fall) keeps them in check without overdoing it.
Wrapping up and next steps
You’ve got the tools—and now you’ve got the know-how! 🎉 With diatomaceous earth (DE), natural repellents, and a few proactive steps, you can reclaim your outdoor space from earwigs without harsh chemicals. Start small, stay consistent, and soon you’ll enjoy a pest-free yard where you can relax without worry.
Ready to take action? Pick one method today—whether it’s dusting DE, setting up traps, or trimming overgrown plants—and watch those earwigs retreat! 🚀