
Size
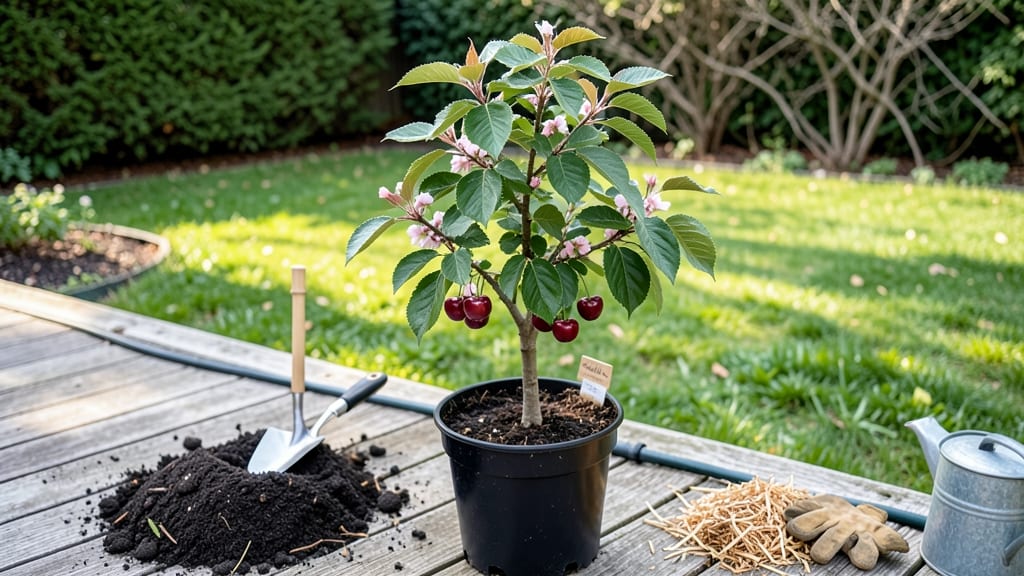
How to grow cherries at home means sweet summer treats from your own trees—if you’re willing to wait. 🌿 I planted my first cherry tree five years ago, and while it’s still not fruiting yet, the anticipation of those juicy bites makes every pruning session worth it. The key isn’t just patience—it’s choosing the right variety for your climate and giving it the perfect start.
You’ll need well-draining soil, full sun (6+ hours daily), and space—cherry trees can grow 15-25 feet tall, though dwarf varieties stay manageable. Sweet cherries often need a pollinator, while tart varieties can self-pollinate.
Containers work for smaller varieties, but ground planting gives roots the room they crave. The first year is all about establishing strong roots before even thinking about fruit.
By year three or four, you’ll see buds forming, and with proper pruning, your tree will reward you with hundreds of cherries in late summer. The smell of ripe fruit on a warm afternoon? Worth every season of waiting. Just watch for birds—they’ll be your first (and most enthusiastic) customers.
Whether you’re planting a single tree or a small orchard, cherries thrive with consistent care. The real magic happens in the second and third years, when proper pruning and watering pay off. Let’s get those roots growing strong!
📚 In This Guide
- What you need
- Instructions
- Tips and common mistakes
- Wrapping up and next steps
What you need
- ● Cherry Tree/Sapling: 1-2 dwarf cherry trees (e.g., Stella®, Lapins®, or Montmorency for sour cherries)—they’re compact and perfect for home gardens! 🌳
- ● Self-pollinating varieties (like Stella®) if you only have one tree, or two compatible trees (e.g., Bing + Stella) for cross-pollination.
- ● Soil: Well-draining, slightly acidic to neutral soil (pH 6.0–7.0). Mix in compost or aged manure (5–10 lbs per planting hole) for nutrients. 🌿
- ● Container growers: Use a 5-gallon pot or larger with drainage holes and a high-quality potting mix blended with perlite or sand.
- ● Fertilizer: Balanced fertilizer (10-10-10 or 20-20-20) at planting time (follow package rates).
- ● Slow-release organic fertilizer (like 5-5-5) in early spring for ongoing growth.
- ● Watering Supplies: Drip irrigation system or soaker hose (cherry trees hate soggy roots!).
- ● Watering can or hose (for containers).
- ● Mulch: 2–3 inches of organic mulch (wood chips, straw, or pine needles) to retain moisture and regulate soil temp.
- ● Pruning Tools: Bypass pruners (for clean cuts).
- ● Loppers (for thicker branches).
- ● Hand saw (for large limbs).
- ● Protective Gear: Bird netting (to guard ripe fruit from hungry birds!).
- ● Frost cloth (if you live in a cold climate).
- ● Soil test kit—to check pH and nutrient levels before planting.
- ● Tree supports/stakes—for young trees in windy areas.
- ● Epsom salt (magnesium sulfate)—boosts leaf health if yellowing appears.
- ● Compost tea or fish emulsion—for an extra nutrient kick during growing season.
- ● Grafting tools—if you want to experiment with grafting different cherry varieties onto your tree!
Step-by-step instructions for growing cherries at home
Here's how to cultivate your own sweet cherry trees—even in small spaces.
🌱 Step 1: Choose the Right Variety and Planting Site
Start with a dwarf cherry tree variety like 'Stella' or 'Black Tartarian'—they're perfect for home gardens and bear fruit in just 3-5 years. Plant in full sun (at least 6-8 hours daily) with well-draining soil. If your soil is heavy clay, mix in 2-3 inches of compost to improve drainage.
Cherries need space—dwarf varieties still require 10-15 feet between trees for proper airflow. If you're limited on space, consider container growing for smaller varieties like 'Balaton' or 'Montmorency' sour cherries. The key is ensuring they get plenty of sunlight and room to grow strong roots.
🪴 Step 2: Plant at the Right Time and Depth
Plant your cherry tree in late winter or early spring, before new growth begins. Dig a hole twice as wide as the root ball but no deeper—cherries hate having their roots buried too deeply. Gently loosen the roots if they're circling the root ball before placing the tree in the hole.
Backfill with the original soil, tamping lightly to remove air pockets. Water deeply to settle the soil, then add a 2-3 inch layer of mulch around the base, keeping it 3 inches away from the trunk. This helps retain moisture and regulate soil temperature. Avoid overwatering—cherry roots need oxygen, so soggy soil will stunt growth.
☀️ Step 3: Provide Proper Care for First Two Years
Water your cherry tree deeply once a week during the first growing season, ensuring the soil is moist but not waterlogged. You'll know it's time to water when the top 2-3 inches of soil feel dry. Fertilize lightly in early spring with a balanced 10-10-10 fertilizer, following package instructions.
Prune in late winter to remove any dead, diseased, or crossing branches. Open the center of the tree to allow sunlight and air to reach the interior. Avoid heavy pruning—cherries respond best to gradual shaping. Watch for signs of stress like yellowing leaves or stunted growth, which can indicate overwatering or poor drainage.
⏰ Step 4: Pollination and Fruit Development
Most cherry trees require cross-pollination, so plant at least two compatible varieties. For example, 'Stella' (sweet cherry) pairs well with 'Black Tartarian'. If you only have space for one tree, choose a self-pollinating variety like 'Montmorency'. Blooms appear in early spring, and fruit sets within 6-8 weeks after flowering.
Thin fruit when it's the size of a marble to ensure larger, higher-quality cherries. Remove excess fruit clusters to reduce competition for nutrients. Protect young trees from pests like aphids and birds—use netting if necessary. Harvest when cherries easily detach from the tree and have fully developed color and flavor, usually in late summer.
✂️ Step 5: Long-Term Maintenance for Bountiful Harvests
Continue pruning annually in late winter to remove dead wood and shape the tree. Thin out crowded branches to improve air circulation, which reduces disease risk. Fertilize lightly in early spring with a low-nitrogen fertilizer (like 5-10-10) to encourage fruiting over leafy growth.
Watch for signs of common cherry diseases like brown rot or leaf spot. Remove infected leaves immediately and apply fungicide as needed. Mulch annually to maintain soil moisture and temperature. With proper care, your cherry tree will produce fruit for decades—enjoy the sweet reward of homegrown cherries!
Tips & tricks for growing cherries at home
Here's what nobody tells you about growing cherries—these tricks will help you avoid common pitfalls and maximize your harvest.
Sunlight Strategy: While the instructions mention 6-8 hours of daily sun, cherries actually thrive with full sun exposure (8+ hours) for optimal fruit production. If your yard has partial shade, choose a location that gets the most sunlight possible—even an hour less can reduce fruit quality. South-facing spots are ideal in the Northern Hemisphere.
Soil Prep Secret: Before planting, test your soil's pH—cherries prefer 6.0-6.5. If your soil is too alkaline, mix in peat moss or sulfur to adjust it. I learned this the hard way after my first tree struggled in alkaline soil. Also, avoid fresh manure—it can burn delicate cherry roots. Composted manure is a safer bet.
Watering Wisdom: The instructions say to water deeply once a week, but timing matters just as much. Water in the early morning to reduce evaporation and fungal risks. Use a soaker hose or drip irrigation to deliver water directly to the roots, keeping leaves dry. Overhead watering can spread diseases like brown rot, which cherries are prone to.
Pruning Pro Tip: When pruning in late winter, focus on removing water sprouts and suckers—these fast-growing shoots steal energy from fruit production. Use sharp, clean pruners to make cuts just outside the branch collar (the swollen area where the branch meets the trunk). Sterilize your tools with rubbing alcohol between cuts to prevent spreading disease.
Pro Tips for Grow Cherries At Home
- Here's what nobody tells you about growing cherries—these tricks will help you avoid common pitfalls and maximize your harvest.
- Sunlight Strategy: While the instructions mention 6-8 hours of daily sun, cherries actually thrive with full sun exposure (8+ hours) for optimal fruit production.
- Soil Prep Secret: Before planting, test your soil's pH—cherries prefer 6.0-6.5.
Frequently asked questions
Got questions about growing cherries at home?
You’re not alone! Here are answers to the most common queries—from timing to troubleshooting—so you can cultivate sweet, juicy fruit with confidence.
Can I grow cherries in containers or do I need a full backyard?
Yes! Dwarf cherry tree varieties (like Stella® or Balaton) thrive in large containers (15+ gallons). Just ensure the pot has drainage holes, use well-draining soil, and place it in full sun. Containers work great for patios or small spaces—just expect smaller fruit yields than in-ground trees.
How long does it take for a cherry tree to bear fruit?
Patience is key! Most cherry trees take 3–5 years to produce fruit, depending on the variety and growing conditions. Dwarf trees may fruit slightly sooner (2–3 years), but consistent care—like pruning, watering, and cross-pollination (for sweet cherries)—speeds up the process.
Why aren’t my cherry tree flowers turning into fruit?
Several factors could be at play: lack of pollination (sweet cherries need a second tree), late frosts (damaging blossoms), or poor soil nutrients (add compost or a balanced fertilizer). If flowers appear but drop off, check for pests (like mites) or fungal issues (e.g., brown rot). Hand-pollinate with a soft brush if needed!
Do I need to thin cherry fruit, and how?
Thinning is crucial for larger, sweeter cherries! When fruits are pea-sized, gently twist them off, leaving 4–6 inches between each cherry. This improves air circulation and reduces disease risk. Use pruning shears for stubborn clusters. Pro tip: Thin in early summer for best results.
What’s the best way to store homegrown cherries?
Cherries are delicate—store them unwashed in a single layer on a paper towel in the fridge (up to 2 weeks). For longer storage, pit and freeze them (perfect for jams or baking!). Avoid the counter—they’ll spoil quickly.
Can I grow cherries from a pit I find in my grocery store?
Technically yes, but it’s a gamble! Store-bought pits are often from hybrid varieties that won’t grow true to type. For better success, buy certified nursery trees. If you’re adventurous, try it—just know the tree may take years to fruit (if at all) and could be prone to disease.
Wrapping up and next steps
Growing cherries at home is a rewarding journey that transforms your backyard into a sweet, fruity paradise! 🌱 From selecting the right variety to nurturing your trees with patience and care, you’ve got everything you need to enjoy homegrown cherries year after year. Start small, stay consistent, and soon you’ll be savoring the taste of success—literally!
Ready to take the next step? Plant your first cherry tree this season and watch your garden flourish! 🍒 Whether you’re a beginner or a seasoned gardener, every cherry you pick will be a testament to your hard work. Happy growing!