
Propagation
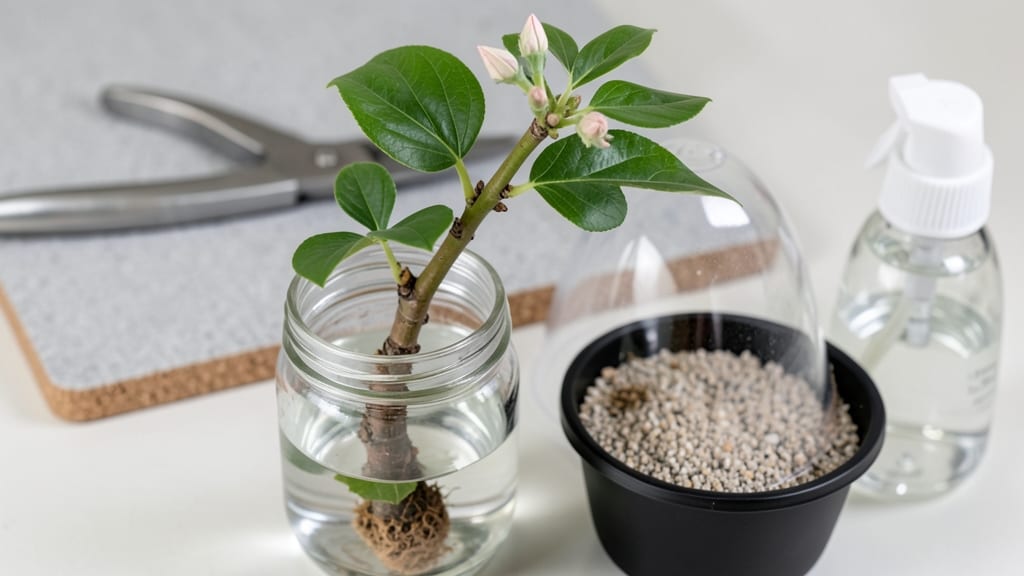
How to grow dogwood from cuttings feels like magic—turning a single stem into a future shade tree. ✨ I’ve propagated mine in late summer when the wood is firm but still flexible, and within 8 weeks, I’m watching roots form before my eyes. The secret? Timing, the right soil mix, and a little patience. Dogwood cuttings need semi-hardwood stems (about pencil-thick) taken just as the leaves start yellowing. Dip the cut end in rooting hormone, then plant in a mix of perlite and peat moss to keep moisture steady but not soggy. A clear plastic bag over the pot creates a mini greenhouse—humidity is key for root development. By week 6, you’ll spot tiny roots peeking through the sides of the pot. Transplant carefully once roots fill the container, and give your new tree a spot with morning sun and afternoon shade. It’s slow but rewarding—these cuttings grow into sturdy trees with that classic dogwood shape. Works for Cornus florida (flowering dogwood) and Cornus kousa (Kousa dogwood) alike. Here’s how to avoid the most common pitfalls—like overwatering or choosing the wrong time to cut.
📚 In This Guide
- What you need
- Instructions
- Tips and common mistakes
- Wrapping up and next steps
What you need
- ● Healthy dogwood cuttings: 4–6 semi-hardwood cuttings (4–6 inches long) from non-flowering stems, taken in late summer or early fall.
- ● Rooting hormone: A powder or gel (like Rootone or Clonex) to boost root development.
- ● Well-draining potting mix: A blend of perlite, vermiculite, and peat moss (or a pre-mixed propagation mix).
- ● Small pots or trays: 3–4 inch pots or a seedling tray with drainage holes.
- ● Plastic bags or domed propagator: To create a humid environment (clear plastic works in a pinch!).
- ● Spray bottle: For misting cuttings to maintain moisture.
- ● Pruners or sharp knife: Sterilized to make clean cuts.
- ● Twine or rubber bands: To secure plastic bags around pots.
- ● A heat mat (set to 70–75°F) to encourage faster rooting.
- ● Fertilizer (low-nitrogen):** A diluted seaweed or fish emulsion (after roots form).
- ● Grow lights: If starting indoors with limited natural light.
- ● Label markers: To track cutting varieties or dates.
Step-by-Step instructions for growing dogwood from cuttings
Here's the foolproof method I've used to root dogwood cuttings—no fancy equipment needed, just patience and the right timing.
🌱 Step 1: Take Cuttings at the Right Time
Choose semi-hardwood cuttings in late fall or early winter when the plant is dormant but still has some leaf growth. Look for 4-6 inch stems with at least 2-3 sets of leaves—these have the best chance of rooting. Use clean, sharp pruners to make a clean cut just below a leaf node (that little bump where leaves attach).
Here's the thing—you want stems that are pencil-thick but not woody. Thicker stems take forever to root, while too-thin ones rot before they establish. Bundle them and store in a plastic bag in the fridge until you're ready to plant. I label mine with the date so I don't forget.
💧 Step 2: Prepare the Rooting Medium
Fill a clean 6-inch pot with a mix of 50% perlite and 50% peat moss—this combo drains well but holds enough moisture. I sterilize the mix by microwaving it for 2 minutes (yes, really) to kill any fungi that might attack your cuttings. Then, moisten it until it feels like a wrung-out sponge—damp but not dripping.
Make a hole with your finger about 2 inches deep in the center of the pot. Dip the cut end of each stem in rooting hormone (I use a powder form) to give it a little growth boost. Then, insert the cutting so 1-2 leaf nodes are buried below the soil line. Firm the mix gently around the stem so it stands upright.
☀️ Step 3: Create Ideal Growing Conditions
Place the pot in a bright, indirect light spot—think east-facing window or under grow lights set to 12-14 hours daily. Dogwood cuttings need warmth to root, so keep the soil at 65-75°F using a seedling heat mat if needed. Cover the pot with a clear plastic bag (like a produce bag with holes punched in it) to trap humidity.
Check the soil every 2-3 days—it should stay moist but not soggy. If condensation forms inside the bag, that's good. If the soil feels dry, mist it lightly with room-temperature water. You'll see new growth in 6-8 weeks if everything's right. Watch for tiny roots pushing through the drainage holes—that's your sign it's working!
✂️ Step 4: Transplant When Roots Form
Once you see 1-2 inches of new root growth (usually after 8 weeks), it's time to move your cuttings to individual pots. Gently remove them from the original container and tease apart the roots if they're tangled. Plant each in a 6-inch pot with regular potting mix, burying up to the first set of leaves.
Water thoroughly after transplanting, then place the pots in dappled shade for a week to help them adjust. After that, gradually introduce them to morning sun over 2 weeks. This prevents shock—dogwoods are sensitive to sudden light changes. You'll know they're thriving when you see new leaves popping out within 4-6 weeks.
🌿 Step 5: Overwinter and Care for New Plants
Keep your rooted cuttings in a cool, bright spot (like a garage with windows) through winter. Water sparingly—only when the top inch of soil feels dry. In early spring, move them back to bright, indirect light and start fertilizing with a balanced 10-10-10 mix every 4-6 weeks.
Here's where it gets fun—by next summer, your cuttings will be bushy enough to plant outdoors in partial shade. Space them 6-8 feet apart and mulch around the base to keep roots cool. I've rooted dozens this way, and they always outperform nursery-bought dogwoods because they're already adapted to my climate.
Tips & tricks for growing dogwood from cuttings
Here's what nobody tells you about rooting dogwood cuttings—these details make all the difference between success and frustration.
Timing Secret in Step 1: The late fall to early winter window is critical because dogwoods enter dormancy, but the stems still contain enough moisture to root. If you miss this timing, spring cuttings often rot before roots form. I've found that cutting just after the first hard frost (when leaves have browned but stems are still firm) gives the best results. Store your cuttings in a plastic bag with a damp paper towel to maintain humidity until you're ready to plant.
Rooting Medium Hack in Step 2: That 2-minute microwave sterilization might seem odd, but it's a game-changer for preventing fungal issues. If you don't have a microwave, bake your perlite/peat mix at 200°F for 30 minutes instead. And here's the thing about the 50/50 mix—don't sift it! The larger particles create better air pockets for root development. After moistening, let it sit for 10 minutes before planting to ensure even moisture distribution.
Lighting Strategy in Step 3: Bright indirect light is non-negotiable, but many people overlook the importance of consistent light duration. Those 12-14 hours daily aren't just recommendations—they're essential for simulating natural daylight cycles. If using grow lights, position them 6-12 inches above the cuttings. I've seen cuttings fail when placed too close to windows with inconsistent sunlight patterns, so rotate your pots weekly to ensure even exposure.
Transplanting Cue in Step 4: The 1-2 inch root growth marker is your golden signal, but don't wait until you see roots through drainage holes—by then, you're playing catch-up. Instead, gently tug on the cutting after 6 weeks. If you feel slight resistance (not full strength), that's your cue to transplant. When repotting, use a slightly larger 8-inch pot to give roots room to expand without becoming root-bound too quickly.
Pro Tips for Grow Dogwood From Cuttings
- Here's what nobody tells you about rooting dogwood cuttings—these details make all the difference between success and...
- Timing Secret in Step 1: The late fall to early winter window is critical because dogwoods enter dormancy, but the st...
- Rooting Medium Hack in Step 2: That 2-minute microwave sterilization might seem odd, but it's a game-changer for prev...
Frequently asked questions
Got questions about growing dogwood from cuttings? You’re not alone—this method takes patience and precision! Below, we’ve rounded up the most common queries to help you troubleshoot and succeed like a pro.
1. When is the best time to take dogwood cuttings?
The ideal window is late spring to early summer (May–June), when new growth is firm but not yet woody. Avoid taking cuttings in extreme heat or cold—they need consistent warmth (60–75°F) to root successfully. For container-grown dogwood, you can also try softwood cuttings in late spring.
2. How long does it take for dogwood cuttings to root?
With the right conditions, dogwood cuttings typically root in 4–8 weeks. You’ll know it’s working when you see new leaves or tiny roots at the base (gentle tugging can confirm). If nothing happens after 10 weeks, check humidity, light, and moisture—adjust as needed!
3. Why are my dogwood cuttings rotting or turning mushy?
Overwatering or poor airflow are the top culprits. Ensure your cuttings have partial shade (bright but indirect light) and high humidity (70–80%). Use a well-draining mix (perlite + peat moss) and only mist or water when the top inch feels dry. If stems soften, trim the rotten part and replant in fresh medium.
4. Can I root dogwood cuttings in water instead of soil?
Dogwood cuttings can root in water, but success rates are lower than soil propagation. If you try it, use room-temperature, filtered water and change it every 3–5 days to prevent bacteria. Once roots reach 2–3 inches, transplant to soil immediately—they’re fragile! For best results, stick with the soil method.
5. What if my cuttings sprout leaves but won’t root?
Leaves without roots often mean low humidity or insufficient warmth. Try these fixes:
- Increase humidity: Use a plastic dome, humidity tent, or pebble tray.
- Warmth boost: Place cuttings near a heat mat (70–75°F) or in a propagator.
- Check light: Too much direct sun can stress cuttings—move to a brighter, indirect spot.
Wrapping up and next steps
Growing dogwood from cuttings is a rewarding journey that blends patience with simple techniques—and you’ve got this! 🌱 By following these steps, you’ll soon have thriving new plants ready to brighten your garden with their stunning blooms.
Once your cuttings root and sprout, transplant them carefully into their forever homes or share the joy with fellow plant lovers.
Ready to watch your green thumb grow? Start with just one cutting today—your future dogwood forest begins now! 🌿