
Size
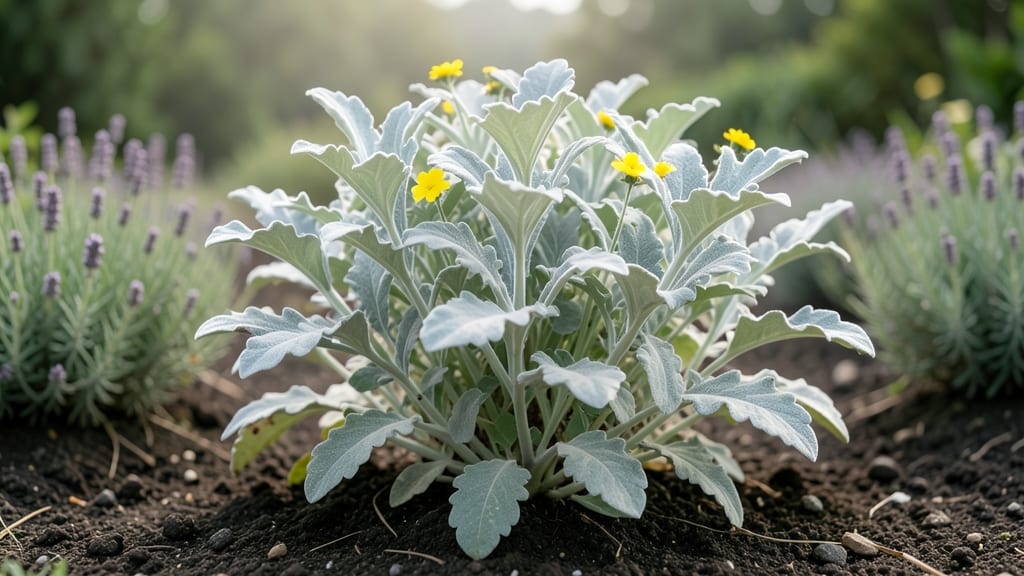
How to grow Dusty Miller plants—these sun-loving beauties transform gardens with their velvety silver foliage. ✨ I’ve grown mine for years, and they’ve become my go-to for adding texture and contrast to sunny borders. The key? Well-drained soil, full sun, and minimal fuss—they’re practically indestructible once established.
Start with a spot that gets at least 6 hours of sunlight daily, and mix sandy soil with compost to prevent soggy roots. Dusty Miller hates wet feet, so raised beds or containers with drainage holes work best.
Water only when the top inch of soil feels dry—overwatering is the fastest way to kill these tough plants.
You’ll love how they bounce back from neglect, with silvery leaves that glow under the sun. They’re drought-tolerant, pest-resistant, and even deer-proof, making them perfect for low-maintenance gardens. Plus, their unique foliage pairs beautifully with deep greens, purples, or reds.
Propagate from cuttings in spring or divide mature plants in early fall. Just snap off a healthy stem, dip it in rooting hormone, and plant it in fresh soil. Within weeks, you’ll have a new Dusty Miller ready to brighten up your garden.
📚 In This Guide
- What you need
- Instructions
- Tips and common mistakes
- Wrapping up and next steps
What you need
- ● Dusty Miller plants: Start with healthy nursery-grown Jacobaea maritima (or seeds if propagating from scratch). Pro tip: 💡 Choose varieties like 'Silver Dust' or 'Cenizo' for extra flair!
- ● Well-draining potting mix: 1–2 bags (1–2 cubic feet each) of a blend like 50% cactus/succulent mix + 50% perlite or pumice to prevent root rot.
- ○ Containers or garden bed: Pots: 1–2 containers per plant (12–16 inches in diameter) with drainage holes. Optional: Terracotta pots help wick moisture away.
- ● Garden spot: A sunny, sheltered area with 6+ hours of direct sunlight daily and loose, rocky soil.
- ● Garden trowel or shovel for transplanting.
- ● Pruning shears (sterilized with rubbing alcohol) to trim dead foliage.
- ● Watering can with a narrow spout (or hose with gentle spray) to avoid soggy soil.
- ○ Mulch (optional): 1–2 inches of gravel or coarse sand to retain heat and deter weeds.
- ○ Fertilizer (optional): Balanced 10-10-10 or fish emulsion (diluted to half-strength) for slow feeders.
- ● Hardiness zone: Dusty Miller thrives in USDA Zones 5–10. In colder zones, grow in containers for winter protection.
- ● Sunlight: Full sun (6+ hours/day) is a must—partial shade dulls its silvery magic! ☀️
- ● Watering know-how: Let soil dry completely between waterings (overwatering = root rot!).
Step-by-step instructions for growing dusty miller plants
Here's how to cultivate these striking silver-leaved perennials with minimal fuss.
🌱 Step 1: Choose the Perfect Planting Location
Dusty miller (Artemisia stelleriana) thrives in full sun—at least 6 hours of direct sunlight daily. I always pick the sunniest, driest spot in my garden because this plant despises soggy soil. If your yard has afternoon shade, position it where it gets morning sun instead.
Check your site by observing how sunlight moves across your yard. Dusty miller tolerates some afternoon shade in hot climates, but the leaves will lose their signature silver sheen and grow paler. The ideal spot gives you bold, velvety foliage that stands out all season long.
🪴 Step 2: Prepare Well-Draining Soil
This plant refuses to grow in heavy, compacted soil. Amend your garden bed with 2-3 inches of coarse sand or perlite mixed into the top 6 inches of soil. I also add a 1-inch layer of gravel at the bottom of containers to prevent waterlogging.
Dusty miller prefers dry, lean conditions. If your soil drains poorly, create a raised bed or use containers with drainage holes. Test drainage by digging a 6-inch hole, filling it with water, and checking if it drains within 30 minutes. If not, keep improving until it does.
☀️ Step 3: Plant with Proper Spacing and Watering
Space plants 18-24 inches apart to allow airflow and prevent fungal issues. Dig a hole twice as wide as the root ball but only as deep as the container it came in. Gently remove the plant, loosen roots if pot-bound, and place it in the hole.
Water deeply only once after planting to settle the soil. Dusty miller is drought-tolerant, so do not water again for 2 weeks. After that, water only when the top 2 inches of soil feel dry—overwatering is the fastest way to kill this plant. Mulch with 1 inch of gravel (not organic mulch) to keep roots cool.
✂️ Step 4: Prune and Maintain for Year-Round Beauty
Cut back brown or leggy stems in early spring to encourage fresh growth. I shear mine lightly with clean shears to maintain a compact, bushy shape. Avoid heavy pruning in late summer, as new growth won’t harden off before winter.
Fertilize once in early spring with a low-nitrogen, balanced fertilizer (5-5-5). Too much nitrogen makes leaves grow fast but weakens their striking silver color. Deadhead spent flowers in late summer to redirect energy into foliage rather than seed production.
⏰ Step 5: Overwinter for Next Year’s Growth
Dusty miller is hardy to USDA Zone 5, but in colder climates, protect it with 2-3 inches of mulch after the first frost. In containers, move pots to a sheltered location or wrap them in burlap to shield from wind.
Prune back by half in late winter to stimulate fresh spring growth. The plant often regrows from the base, so don’t worry if it looks dormant—it’s just conserving energy. Resume regular care once daytime temperatures stay above 50°F for a week.
Tips & tricks for growing dusty miller plants
These simple strategies will help you cultivate the most vibrant dusty miller foliage with minimal effort.
Sunlight Secret: Dusty miller's signature silver color comes from its need for full sun. If your yard has afternoon shade, position plants where they get at least 6 hours of morning sun. I've seen plants in partial shade lose their striking color within weeks. The more direct sunlight, the more intense that velvety silver hue becomes.
Soil Test Trick: Before planting, do this quick drainage test: Dig a 6-inch hole, fill it with water, and time how long it takes to drain. If it takes longer than 30 minutes, you need to amend your soil with more coarse sand or perlite. I've ruined several dusty millers by planting in heavy clay soil—don't make my mistake!
Watering Wisdom: The 2-week waiting period after planting might feel long, but it's crucial. Dusty miller stores water in its leaves, so frequent watering actually encourages weak, floppy growth. Once established, let the top 2 inches of soil dry completely between waterings. I use my finger to check moisture—it's the most reliable method.
Pruning Pro Tip: When you cut back those brown stems in early spring, save the clippings! Dry them out and use them for winter arrangements—they maintain their beautiful silver color even when dried. Just bundle them and hang upside down in a dry, dark place for about 2 weeks. It's a great way to extend their beauty beyond the growing season.
Pro Tips for Grow Dusty Miller Plants
- These simple strategies will help you cultivate the most vibrant dusty miller foliage with minimal effort.
- Sunlight Secret: Dusty miller's signature silver color comes from its need for full sun.
- Soil Test Trick: Before planting, do this quick drainage test: Dig a 6-inch hole, fill it with water, and time how long it takes to drain.
Frequently asked questions
Got questions about growing Dusty Miller? You’re not alone—this silvery beauty has a few quirks! Here are answers to the most common curiosities to keep your plants thriving.
Can Dusty Miller grow indoors?
While it loves outdoor light, Dusty Miller can survive indoors near a bright, south-facing window. Just expect slower growth and less dramatic foliage. For best results, supplement with a grow light (12–14 hours/day) and keep humidity moderate to prevent browning.
How long does it take to grow from seed?
Patience is key! Dusty Miller seeds can take 4–6 weeks to germinate (sometimes longer) and another 3–4 months to reach mature size. For faster results, opt for nursery-started plants—just transplant them carefully to avoid root shock.
Why are my Dusty Miller leaves turning brown?
Brown edges usually mean overwatering or low humidity. Let the soil dry out between waterings, and avoid wetting the foliage. If the air is dry (common indoors), mist lightly or place a tray of pebbles with water nearby to boost moisture.
What’s the best companion plant for Dusty Miller?
Pair it with purple or deep red flowers (like salvia or petunias) to make the silver foliage pop! It also thrives alongside lavender, rosemary, or black-eyed Susans—all of which love similar sunny, well-drained conditions.
Can Dusty Miller survive winter outdoors?
In USDA Zones 7–10, it’s perennial and winter-hardy. Below Zone 7? Treat it as an annual or dig up pots and store them in a cool, dark place (like a garage) over winter. Mulch heavily if leaving it in the ground for extra protection.
Wrapping up and next steps
Growing dusty miller plants is a rewarding way to add silvery elegance to your garden with minimal effort! With the right sunlight, well-draining soil, and a little patience, these drought-tolerant beauties will thrive year-round.
Whether you’re a beginner or a seasoned gardener, their striking foliage makes them a standout addition to any landscape.
Now that you’re armed with the know-how, roll up your sleeves and plant your first dusty miller today! 🌱 Start by selecting a sunny spot, prep the soil, and watch your garden transform with this easy-care perennial. Happy gardening!