
Propagation
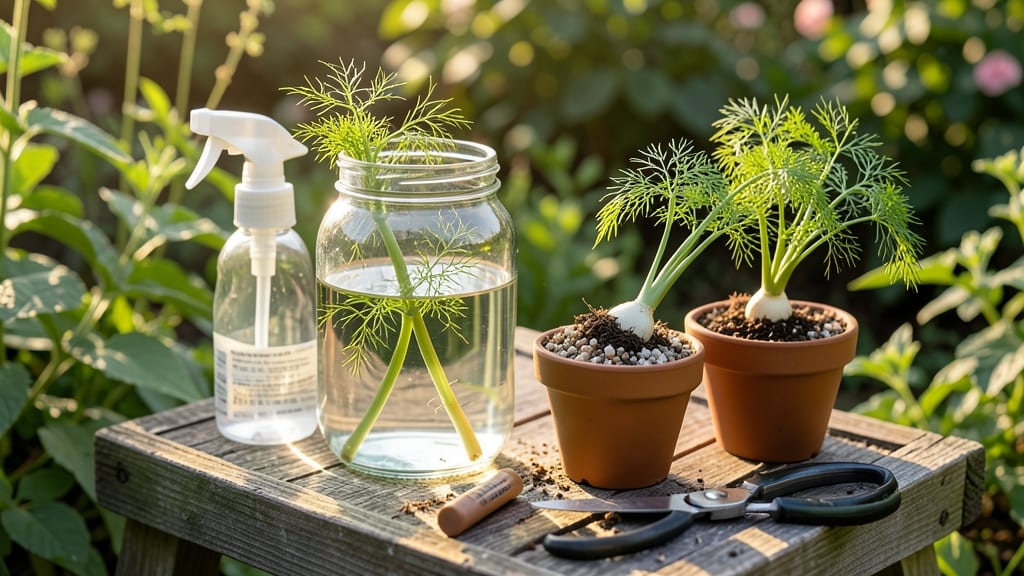
How to grow fennel from cuttings is like cloning your favorite plant—except it’s easier than it sounds. 🌱 I’ve propagated fennel this way three times, and the first batch always surprises me with how quickly those feathery fronds reappear. The secret? Healthy stems, the right timing, and a little patience to avoid the dreaded rot that stalls so many beginners.
Start with 4-6 inch cuttings from non-flowering stems—thick, green, and still flexible. Snip just below a leaf node (that’s where roots form) and strip the lower leaves so they sit in water or soil without drowning.
Fennel loves warmth, so aim for 70-75°F and bright, indirect light. Too much sun scorches the leaves before roots even think about showing up.
Within 2-3 weeks, you’ll see tiny white roots if you’re rooting in water, or new growth if you’ve planted directly in soil. That’s when the real magic happens—the plants bulk up faster than seed-grown fennel, and by summer, you’ll have a foot-tall bush ready to divide or transplant.
The best part? Fennel cuttings root best in spring or early summer, when the plant’s energy is all about growth, not seeds.
Watch for yellowing leaves—that’s usually overwatering or poor light. If your cuttings sulk instead of thrive, try a hormone rooting gel for stubborn stems. Once established, these plants are tougher than they look, and you’ll have fresh fennel for cooking (or sharing with jealous neighbors) all season long.
📚 In This Guide
- What you need
- Instructions
- Tips and common mistakes
- Wrapping up and next steps
What you need
- ● Mature fennel plant: Choose a healthy, disease-free fennel plant (preferably Foeniculum vulgare) with thick, woody stems and no flowers yet. Look for stems about ¼-inch to ½-inch in diameter.
- ● Sharp pruning shears or clean knife: Sterilize with rubbing alcohol to prevent bacterial infections. A bypass pruner works best for clean cuts.
- ○ Rooting hormone (optional but recommended): A powder or gel like Clonex or Dip ‘N Grow to boost root growth. Follow package instructions for application.
- ● Well-draining potting mix: Use a lightweight, sterile mix like a 50/50 blend of perlite and coco coir or a seed-starting mix with added sand for aeration.
- ● Small pots or containers: Use 3-4 inch diameter pots with drainage holes (or repurpose clean yogurt cups with holes punched in the bottom).
- ● Clear plastic bag or humidity dome: A ziplock bag or propagator to create a humid environment (cut the top off the bag for easy access).
- ● Spray bottle with water: Fill with room-temperature, filtered water to mist cuttings gently.
- ● Grow lights or sunny windowsill: Provide 12-16 hours of indirect light daily (a LED grow light works well if natural light is limited).
- ○ Twine or plant ties: Optional, but helpful to secure cuttings in place if they’re wobbly.
- ● Hydrogen peroxide (3% solution): Dilute with water (1:10 ratio) to soak cuttings for 5-10 minutes before planting to prevent rot.
- ● Fertilizer (balanced, water-soluble): Like 10-10-10 or fish emulsion (use ½-strength once roots form).
- ● Heat mat: Keeps soil 70-75°F to speed up rooting (especially useful in cooler climates).
- ● Labeling tags: Mark pots with the date and type of cutting to track progress.
Step-by-step instructions for growing fennel from cuttings
Here’s my foolproof method for rooting fennel cuttings—no fancy tools, just patience and the right touch.
🌱 Step 1: Select and Prepare Healthy Fennel Cuttings
Choose a mature fennel plant with thick, sturdy stems—about ½-inch in diameter—and cut just below a leaf node with clean, sharp scissors. The cutting should be 4-6 inches long, with at least 3-4 sets of leaves remaining. Remove the lower leaves, leaving only the top cluster to reduce moisture loss.
Place the cuttings in a glass of room-temperature water (no chlorine—let tap water sit out for 24 hours first). Submerge only the bottom 1-2 inches of the stem. Change the water every 2-3 days to prevent bacteria buildup. You’ll see tiny white roots forming in 7-10 days—that’s your cue it’s ready for the next step.
💧 Step 2: Root in Water Until Established
Once roots reach 1-2 inches long, they’re strong enough to transplant. Keep the cuttings in water for another 3-5 days to thicken the roots further—this ensures they’ll handle soil stress. Avoid direct sunlight during this phase; bright, indirect light is best. You’ll notice the roots branch out and turn a deeper white or pale yellow.
Real talk: If the water gets cloudy or smells funky, dump it and rinse the roots gently. Fungal growth here will kill your cuttings before they even hit soil. A clean glass and fresh water are your best friends.
🪴 Step 3: Plant in Moist, Well-Draining Soil
Fill a 4-6 inch pot with a mix of 50% potting soil and 50% perlite or sand to improve drainage—fennel hates soggy roots. Make a small hole with your finger, then gently slide the rooted cutting in until the stem is buried to 1 inch below the soil line. Press lightly around the base to secure it.
Water lightly until the soil feels damp but not soggy. Place the pot in a spot with bright, indirect light for the first 7-10 days. You’ll see new growth within 2-3 weeks—small, feathery leaves signaling the cutting has taken. Here’s the thing: Fennel is finicky about humidity, so if your air is dry, mist the leaves occasionally to mimic its Mediterranean roots.
☀️ Step 4: Acclimate to Sun and Soil Gradually
After 10 days, start moving the pot to a sunnier spot, increasing exposure by 1-2 hours daily. Fennel loves full sun (6+ hours), but sudden direct light can scorch new leaves. You’ll know it’s ready for full sun when the stems are sturdy and the leaves are a deep, vibrant green.
Fertilize lightly with a balanced liquid fertilizer (10-10-10) diluted to half-strength after 4 weeks. Overfeeding now can burn tender roots. Water when the top 1 inch of soil feels dry—fennel’s a drought-tolerant herb once established, but cuttings need consistent moisture to root properly.
✂️ Step 5: Prune and Care for Mature Growth
Once your fennel cutting has 6-8 inches of new growth, pinch back the top set of leaves to encourage bushier growth. This also prevents the plant from flowering too soon, which makes the stems woody and less flavorful. You’ll see side shoots emerge within 2-3 weeks—these are your future harvest points.
Harvest outer leaves as needed, but avoid cutting more than ⅓ of the plant at once. Fennel is biennial, so if you keep it alive through winter, it’ll bolt in spring. To extend its life, move pots indoors near a sunny window or under grow lights during cold months. With this method, you’ll have 4-6 healthy fennel plants ready for kitchen use in just 8-12 weeks.
Tips & tricks for perfect fennel propagation
Here's the secret to turning those stubborn fennel cuttings into thriving plants—without losing them to rot or stress.
Cutting Selection: Look for stems with a slight bend at the base—this is where new roots will form most vigorously. Avoid cuttings with yellowing leaves or soft spots, as these indicate disease or stress. I've found that early morning cuttings (right after dew dries) have the highest success rate because the plants are fully hydrated.
Water Quality Matters: Never use tap water straight from the faucet—always let it sit uncovered for 24 hours to evaporate chlorine. For even better results, use filtered or rainwater. I've noticed cuttings in chlorinated water develop weak, stunted roots that struggle to support the plant during transplanting.
Rooting Environment: Place your cuttings in a spot with bright, indirect light during the rooting phase—think east-facing window or under fluorescent grow lights. Direct sunlight can cause the leaves to wilt before roots establish. I keep mine near a bathroom window where the humidity stays naturally higher, which mimics fennel's Mediterranean habitat.
Transplanting Timing: Wait until roots reach 1-2 inches before transplanting—this ensures they're strong enough to handle soil stress. Don't rush this step! I've seen cuttings with only ½-inch roots fail completely when planted too soon. The extra 3-5 days in water thickens the roots significantly, making the transition to soil much smoother.
Pro Tips for Grow Fennel From Cuttings
- Here's the secret to turning those stubborn fennel cuttings into thriving plants—without losing them to rot or stress.
- Cutting Selection: Look for stems with a slight bend at the base—this is where new roots will form most vigorously. A...
- Water Quality Matters: Never use tap water straight from the faucet—always let it sit uncovered for 24 hours to evapo...
Frequently asked questions
Got questions about growing fennel from cuttings?
You’re not alone! Here are some of the most common concerns—and straightforward answers—to help you propagate like a pro.
Can I grow fennel from cuttings without roots?
Yes, but it’s trickier! Fennel cuttings can root in water, but they’re more likely to succeed if you take a 4–6 inch stem cutting with a small piece of the root still attached. Dip the base in rooting hormone for extra insurance. If you’re starting from a bare stem, use a humid propagator or plastic bag to keep moisture high.
How long does it take for fennel cuttings to root?
Patience is key! Most fennel cuttings take 2–6 weeks to develop roots, depending on warmth (70–75°F) and humidity. Check for roots by gently tugging—if resistance meets your fingers, you’re good to go! If no roots appear after 6 weeks, try a fresh cutting or adjust your humidity setup.
What’s the best time of year to propagate fennel?
Spring and early summer are ideal! Fennel thrives in warm soil (60°F+), so aim for after the last frost when nights stay mild. Avoid winter propagation—fennel is sensitive to cold and may rot. If you’re in a warm climate, late summer can work, but provide shade to prevent stress.
Can I reuse old fennel bulbs for cuttings?
Old fennel bulbs are perfect for propagation. Cut them into 1–2 inch chunks, ensuring each piece has an "eye" (bud) and a bit of root. Plant them shallowly in moist soil—they’ll often sprout new shoots within weeks. Just avoid bulbs that’ve gone soft or moldy!
Why are my fennel cuttings turning yellow or mushy?
Yellowing or mushiness usually means overwatering or rot. Fennel cuttings need moist but not soggy conditions. Let the soil dry slightly between waterings, and ensure pots have drainage holes. If you’re rooting in water, change it every 2–3 days to prevent bacterial growth. Yellow leaves? Trim them off to redirect energy to root growth.
Wrapping up and next steps
Growing fennel from cuttings is a rewarding way to expand your garden with minimal effort!
With the right tools—like sharp pruners, rooting hormone, and a bright, humid environment—you can propagate healthy plants that thrive in your kitchen or landscape. Remember: patience and consistency are key, but the payoff of fresh, aromatic fennel is worth it!
Ready to take the next step? Try experimenting with different fennel varieties or share your new green thumb knowledge with fellow gardeners. Happy growing! 🌱✨