
Landscaping
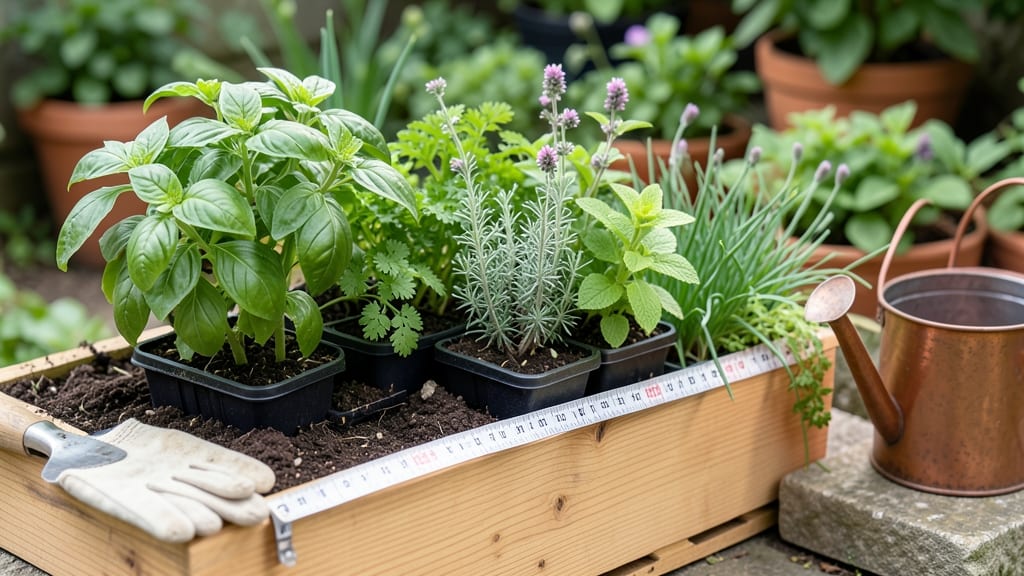
How to grow herbs in planter boxes transformed my tiny balcony into a fragrant, year-round kitchen garden—no green thumb required. The right setup turns a 2'x4' space into a thriving herb haven that smells like summer and trims grocery bills. Start with well-draining soil and containers with drainage holes. Basil, parsley, and chives thrive in 6-inch pots, while mint (the space hog) needs its own container. Place your boxes where they’ll get 6-8 hours of sunlight daily, and use a mix of potting soil and compost for nutrient-rich roots. Water when the top inch feels dry, but don’t drown them—herbs hate soggy soil. A light misting in the morning keeps pests away and encourages lush growth. Within 4-6 weeks, you’ll have enough basil for pesto, parsley for garnishes, and enough mint to share (or regret planting so much). This method works for apartments, fire escapes, or even sunny windowsills. The key? Consistency—herbs forgive small mistakes but hate neglect. Let’s get those boxes planted!
📚 In This Guide
- What you need
- Instructions
- Tips and common mistakes
- Wrapping up and next steps
What you need
- ● Planter Box: Depth: at least 6–12 inches (deeper for root crops like parsley or cilantro)
- ● Width: 12–18 inches (allows space for multiple herbs)
- ● Material: wood (cedar or redwood), fabric, or plastic (ensure drainage holes!)
- ● Potting Soil: High-quality, well-draining organic mix (avoid garden soil—it compacts!)
- ● Herb Seeds or Seedlings: Seeds: Choose fast-growing varieties like basil, parsley, or chives (packets include ~50–100 seeds)
- ● Seedlings: 3–5 per herb type (transplants save time!)
- ● Drainage Layer: Pebbles, gravel, or broken pottery shards (1–2 inches at the bottom)
- ● Watering Can or Spray Bottle: With a gentle nozzle (herbs hate soggy roots!)
- ● Fertilizer: Balanced liquid fertilizer (10-10-10) or organic compost (apply every 4–6 weeks)
- ○ Mulch (Optional): Straw or shredded leaves (retains moisture and suppresses weeds)
- ● Grow Lights: LED or fluorescent (for indoor setups or low-light spots)
- ● Herb Labels: Stakes or plant markers (trust us, you’ll forget which is which!)
- ● Pruning Shears: Small, sharp scissors (for harvesting and shaping plants)
- ● Self-Watering System: Wick or reservoir kit (great for vacations!)
- ● Companion Planting Guide: Some herbs thrive together (e.g., basil + tomatoes)
Step-by-Step instructions for growing herbs in planter boxes
Here's how to create a productive, space-efficient herb garden that thrives in just a few square feet.
🪴 Step 1: Choose and Prepare Your Planter Box
Select a wooden, plastic, or metal planter box that's at least 12 inches deep—shallow boxes dry out too quickly and stunt root growth. If your box lacks drainage holes, drill ¼-inch holes along the bottom and sides every 6 inches to prevent waterlogging. Line the bottom with landscape fabric to block weeds while allowing water to flow freely.
Position your box where it receives at least 6 hours of sunlight daily, preferably in a south-facing location. Morning sun with afternoon shade works well in hot climates to prevent leaf scorch. I like to place mine on a drip irrigation tray or elevated stand to catch excess water and keep roots healthy.
🌱 Step 2: Fill With Quality Soil and Plant Starts
Fill the bottom 3 inches with garden soil mixed with compost to create a loose, fertile base. Then add 3 inches of high-quality potting mix—this ensures excellent drainage while retaining moisture. I blend in a slow-release organic fertilizer (like 10-10-10) to provide nutrients all season long.
Plant 4-6 herb starts spaced 4-6 inches apart, depending on their mature size. Basil and parsley need more space, while chives and thyme can live happily closer together. Dig holes just deep enough to cover the roots but leave the crown slightly above soil level—this prevents rot. Water gently after planting to settle the soil around the roots.
☀️ Step 3: Water and Maintain Consistent Care
Water deeply every 2-3 days until the top 1 inch of soil feels dry to the touch. Herbs hate soggy roots, so always check moisture before watering. I use a soaker hose or watering can with a fine rose to deliver moisture evenly without disturbing the soil. Mulch the surface with ½ inch of straw or shredded leaves to retain moisture and suppress weeds.
Fertilize every 4-6 weeks with a balanced liquid fertilizer diluted to half-strength. Too much fertilizer burns delicate herb roots, so less is always better. Watch for pests like aphids—if you spot them, spray with neem oil or a soapy water solution to keep your herbs thriving without harsh chemicals.
✂️ Step 4: Prune and Harvest Regularly
Pinch back the tips of new growth when plants reach 6 inches tall to encourage bushier, more productive plants. This is especially important for basil and mint, which can become leggy if left unchecked. Use clean, sharp scissors to make cuts just above a set of leaves—this prevents disease and promotes new growth.
Harvest leaves in the morning when essential oils are at their peak. Snip individual leaves or small stems, leaving at least ⅓ of the plant intact so it continues growing. Regular harvesting actually encourages more growth—if you let herbs flower, they'll focus energy on seeds instead of leaves. Store fresh herbs in the fridge wrapped in a damp paper towel for up to 1 week.
Tips & tricks for thriving herb gardens in planter boxes
These simple strategies will help you avoid common pitfalls and maximize your herb garden's potential in limited space.
Drainage is Non-Negotiable: In Step 1, if your planter box doesn't have drainage holes, don't just skip them! Create a DIY solution by drilling holes every 6 inches along the bottom and sides, then line with landscape fabric. This prevents waterlogging, which is the #1 killer of herb roots. I've seen herbs die from soggy soil when people skip this step—trust me, it's worth the 10 minutes of effort.
Soil Layering for Success: The 3-inch layer of garden soil mixed with compost in Step 2 creates the perfect foundation, but here's the secret: mix in a handful of perlite or vermiculite to improve aeration. This helps prevent compacted soil that can suffocate roots. For extra flavor, I often add a thin layer of worm castings to the top inch of soil before planting.
Sunlight Strategy: While the instructions mention 6 hours of sunlight, here's what I've learned: herbs like basil and cilantro need full sun (6+ hours), while parsley and chives tolerate partial shade (4-6 hours). If your space gets afternoon shade, prioritize planting sun-lovers in the south-facing side of your box. Morning sun with afternoon shade actually works better in hot climates, preventing leaf scorch.
Pruning Payoff: When you pinch back growth at 6 inches in Step 4, here's the pro move: always cut just above a set of leaves where new growth emerges. This encourages bushier plants and prevents those sad, leggy stems. I like to harvest a few leaves at the same time—this gives me fresh herbs while still leaving enough foliage for the plant to continue growing.
Pro Tips for Grow Herbs In Planter Boxes
- These simple strategies will help you avoid common pitfalls and maximize your herb garden's potential in limited space.
- Drainage is Non-Negotiable: In Step 1, if your planter box doesn't have drainage holes, don't just skip them! Create ...
- Soil Layering for Success: The 3-inch layer of garden soil mixed with compost in Step 2 creates the perfect foundatio...
Frequently asked questions
Got questions about growing herbs in planter boxes? Here are answers to some of the most common ones to help you get started with confidence!
What’s the best time of year to start growing herbs in planter boxes?
For most herbs, late spring or early summer is ideal—after the last frost when temperatures are consistently above 50°F (10°C). However, hardy herbs like parsley, cilantro, and chives can be planted in early spring or even fall in mild climates. If you’re in a warm region, you can grow herbs year-round with proper care!
How often should I water herbs in planter boxes?
Herbs typically need watering every 2-3 days during hot weather, but check soil moisture first—stick your finger 1-2 inches deep. Overwatering is a common mistake! Planter boxes dry out faster than ground soil, so adjust based on weather. Drainage holes are a must to prevent root rot.
Can I grow herbs in planter boxes without sunlight?
Most herbs thrive in 6+ hours of direct sunlight daily, but low-light options like parsley, mint, and chives can tolerate partial shade (4-6 hours). If sunlight is limited, use a grow light for 12-14 hours/day. South-facing windows or balconies work well for smaller setups.
How do I keep pests away from my herb planter boxes?
Prevent pests with neem oil, companion planting (like marigolds), or row covers. Common culprits include aphids, spider mites, and slugs. Inspect leaves regularly and remove affected ones. Healthy soil (rich in compost) also deters pests by strengthening plants.
What can I do if my herbs are growing leggy or sparse?
Leggy growth usually means too little light. Move your planter box to a sunnier spot or supplement with a grow light. Overcrowding can also stunt growth—thin seedlings or replant if needed. Ensure your herbs have 12-24 inches of space (depending on the type) for optimal airflow and growth.
Wrapping up and next steps
Growing herbs in planter boxes is a rewarding way to bring fresh, flavorful greens into your space—no matter how small your garden! 🌿 With the right soil, sunlight, and care, you’ll enjoy a thriving indoor or outdoor herb garden in no time.
Start with a few easy varieties like basil, mint, or parsley, and soon you’ll be harvesting homegrown goodness for meals, teas, or gifts.
Ready to dive in? Pick your favorite herbs, grab a planter, and get growing today! 🌱 For extra inspiration, check out herb companion planting guides or explore creative ways to use your harvest in the kitchen.