
Landscaping
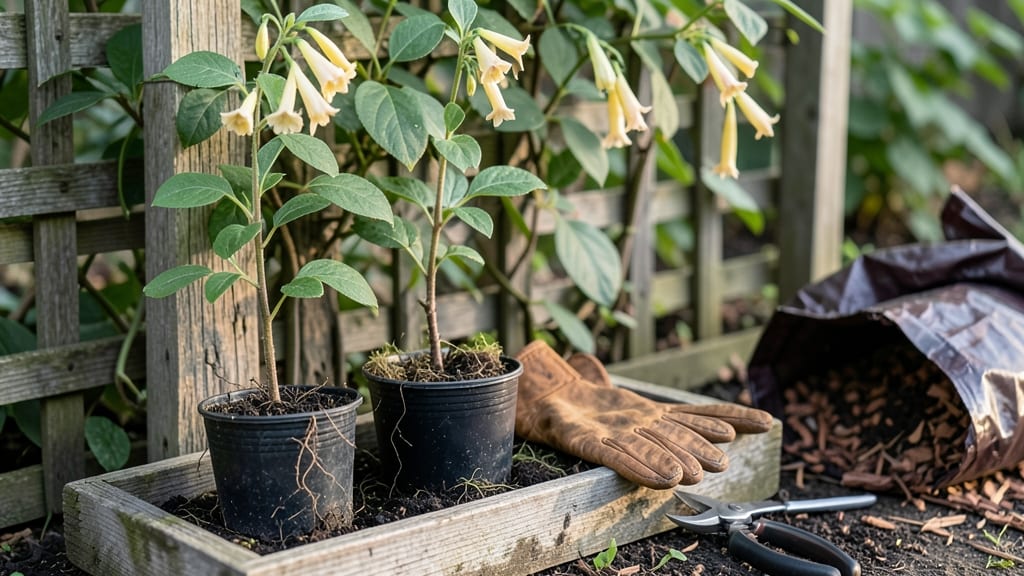
How to grow honeysuckle on a fence turns bare wood into a fragrant, buzzing paradise. 🌿 The moment those first trumpet-shaped blooms appear, you’ll understand why this vine is a garden superstar—it’s drought-tolerant, attracts hummingbirds, and thrives with minimal fuss once established.
Start with full-sun exposure and well-draining soil, then plant your honeysuckle slips at the base of the fence in early spring. Use twine or soft ties to guide the vines upward, giving them support as they climb.
Water deeply once a week for the first month, then taper off—honeysuckle hates soggy roots but loves consistent moisture.
By midsummer, you’ll see rapid growth and clusters of fragrant blooms that perfume the air. Prune lightly in late winter to shape the vine and remove dead stems, but avoid heavy cuts—this vine rewards patience with years of lush, fragrant coverage.
The best part? It’s nearly pest-proof and spreads easily, making it perfect for fences, trellises, or even old chain-link.
If your honeysuckle starts lagging, check for overcrowded roots or poor sunlight—these are the usual culprits. With the right care, your fence will become a living tapestry of green and gold, humming with life all season long. Ready to transform that plain fence into a fragrant showstopper?
📚 In This Guide
- What you need
- Instructions
- Tips and common mistakes
- Wrapping up and next steps
What you need
- ● Honeysuckle plants: 2–4 healthy nursery-grown vines (choose established plants for faster coverage).
- ● Pruning shears: Sharp, clean pair (sterilize with rubbing alcohol to prevent disease).
- ● Garden gloves: Heavy-duty (to protect against thorns and rough bark).
- ● Trellis or twine: ¼-inch thick jute twine or lightweight wire mesh (for initial support).
- ● Mulch: 2–3 inches of organic mulch (shredded bark or wood chips) to retain moisture.
- ○ Compost or slow-release fertilizer: 5–10–10 NPK ratio (optional but recommended for poor soil).
- ● Watering can or hose with a gentle spray nozzle: For deep, even hydration.
- ● Soil test kit: To check pH (ideal range: 6.0–7.0 for most honeysuckle varieties).
- ● Epsom salt: 1 tablespoon per gallon of water (for magnesium boost in yellowing leaves).
- ● Bird netting: To protect flowers from hungry pollinators (if you want to save seeds).
- ● Decorative stakes or clips: For a polished, guided look (especially for L. sempervirens).
- ● Drip irrigation system: For automated watering (great for long fences!).
Step-by-step instructions for growing honeysuckle on a fence
Here’s how to transform your fence into a fragrant, blooming haven—no green thumb required.
🪴 Step 1: Choose the Right Honeysuckle Variety and Planting Site
Honeysuckle thrives in full sun to partial shade, with at least 6 hours of direct sunlight daily. For a fence, I recommend ‘American Beauty’ or ‘Belle of Woking’—both climb aggressively and produce heavy fragrance. Avoid shady spots; honeysuckle needs sunlight to fuel its rapid growth and prolific blooms.
Test your fence’s stability first. Honeysuckle can reach 15-20 feet tall and weigh 20+ pounds per vine—weak fences will sag under the weight. If your fence is lightweight, install horizontal support wires (every 3-4 feet) to distribute the vine’s weight.
🌱 Step 2: Plant Honeysuckle at the Base of the Fence
Dig a hole twice as wide as the root ball and just as deep. Loosen the roots gently if they’re circling the root ball—this encourages outward growth. Place the plant so the top of the root ball sits 1 inch below soil level (settling will occur over time).
For a lush, continuous look, plant 3-4 vines per 6-foot fence section, spacing them 12-18 inches apart. This creates a dense, fragrant curtain without gaps. Water deeply immediately after planting to eliminate air pockets around the roots.
☀️ Step 3: Train Vines Along the Fence Using Support Structures
Honeysuckle climbs using tendrils, but it needs guidance to grow evenly. Install twine or soft garden ties (never wire—it cuts into the bark) every 2-3 feet along the fence. Loop the twine loosely around the vine’s main stem and attach it to the fence or support wire.
As the vine grows, gently weave new tendrils through the twine. Avoid pulling or forcing growth—honeysuckle will follow the twine naturally. In 3-4 months, you’ll see the vine climb steadily, filling the space between support points.
💧 Step 4: Water and Fertilize for Rapid, Fragrant Growth
Keep the soil consistently moist but not soggy—honeysuckle roots rot easily in waterlogged conditions. Water deeply 2-3 times per week in the first growing season, then taper to once weekly once established. You’ll know it’s thriving when new growth appears every 2-3 weeks in spring and summer.
Feed with a balanced 10-10-10 fertilizer in early spring and again after blooming. Avoid high-nitrogen fertilizers—they promote leafy growth at the expense of flowers. Prune back 1/3 of the previous year’s growth in late winter to encourage bushier, more fragrant blooms.
✂️ Step 5: Prune and Maintain for a Full, Fragrant Fence
Prune honeysuckle in late winter or early spring before new growth begins. Remove dead or crossing branches first, then cut back the longest stems to 6-8 inches from the base. This rejuvenates the plant and prevents it from becoming top-heavy.
Watch for powdery mildew (white fuzzy spots on leaves)—a common issue in humid climates. Improve airflow by thinning dense growth and avoid overhead watering. If mildew appears, spray with a neem oil solution (1 tablespoon per gallon of water) every 7-10 days until it clears.
Tips & tricks for perfect honeysuckle fence growth
Common pitfalls—and how to sidestep every one—when turning your fence into a fragrant climbing paradise.
Sunlight Strategy: That 6-hour minimum of sunlight is non-negotiable, but don't assume your fence gets full sun just because it faces south. Test your spot for at least a week before planting—morning sun (east-facing) works best for honeysuckle's fragrance development. If your fence gets afternoon shade, consider 'Belle of Woking' which tolerates partial shade slightly better than 'American Beauty'.
Fence Reinforcement: I learned this the hard way after watching a neighbor's fence sag under 3-year-old honeysuckle vines. For wooden fences, install horizontal support wires every 3-4 feet before planting. For chain-link, add plastic-coated wire mesh along the back to distribute weight. This prevents the vine from pulling the entire structure down while still letting it climb freely.
Root Ball Technique: When loosening circling roots in Step 2, make clean vertical cuts with a knife rather than pulling them apart. This prevents root damage while encouraging outward growth. The 1-inch below soil level placement isn't just about settling—it protects the stem from rot while allowing roots to access moisture. Pro tip: Add a handful of compost to the planting hole for instant nutrient boost.
Tendril Training: Those 2-3 foot intervals for twine placement might seem excessive, but trust me—it's worth it. Honeysuckle vines can grow 12 inches in a single day during peak season. Install twine at planting time (even if vines aren't climbing yet) so you're not scrambling to catch up later. Use jute twine—it's biodegradable and won't damage the bark when removed later.
Pro Tips for Grow Honeysuckle On A Fence
- Common pitfalls—and how to sidestep every one—when turning your fence into a fragrant climbing paradise.
- Sunlight Strategy: That 6-hour minimum of sunlight is non-negotiable, but don't assume your fence gets full sun just ...
- Fence Reinforcement: I learned this the hard way after watching a neighbor's fence sag under 3-year-old honeysuckle v...
Frequently asked questions
Got questions about growing honeysuckle on your fence? You’re not alone! Here are answers to the most common queries—so you can get started with confidence and avoid pitfalls.
When is the best time to plant honeysuckle on a fence?
Plant honeysuckle in early spring (after the last frost) or fall (6-8 weeks before the first frost). This gives roots time to establish before extreme temperatures. Avoid planting in summer heat or winter cold, as young plants struggle to adapt.
How fast does honeysuckle grow on a fence, and how much space does it need?
Honeysuckle grows 3–5 feet per year with proper care, so it can cover a 6-foot fence in 1–2 seasons! Give it 3–6 feet of vertical space to climb (or more for vigorous varieties like Lonicera sempervirens). Space plants 3–5 feet apart for full coverage.
What if my honeysuckle isn’t climbing the fence? How do I encourage it?
Honeysuckle needs support to twine. If it’s flopping, gently tie vines to the fence with soft twine or clips every few feet. Prune leggy growth in late winter to redirect energy upward. Ensure it gets 6+ hours of sun—shady spots slow climbing.
Can I grow honeysuckle on a wooden fence without damaging it?
Yes! Honeysuckle’s vines are non-invasive to wood (unlike ivy), but secure them with plastic-coated wire or mesh to prevent scratching. Avoid metal staples—they can harm the bark. If your fence is new, wait 6–12 months to let it settle before planting.
Are there alternatives to honeysuckle for a fragrant fence?
If honeysuckle isn’t your style, try:
- Clematis – Fast-growing, fragrant, and drought-tolerant.
- Jasmine – Sweet-scented but slower to climb (needs pruning).
- Wisteria – Dramatic blooms but aggressive—best for sturdy trellises.
- Passionflower – Unique foliage and edible flowers (great for pollinators!).
Each has different care needs, so research before choosing!
Wrapping up and next steps
Growing honeysuckle on your fence is a rewarding way to add beauty, fragrance, and wildlife appeal to your outdoor space!
With the right sunlight, support, and a little patience, this hardy climber will flourish and fill your yard with sweet-scented blooms. Start small—whether it’s a single vine or a full fence transformation—and enjoy the process!
Now that you’re ready, take the next step: grab your gloves, pick a sunny spot, and let nature do the rest. Ready to plant? Your fragrant fence oasis awaits! 🌿✨