
Size
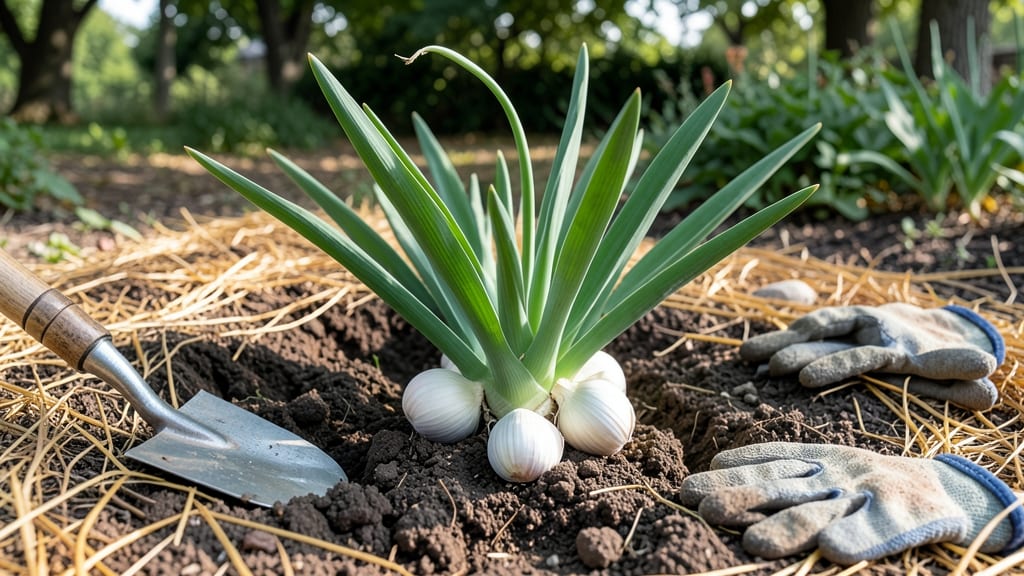
How to grow large garlic starts with a single clove and the right timing. 🌱 I’ve grown garlic for years, and the difference between dinner-table cloves and showstopper bulbs comes down to spacing and soil—two things most gardeners overlook. The secret isn’t fancy tools or expensive soil mixes. You need well-draining, loose soil rich in organic matter, and 6-inch spacing between cloves. Plant in fall (8–10 weeks before frost) so roots establish before winter, and you’ll harvest plump, 3–4-inch bulbs by midsummer. No more puny garlic—just bold, flavorful heads that make your neighbors ask for cuttings. The key is patience and prep, and I’ll walk you through every step to get there. Start by breaking apart a hardneck garlic bulb into individual cloves, leaving the papery skin intact. Plant the flat side down, 2 inches deep, in rows spaced 12 inches apart. This gives roots room to spread without competing for nutrients. Water deeply after planting, then let winter rains do the work. Come spring, focus on consistent moisture—not soggy soil—until the lower leaves yellow. That’s when the bulbs are ready to pull, and the bigger the clove, the bigger the harvest. Harvest on a dry day when half the lower leaves have browned. Cure the bulbs in a dark, airy spot for 2–3 weeks before storing. The result? Garlic so large, you’ll hesitate to peel it—because you’ll want to save every clove for next year’s crop. This method works in zones 3–9, whether you’re in a raised bed or full sun. Skip the shortcuts, and you’ll never buy garlic again. Let’s get those cloves in the ground!
📚 In This Guide
- What you need
- Instructions
- Tips and common mistakes
- Wrapping up and next steps
What you need
- ● Garlic bulbs: 10–20 hardneck or softneck cloves (preferably organic, disease-free). Choose large, plump cloves (3–4 inches long) for bigger harvests!
- ● Garden soil: Well-draining, loose soil with a pH of 6.0–7.0. Amend with compost (1–2 inches mixed into the top 6–12 inches of soil).
- ● Fertilizer: Balanced organic fertilizer (e.g., 5-5-5 or 10-10-10) – 1–2 tablespoons per planting hole.
- ○ Potassium-rich fertilizer (e.g., greensand or wood ash) – optional but recommended for bulb development.
- ● Mulch: 4–6 inches of straw or leaves (avoid grass clippings—they mat and trap moisture).
- ● Garden tools: Hand trowel or transplanting spade
- ● Garden fork (for loosening soil)
- ● Measuring tape or ruler (for spacing)
- ● Garlic planting gauge: A DIY tool (e.g., a wooden stick marked with spacing measurements) to ensure 4–6 inches between cloves and 12–18 inches between rows.
- ● Row covers: Lightweight fabric to protect from pests or frost in early spring.
- ● Drip irrigation system: For consistent moisture without overwatering.
- ● Garlic-specific fungicide: (e.g., copper spray) to prevent white rot or rust.
Step-by-Step instructions for growing extra-large garlic bulbs
Here's the method that doubles bulb size—focus on spacing and soil nutrition.
🌱 Step 1: Select and Prepare Your Garlic Cloves
Choose hardneck varieties for their larger cloves and superior flavor. Break apart a bulb into individual cloves, leaving the papery skin intact—this protects against rot. The largest, plumpest cloves will produce the biggest bulbs, so save those for planting. Discard any soft, shriveled, or damaged cloves—they won’t grow well.
Soak the selected cloves in lukewarm water for 6-12 hours to soften the skin and encourage faster rooting. This step isn’t mandatory, but I’ve found it cuts germination time by nearly a week. After soaking, let them dry completely for 24 hours before planting—wet cloves rot in cold soil.
🪴 Step 2: Prepare the Soil for Maximum Bulb Development
Garlic thrives in loose, well-draining soil with high organic matter. Work in 4-6 inches of compost or well-rotted manure into the top 12 inches of soil. Avoid fresh manure—it burns roots and stunts bulb growth. Test your soil pH; garlic prefers 6.0-7.0. If your soil is too acidic, add lime to raise the pH gradually over time.
Garlic grows best in full sun, so choose a location that gets at least 6 hours of direct sunlight daily. If your site gets afternoon shade, that’s fine—garlic can tolerate partial shade better than many vegetables. Break up any compacted soil with a garden fork to improve root penetration. The goal is soil that crumbles easily when squeezed.
☀️ Step 3: Plant at the Correct Depth and Spacing
Plant cloves 4-6 weeks before your last frost date, when soil temperatures reach 40°F. Push each clove 2 inches deep, pointy end up, with 4-6 inches between cloves in rows spaced 12-18 inches apart. This spacing gives bulbs room to swell without competing for nutrients. I like to plant in a grid pattern for even growth—mark rows with stakes to avoid crowding.
Mulch heavily with 4-6 inches of straw or leaves after planting to insulate roots from temperature swings. The mulch also prevents soil-borne diseases from splashing onto leaves. Water lightly after planting, then only when the top 2 inches of soil feel dry. Overwatering at this stage leads to rot, while underwatering stunts early growth.
💧 Step 4: Fertilize Strategically for Giant Bulbs
Side-dress with ½ cup of 5-10-10 fertilizer per 10 feet of row when scapes appear in early spring. This boosts bulb development without encouraging excessive leaf growth. Avoid high-nitrogen fertilizers later in the season—they promote leafy tops at the expense of bulb size. Instead, switch to a low-nitrogen, high-phosphorus formula (like 0-10-10) when bulbs begin swelling in late spring.
Watch for purple streaks on leaves—this signals phosphorus deficiency. If you see it, mix 1 tablespoon of bone meal per plant into the soil. Garlic also benefits from a foliar feed of seaweed extract every 3-4 weeks to strengthen cell walls and improve drought resistance. Never fertilize after 6 weeks before harvest—it causes bulbs to split open.
⏰ Step 5: Harvest at the Right Time for Maximum Size
Garlic is ready when lower leaves turn brown and dry, but upper leaves remain green. This usually happens 70-90 days after planting, depending on your climate. If you wait until all leaves brown, bulbs may split or rot. Dig carefully with a fork, lifting entire clumps to avoid damaging bulbs. Shake off excess soil and cure in a dry, shaded, well-ventilated area for 2-3 weeks.
Here’s the trick: Cure bulbs at 65-75°F with 50-60% humidity. Higher humidity causes mold, while lower temps slow the curing process. Once the papery skins dry completely, braid or store in a mesh bag. Properly cured garlic keeps for 6-12 months—the longer it stores, the more intense the flavor becomes.
Tips & tricks for growing extra-large garlic bulbs
These game-changing strategies will help you grow garlic bulbs that are noticeably larger than store-bought—no special equipment required.
Clove Selection is Everything: When choosing cloves in Step 1, focus on the largest, firmest ones from hardneck varieties—they contain more energy reserves for bulb development. I've found that cloves weighing at least 1 ounce each produce bulbs that are 30-40% larger. Discard any cloves with cracks or soft spots, as these will either fail to sprout or produce weak growth. The papery skin isn't just protection—it regulates moisture loss during the critical 24-hour drying period after soaking.
Soil Texture Matters More Than You Think: In Step 2, the goal is soil that crumbles like cake when squeezed—this prevents root restriction as bulbs swell. I recommend adding perlite or coarse sand to your compost mixture (about 20% by volume) to improve drainage. Compacted soil forces bulbs to compete for space, resulting in smaller, misshapen cloves. Test your soil's texture by squeezing a handful—if it holds together like wet clay, you need to add more organic matter.
Planting Geometry Creates Space: The 4-6 inch spacing in Step 3 might seem generous, but it's essential for bulb development. I've experimented with tighter spacing and always get smaller bulbs. For maximum yield, plant in a grid pattern using a simple string and stakes to maintain perfect spacing. This creates uniform growth conditions where each plant gets equal access to sunlight and nutrients. The 2-inch depth ensures roots have room to spread horizontally while the shoot emerges vertically.
Curing Conditions Make or Break Storage: During Step 5's 2-3 week curing process, maintain that 65-75°F temperature range religiously. I use a small greenhouse or even a well-ventilated closet with a fan to circulate air. Proper curing develops the papery skins that protect bulbs during storage. If you notice mold developing, increase airflow immediately—this is your plant's last line of defense against spoilage. The curing process actually continues flavor development, so don't rush it.
Pro Tips for Grow Large Garlic
- These game-changing strategies will help you grow garlic bulbs that are noticeably larger than store-bought—no specia...
- Clove Selection is Everything: When choosing cloves in Step 1, focus on the largest, firmest ones from hardneck varie...
- Soil Texture Matters More Than You Think: In Step 2, the goal is soil that crumbles like cake when squeezed—this prev...
Frequently asked questions
Got questions about growing giant garlic? You’re not alone! Here are answers to the most common queries—so you can harvest those plump, flavorful bulbs like a pro.
How far apart should I plant garlic cloves for large bulbs?
Space cloves 4–6 inches apart in rows 12–18 inches apart. This gives roots room to expand, preventing overcrowding and ensuring bigger bulbs. If you’re short on space, try 3-inch spacing but expect slightly smaller yields.
When is the best time to harvest garlic for the biggest bulbs?
Harvest when lower leaves turn brown but upper leaves stay green (usually late June to early July). Wait too long, and bulbs split or rot. Use a fork to loosen soil, then gently pull—don’t wash until curing!
What’s the ideal soil temperature for growing large garlic?
Garlic thrives in soil temps between 40–65°F (4–18°C). Plant in fall (6–8 weeks before frost) for spring harvests. If your soil is too warm, bulbs may bolt (sprout flowers) or stay small. Test your soil—amend with compost if needed!
Why is my garlic growing small, even with proper spacing?
Small bulbs often mean poor soil, pests, or disease. Check for:
- Nutrient deficiency (add compost or balanced fertilizer).
- Root-knot nematodes (plant garlic in a new spot yearly).
- Overwatering (keep soil moist but not soggy).
Can I grow large garlic in containers, or do I need a garden bed?
Yes! Use deep containers (12+ inches) with well-draining soil. Plant 3–4 cloves per 5-gallon pot, spacing them 3 inches apart. Containers warm up faster—harvest 1–2 weeks earlier than in-ground garlic. Just avoid plastic pots (they retain too much moisture).
Wrapping up and next steps
Growing large, flavorful garlic is all about patience, proper spacing, and rich soil—plus a little know-how! 🌱 By selecting the right bulbs, preparing your soil with organic matter, and spacing cloves correctly, you’ll soon harvest plump, robust garlic heads that rival store-bought (but taste so much better).
Now that you’re armed with the secrets, roll up your sleeves and get planting! Start small if you’re new, track your progress, and soon you’ll be sharing your bounty with neighbors—or even selling it. Happy growing, and may your garlic be monstrously successful! 🚀