
Propagation
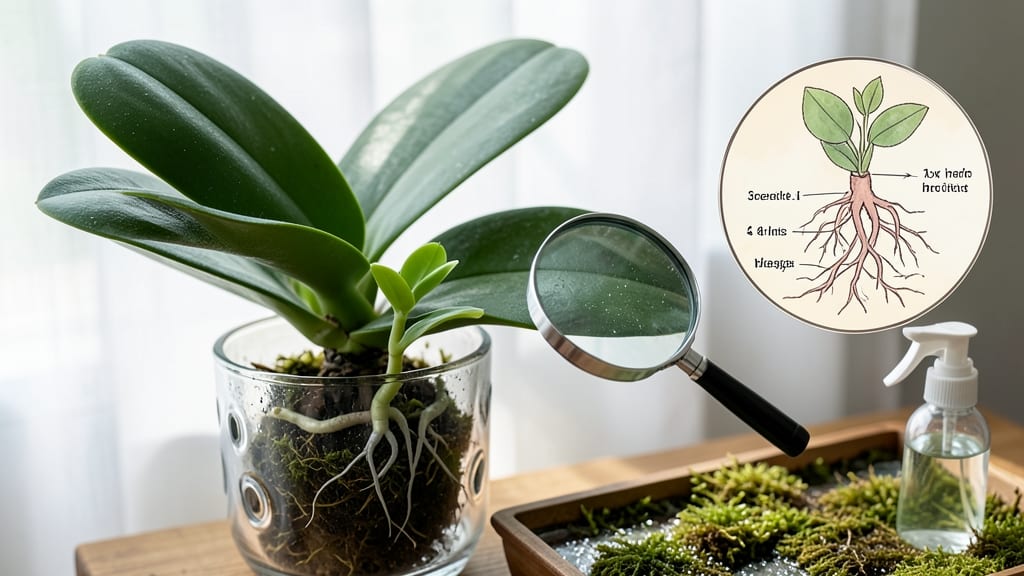
How to grow orchids to form keikis—your Phalaenopsis just gave you a free plant, and all you need is the right care to encourage it. 🌱 The little baby shoots called keikis form naturally when conditions are perfect, and with the right light, humidity, and care, you’ll have new orchids ready to repot in just a few months. I’ve watched these tiny plants grow into thriving orchids right on their mother plant, and it’s the easiest way to expand your collection without buying new ones.
First, you’ll need a mature orchid with at least one healthy pseudobulb and a stable environment—think bright, indirect light (like an east-facing window) and humidity around 50-70%. The trick is to mimic the orchid’s natural habitat without overcomplicating things.
Too much direct sun or low humidity will stall keiki growth, so keep an eye on those conditions. Once your orchid is happy, it’s time to coax those babies into action with the right care routine.
With consistent watering (soaking the roots once a week) and a balanced fertilizer (diluted to half-strength), you’ll see those tiny bumps appear within weeks. The first sign is a small, rounded growth at the base of the plant—this is your keiki starting to form.
By the time it’s 2-3 inches tall, it’s ready to be separated, and you’ll have a brand-new orchid to grow into a stunning bloom producer.
This method works best with Phalaenopsis orchids, but other species like Dendrobium and Oncidium can also produce keikis with the right approach. The key is patience—these little plants grow slowly at first, but with the right care, they’ll reward you with lush, healthy growth.
Here’s how to set it up for success and avoid common pitfalls along the way.
📚 In This Guide
- What you need
- Instructions
- Tips and common mistakes
- Wrapping up and next steps
What you need
- ● Mature orchid plant (Phalaenopsis or Dendrobium work best for beginners; ensure it’s healthy with at least 3-4 pseudobulbs or leaves).
- ● Sharp, sterilized pruning shears (or a clean knife) – for precise cuts without damaging the plant.
- ● Sphagnum moss (1-2 small handfuls) – for moisture retention during keiki development.
- ● Plastic wrap or clear plastic bag – to create a humid microclimate (size depends on plant; a 1-gallon bag works for most).
- ● Spray bottle with distilled water (16 oz or larger) – to mist the plant gently without over-saturating.
- ● Balanced orchid fertilizer (e.g., 20-20-20 or 10-10-10, diluted to half-strength) – for nutrient boosts during growth.
- ○ Hormone gel or powder (optional but helpful) – such as Rootone or Clonex to encourage faster keiki formation.
- ● Bright, indirect light (1,000–2,000 foot-candles; avoid direct sunlight to prevent leaf burn).
- ● Warmth (70–85°F during the day, slightly cooler at night for optimal growth).
- ● Humidity (60–80%) – mimic tropical conditions to support keiki development.
- ● Patience! – Keiki formation can take weeks to months, depending on the orchid’s health and conditions.
Step-by-Step instructions for encouraging keiki formation in orchids
Here’s how I’ve helped orchids produce those adorable baby plants—called keiki—without stressing the mother plant.
🌱 Step 1: Select a Healthy, Mature Orchid
Choose a Phalaenopsis orchid that’s at least 2-3 years old with several mature pseudobulbs and at least 5-6 leaves. Look for a plant that’s actively growing new leaves and has no signs of disease or pests. I always pick a specimen that’s finished blooming—this means its energy is focused on growth, not flowers.
Check the leaf color: vibrant green means the plant is healthy. If the leaves are yellowing or have brown edges, it’s stressed and won’t produce keiki. Give it a few months to recover before attempting keiki formation. The right plant is your foundation—skip this, and you’ll waste time and energy.
☀️ Step 2: Provide Ideal Growing Conditions
Orchids thrive in bright, indirect light—think of it as morning sun with afternoon shade. A north- or east-facing window is perfect, but if you only have a south-facing window, place the orchid 6-12 inches away to avoid leaf burn. Too little light means no keiki; too much light turns leaves yellow or crispy.
Keep the temperature between 65-80°F during the day and 55-65°F at night. Use a small fan on low setting near the plant to create gentle airflow—this mimics tropical breezes and encourages keiki formation. Mist the leaves lightly every 2-3 days to maintain humidity around 50-70%. You’ll know the conditions are right when the plant stays lush and green.
💧 Step 3: Adjust Watering to Stimulate Growth
Water your orchid once a week using room-temperature water. Soak the potting mix thoroughly until water runs out the drainage holes, then let it drain completely. Avoid letting the plant sit in standing water—root rot is a silent killer. I use a spray bottle to mist the leaves lightly between waterings to keep the environment humid.
Here’s the trick: After watering, wait until the top inch of the potting mix feels dry before watering again. This mimics natural drought cycles and signals the plant to focus on producing keiki. If you notice the leaves starting to wrinkle slightly, it’s time to water—this is your plant’s way of telling you it’s ready for a drink.
✂️ Step 4: Encourage Keiki Formation with Hormone Treatment (Optional)
For faster results, apply an orchid keiki gel or powder to the back bulbs (the smaller pseudobulbs near the base of the plant). Follow the product instructions carefully—too much can stress the plant. I like to use a toothpick or cotton swab to gently apply the gel to the top of the back bulbs where new growth will emerge.
Watch for tiny bumps forming within 4-8 weeks. These bumps are the first sign of keiki development. If you don’t use a hormone treatment, it may take 3-6 months to see keiki appear naturally. Patience is key—rushing this step often leads to weak or failed growth. Keep the environment stable, and the keiki will follow.
🌿 Step 5: Care for Developing Keiki Until Ready for Separation
Once you see a keiki with 2-3 leaves and its own roots, it’s almost ready to be separated. Keep the mother plant in the same conditions—bright light, warm temperatures, and consistent watering. Avoid fertilizing heavily during this phase; a light, balanced fertilizer every 4-6 weeks is enough to support both the mother plant and the keiki.
When the keiki has 3-4 leaves and roots that are at least 1-2 inches long, it’s time to separate. Use a sterilized knife or scissors to carefully cut the keiki from the mother plant. Don’t worry if the cut looks messy—the keiki will focus on growing its own roots. Plant the keiki in its own pot with fresh orchid mix and treat it like a miniature version of the mother plant.
Tips & tricks for perfect orchid keiki formation
Here's what nobody tells you about growing orchid babies without stressing your plant.
Light Intensity Matters: In Step 2, when positioning your orchid for bright indirect light, use a sheer curtain to diffuse harsh afternoon sun if needed. I've seen leaves burn when placed too close to south-facing windows—even just 6 inches too close can cause irreversible damage. The goal is even, consistent light that mimics morning sun without the intensity.
Temperature Consistency is Key: Maintaining the 65-80°F daytime range (as mentioned in Step 2) is crucial, but don't overlook nighttime temps. If your home drops below 55°F at night, consider moving the orchid to a warmer location or using a small space heater on low setting. I once had a keiki formation fail because nighttime temps dipped too low—keep that thermostat steady!
Watering Technique Makes All the Difference: Step 3 mentions waiting until the top inch feels dry, but here's the real trick: water thoroughly but only when the entire pot feels light. I use my finger to check moisture levels around the edges too—sometimes the center stays wet while the sides dry out. This uneven moisture can confuse your orchid about when to produce keiki. Also, always use room-temperature water to avoid shocking the roots.
Hormone Application Precision: When applying keiki gel in Step 4, less is more. I've ruined back bulbs by over-applying—just a tiny dot on each bulb's top is enough. Use a toothpick to gently spread it, and avoid getting any on the leaves. The gel should look like a tiny raised dot, not a puddle. This precision prevents stress and gives your orchid the best chance to develop strong keiki.
Pro Tips for Grow Orchids To Form Keiki
- Here's what nobody tells you about growing orchid babies without stressing your plant.
- Light Intensity Matters: In Step 2, when positioning your orchid for bright indirect light, use a sheer curtain to diffuse harsh afternoon sun if needed.
- Temperature Consistency is Key: Maintaining the 65-80°F daytime range (as mentioned in Step 2) is crucial, but don't overlook nighttime temps.
Frequently asked questions
Got questions about keiki formation? You’re not alone! Here are some of the most common ones—plus quick answers to get you growing like a pro.
How long does it take for a keiki to form on an orchid?
A keiki typically appears 3–12 months after starting the process, depending on the orchid type, care conditions, and environmental factors like humidity and temperature. Phalaenopsis orchids often respond faster (3–6 months), while Dendrobiums may take longer. Patience is key—consistency in care speeds things up!
What if my orchid isn’t producing a keiki? What should I check first?
If your orchid isn’t cooperating, troubleshoot these first:
- Light levels: Too much direct sun can scorch, while too little stunts growth. Aim for bright, indirect light (like a north or east-facing window).
- Temperature: Most orchids need a 10–15°F (5–8°C) drop at night to trigger keiki formation.
- Humidity: Keep it between 50–70%—low humidity can stress the plant.
- Fertilizer: Ensure you’re using a balanced orchid fertilizer (like 20-20-20) diluted to half-strength.
Can I remove a keiki while it’s still small?
Yes, but timing matters! Wait until the keiki has 3–4 leaves and at least one root (1–2 inches long) before separating it. Removing it too early can stunt its growth or harm the mother plant. Use sterilized scissors or pruners and let the cut end dry for a day before repotting. Pro tip: Water lightly for a week post-separation to avoid shock.
Do I need special tools to encourage keiki formation?
Not necessarily! While tools like cytokinin paste or keiki gel can speed up the process, you can grow keikis naturally with:
- A sharp knife or scissors for trimming.
- An orchid potting mix (bark-based is ideal).
- A spray bottle for humidity control.
- Patience and observation!
What if my keiki turns yellow or mushy?
Yellowing or mushy keikis usually signal overwatering, rot, or bacterial/fungal issues. Act fast:
- Check the roots—if they’re brown/mushy, trim the bad parts with sterilized scissors.
- Let the keiki dry out for a few days before repotting in fresh, well-draining mix.
- Avoid watering until new growth appears (usually 5–7 days).
- If the smell is rotten, treat with a fungicide (like copper-based spray).
Wrapping up and next steps
Growing orchids to form keiki is a rewarding journey that turns your plant into a thriving family!
With patience, the right techniques, and a little love, you’ll soon have baby orchids ready to thrive on their own. Start small—whether it’s air layering, using keiki paste, or nurturing natural offsets—and watch your orchid garden grow!
Ready to take the next step? Share your progress with fellow orchid enthusiasts or experiment with different methods to see what works best for your plants. Happy growing! 🌱✨