
Container Gardens
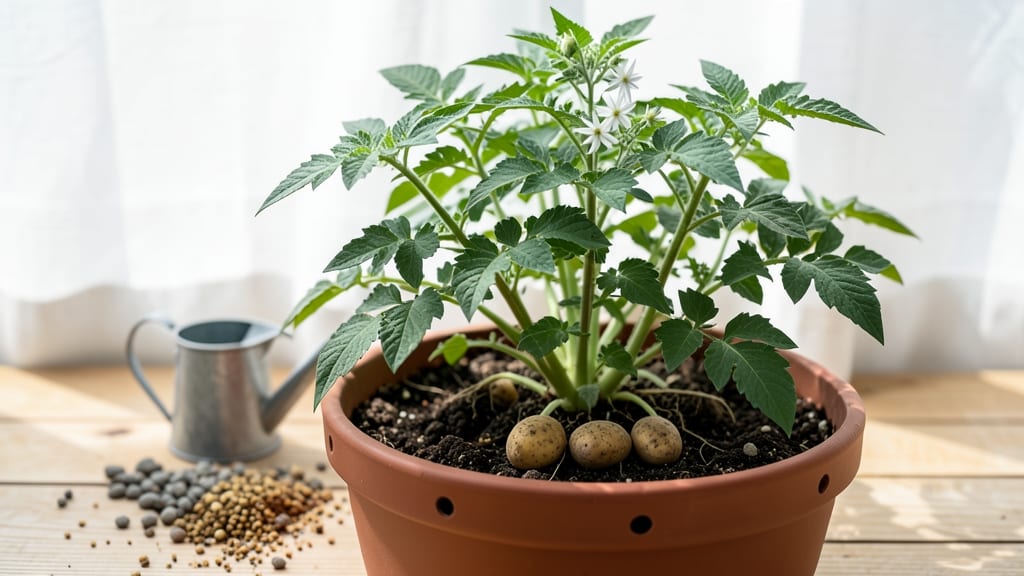
How to grow potatoes in a container indoors feels like magic—especially when you're harvesting crisp, homegrown spuds from a kitchen counter. 🌱 I've turned my tiny apartment into a potato factory using nothing but a few containers, some seed potatoes, and a sunny window. The secret isn't fancy equipment; it's understanding how potatoes grow and adapting the process for indoor spaces.
You'll need a 5-gallon container (or deeper) with drainage, lightweight potting mix, and seed potatoes cut into chunks with at least one "eye." Plant them 4 inches deep, then as they sprout, add more soil until the container is full.
Potatoes need 6-8 hours of sunlight daily, so supplement with a grow light if natural light is weak. Water when the top inch of soil feels dry—never soggy.
By mid-season, you'll be harvesting new potatoes from the sides of the container, and by harvest time, you'll pull out a full bag of spuds. The best part?
No weeds, no pests, and no yard required. My first indoor harvest was twice as productive as I expected, and the flavor? Unbeatable.
This method works year-round, even in winter, and scales from a single container to a whole countertop setup. The only real challenge is patience—potatoes take 8-12 weeks to mature, but the payoff makes it worth every week. Let's get those containers growing!
📚 In This Guide
- What you need
- Instructions
- Tips and common mistakes
- Wrapping up and next steps
What you need
- ● Containers: 3–5 gallon-sized pots (10–12 inches deep) or a large fabric grow bag (at least 18" deep). Drill drainage holes if using plastic!
- ○ Optional: A 5-gallon bucket with a lid (for stacking and space-saving).
- ● Growing Medium: High-quality potting mix (avoid garden soil—it compacts and drains poorly). Look for a lightweight, peat-based mix with perlite or vermiculite.
- ○ Optional: Add compost or worm castings (10–20%) for extra nutrients.
- ● Potato Seeds: Certified seed potatoes (not grocery store potatoes—they’re treated to prevent sprouting!). Choose early-maturing varieties like 'Yukon Gold,' 'Red Pontiac,' or 'Fingerlings' (they thrive in containers).
- ● Quantity: 1–2 seed potatoes per container (cut into pieces with at least 2–3 "eyes" each, let them sprout for 1–2 weeks before planting).
- ● Drainage: Gravel or pebbles (1–2 inches) for the bottom of containers to improve airflow.
- ● Fertilizer: Balanced liquid fertilizer (10-10-10 or 5-5-5) or slow-release granules (follow package instructions).
- ● Watering Tools: A spray bottle (for gentle watering) or a watering can with a fine rose.
- ● Grow Lights: A full-spectrum LED grow light (12–16 hours/day) if natural light is <12 hours/day or weak.
- ● Thermometer/Hygrometer: To monitor temperature (60–70°F ideal) and humidity (40–60%).
- ● Potato Tower Kit: Pre-made stacking containers for vertical growth (saves space!).
- ● Mulch: Straw or shredded leaves to retain moisture and regulate temperature.
- ● Insect Spray: Neem oil or insecticidal soap (prevents pests like aphids or spider mites).
Step-by-step instructions for growing potatoes in containers indoors
Here's how I grow crisp, flavorful potatoes year-round using just a few smart containers and a sunny spot.
🪴 Step 1: Choose and Prepare Your Growing System
For four plants, I use a 5-gallon fabric grow bag or a large plastic tote with drainage holes—both work perfectly. Fabric bags allow roots to breathe while still holding moisture, which potatoes love. If using a tote, drill ½-inch holes along the bottom and sides to prevent root-bound stress.
Line the bottom with 4-6 inches of cardboard (like a pizza box) to act as a wicking layer—this keeps moisture consistent and prevents leaks. The cardboard will break down naturally, enriching the soil as your potatoes grow. Place your container in a spot that gets 6-8 hours of indirect sunlight daily—a south-facing window or under a grow light works best.
🌱 Step 2: Layer Soil and Seed Potatoes
Fill the bottom 2 inches with lightweight potting mix—avoid garden soil, which compacts and suffocates roots. Place 4 certified seed potatoes (like Yukon Gold or Red Pontiac) on top, spacing them evenly around the edges. These should be firm, unspotted potatoes about the size of a golf ball.
Cover the potatoes with another 2 inches of potting mix, leaving just the top ⅓ exposed to light. This encourages multiple stems to grow, giving you more tubers. Water gently until the soil feels evenly moist but not soggy. Here's the thing—potatoes need consistent moisture, but they hate waterlogged soil. Aim for damp, not dripping.
💧 Step 3: Maintain Moisture and Add Soil as Plants Grow
As your potato sprouts grow 4-6 inches tall, add another 2 inches of potting mix around the stems, covering the lower leaves. Repeat this process every 2-3 weeks until the container is full—this is called "hilling," and it prevents sunlight from turning the tubers green (which makes them bitter). You'll end up with 12-18 inches of soil in your container by harvest time.
Water deeply 2-3 times per week, checking the top inch of soil with your finger. If it feels dry, it's time to water. I use a watering can with a narrow spout to direct moisture straight to the roots without disturbing the soil layers. Avoid overhead watering—it can spread disease and wash away soil.
✂️ Step 4: Harvest and Encourage Continuous Growth
When the plants flower and the foliage starts to yellow, it's time for your first harvest. Gently dig around the edges of the container to uncover the largest tubers. Leave 2-3 smaller potatoes in the soil to keep growing—this extends your harvest by 4-6 weeks. Remove only the mature tubers, leaving the roots intact.
After your first harvest, trim back the yellowed foliage 1 inch above the soil and add another 2 inches of fresh potting mix to the container. Keep watering and fertilizing lightly (with a balanced 10-10-10 fertilizer) to encourage a second wave of growth. You'll often get a smaller but still delicious second harvest this way.
☀️ Step 5: Cure and Store Your Potatoes
Once fully harvested, let your potatoes cure in a dark, dry place for 1-2 weeks at room temperature. This thickens their skins and improves storage life. Avoid refrigerating them—cold temperatures convert their starches to sugar, making them sweet and mealy.
Store cured potatoes in a cool (45-50°F), dark, well-ventilated space, like a pantry or basement. Check them monthly and remove any that sprout or soften. With this method, I've kept potatoes fresh for 4-5 months—far longer than store-bought spuds.
Tips & tricks for growing potatoes in containers
Here's what I learned after years of growing potatoes indoors—these small tweaks make all the difference between decent harvests and truly amazing ones.
Container Selection Matters: The 5-gallon fabric grow bag is my top recommendation because it mimics natural soil conditions, but plastic totes work too—just make sure those drainage holes are ½-inch or larger. I've tried smaller containers and ended up with stunted growth because potatoes need room for those deep roots. If you're using a tote, add extra holes halfway up the sides too, not just at the bottom.
Sunlight Strategy: That 6-8 hours of indirect sunlight is non-negotiable, but here's the secret: rotate your container quarter-turn every 2-3 days to ensure even exposure. I place mine on a lazy Susan under my grow lights, which gives perfect 360° coverage. If using a window, move it daily—potatoes will lean toward the light, creating uneven growth patterns.
Soil Layering Technique: When you're adding those 2-inch soil layers every 2-3 weeks, I recommend using a lightweight potting mix with perlite to improve aeration. The perlite prevents compaction as you build up to 12-18 inches of soil. Pro tip: Sift the soil through a mesh bag before adding—this creates a finer texture that potatoes love and prevents clumping around the tubers.
Watering Wisdom: The 2-3 times per week guideline works, but here's how I do it better: water deeply until you see moisture emerge from the drainage holes, then wait until the top inch feels dry. I've ruined crops by either overwatering (which causes rot) or underwatering (which leads to small, tough potatoes). A moisture meter is worth the investment—it takes the guesswork out of this critical step.
Pro Tips for Grow Potatoes In A Container Indoors
- Here's what I learned after years of growing potatoes indoors—these small tweaks make all the difference between decent harvests and truly amazing ones.
- Container Selection Matters: The 5-gallon fabric grow bag is my top recommendation because it mimics natural soil conditions, but plastic totes work too—just make sure those drainage holes are ½-inch or larger.
- Sunlight Strategy: That 6-8 hours of indirect sunlight is non-negotiable, but here's the secret: rotate your container quarter-turn every 2-3 days to ensure even exposure.
Frequently asked questions
Got questions about growing potatoes indoors? You’re not alone! Here are answers to the most common concerns—so you can harvest fresh spuds without leaving your home.
Can I grow potatoes indoors year-round?
Yes! With the right setup—like grow lights, temperature control (60–75°F), and a deep container—you can grow potatoes indoors any time. Just ensure your space gets enough light (12–16 hours/day) and adjust watering to match your home’s humidity. Pro tip: Use a heat mat in winter to keep roots cozy!
How long does it take for container-grown potatoes to harvest?
Most varieties take 8–12 weeks from planting to harvest, but some (like ‘Yukon Gold’) may need 10–14 weeks. Check for flower blooms (if your variety flowers) or gently dig near the base of the plant when leaves start yellowing. Bonus: Harvest baby potatoes early by brushing soil away from stems!
What if my potatoes turn green or sprouts rot?
Greens?
Move your container away from light—greened tubers contain solanine (toxic if eaten). Rot? Likely overwatering or poor drainage. Use containers with drainage holes, water only when the top inch of soil is dry, and avoid soggy soil. Fix: Repot affected plants in fresh, dry soil and reduce watering.
Do I need to use seed potatoes, or can I grow from store-bought?
Store-bought potatoes can work, but they’re treated to prevent sprouting. For best results, use certified seed potatoes (available online or at garden centers). If using store-bought, cut them into 2-inch chunks with at least one “eye” (sprout), let them dry for 24 hours, and plant! Warning: Avoid organic potatoes—they’re often untreated and may carry diseases.
What’s the best container size for growing potatoes?
Aim for at least 12–18 inches deep (deeper = more potatoes!). Width depends on quantity: 5–10 gallons per plant works well. Stackable fabric grow bags or 5-gallon buckets with drainage holes are ideal. Space tip: Grow 2–3 plants per large container to save space!
Can I grow potatoes indoors in a small apartment?
Use a sunny windowsill (south-facing is best) or a grow light on a shelf. Opt for compact varieties like ‘Red Pontiac’ or ‘Fingerling’ potatoes—they thrive in tight spaces. Just ensure good airflow to prevent mold. Hack: Rotate containers weekly for even light exposure!
Wrapping up and next steps
Growing potatoes indoors in containers is a rewarding way to enjoy fresh, homegrown produce—no yard required! 🌱 With the right setup, you can harvest crisp, flavorful tubers year-round while saving money and reducing your carbon footprint.
Start small, experiment with varieties, and soon you’ll be sharing your green-thumb success with friends.
Ready to dive in? Pick your seed potatoes today, set up your container, and watch your indoor garden thrive! Happy planting! 🌟