
Size
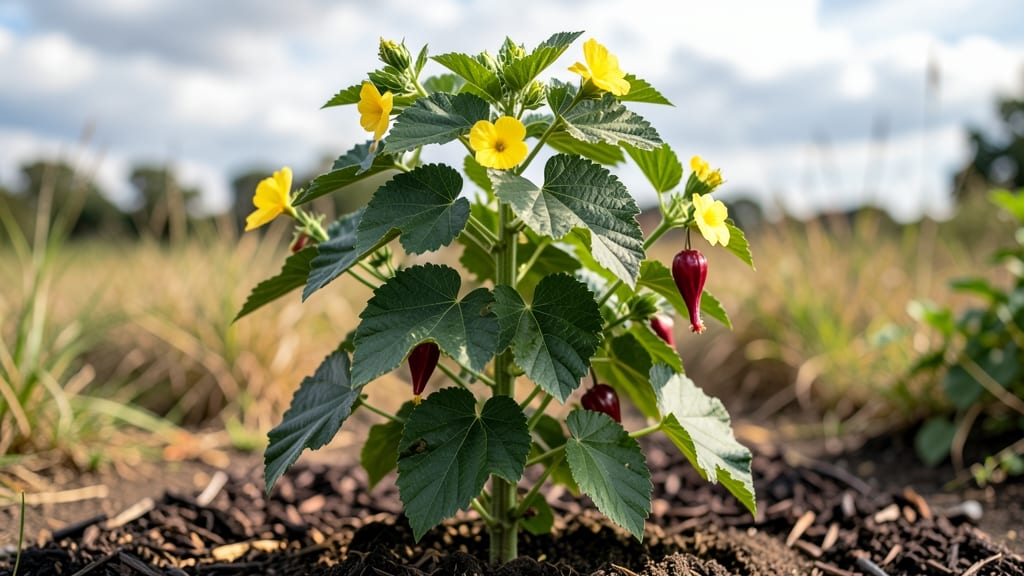
How to grow roselle hibiscus thrives where summers stay hot and humid. 🌿 I’ve grown this vibrant tropical plant for three years, and once you taste its tart, cranberry-like calyces, you’ll never buy store-bought versions again. The key? Mimicking its natural habitat—rich soil, full sun, and consistent moisture—without overcomplicating it.
Start with seeds or transplants in well-draining soil mixed with compost. Roselle loves heat but hates soggy roots, so raised beds or containers work best in cooler climates. Plant in spring after the last frost, spacing them 2–3 feet apart to give their bushy growth room to spread.
Within 6–8 weeks, you’ll see those signature bright flowers—each one a promise of future harvests.
By midsummer, you’ll be snipping deep red calyces (the edible parts) for tea, jams, or stews. The plants stay productive for months if you prune lightly after harvests and fertilize every 4–6 weeks. Even in small spaces, roselle delivers—imagine fresh, homegrown tartness straight from your garden.
Troubleshooting is easy: yellow leaves mean overwatering, while slow growth usually signals too much shade. In colder zones, treat roselle as an annual or overwinter it indoors. The payoff? A tropical harvest that tastes like sunshine in every sip.
📚 In This Guide
- What you need
- Instructions
- Tips and common mistakes
- Wrapping up and next steps
What you need
- ● Roselle hibiscus seeds or cuttings: 5–10 seeds (or 2–3 healthy cuttings for faster growth). Opt for organic, non-GMO seeds if possible.
- ● Well-draining potting mix: 10–15 lbs of a blend like cactus/succulent mix (or garden soil + perlite/sand for outdoor planting). Avoid heavy clay soil—roselle hates soggy roots!
- ● Containers or garden bed: For seedlings: 4–6 small pots (6–8 inches in diameter) with drainage holes.
- ● For mature plants: 1–2 large containers (12+ inches deep) or a sunny garden spot with 6+ feet of vertical space (roselle grows tall!).
- ● Drainage materials: Pebbles, perlite, or broken pottery (1–2 inches) for pots to prevent root rot.
- ● Watering can or hose with a gentle spray nozzle: Roselle needs consistent moisture but hates waterlogging.
- ● Fertilizer: A balanced liquid fertilizer (10-10-10 or 20-20-20) or organic options like compost tea or fish emulsion. Use sparingly—roselle is sensitive to over-fertilizing!
- ○ Support structure (optional but recommended): A bamboo stake, trellis, or wire cage to guide vertical growth (roselle can reach 10+ feet!).
- ● Sunlight: Full sun (6–8+ hours daily). Roselle thrives in warm climates (USDA zones 9–11) but can be grown in pots and brought indoors during cooler months.
- ● Temperature: Ideal range: 70–90°F (21–32°C). Avoid frost—roselle is a tropical plant and won’t survive below 50°F (10°C).
- ● Humidity: Moderate to high (40–70% humidity). Mist leaves occasionally if your climate is dry.
- ● Pruning shears or scissors for harvesting and shaping.
- ● pH test kit (ideal soil pH: 6.0–6.8).
- ● Mulch (straw or shredded leaves) to retain moisture in garden beds.
- ● Insecticidal soap or neem oil (for pest control—roselle can attract aphids or whiteflies).
Step-by-step instructions for growing roselle hibiscus
Here's how to cultivate this vibrant tropical plant with minimal fuss—ideal for warm climates or containers.
🌱 Step 1: Select and Prepare Your Starting Material
Roselle hibiscus thrives from seeds or cuttings. For fastest results, use 4-6 inch cuttings from a healthy plant, ensuring they include 2-3 leaf nodes. Dip the cut end in rooting hormone to encourage faster root development. If starting from seeds, soak them in warm water for 24 hours first—this softens the tough outer shell and speeds germination.
For container growing, use 6-inch pots with well-draining soil mix (equal parts potting soil, perlite, and compost). Fill the pot ¾ full, leaving room for roots to establish. Plant cuttings 1-2 inches deep, or sow seeds ½ inch deep. Keep the soil consistently moist but never soggy during this critical rooting phase.
☀️ Step 2: Provide Ideal Light and Temperature
Roselle hibiscus demands full sun—at least 6-8 hours daily—to produce its signature deep red calyces. Place your plants in a south-facing window or under grow lights if outdoors isn’t an option. Without enough light, stems will stretch weakly, and calyx production will suffer. You’ll notice healthy growth when leaves remain dark green and glossy, not pale or yellowing.
Maintain temperatures between 70-85°F for optimal growth. If nights drop below 60°F, bring potted plants indoors temporarily. Cold stress causes leaf drop and stunted growth. In USDA Zones 9-11, roselle thrives outdoors year-round. In cooler zones, grow it as an annual or overwinter indoors near a bright window.
💧 Step 3: Water and Fertilize for Maximum Yield
Water deeply 2-3 times per week, allowing the top 2 inches of soil to dry between waterings. Overwatering leads to root rot, while underwatering causes buds to drop before opening. Check moisture by sticking your finger 1 inch into the soil—if it feels dry, it’s time to water. Mulch with 1 inch of straw to retain moisture and suppress weeds, which compete for nutrients.
Feed every 4-6 weeks with a balanced liquid fertilizer (10-10-10) diluted to half strength. When buds form, switch to a low-nitrogen, high-phosphorus fertilizer (5-10-10) to encourage flowering. You’ll see vibrant new growth and increased calyx production within 2-3 weeks of fertilizing. Avoid over-fertilizing—salty buildup in soil stunts growth and burns roots.
✂️ Step 4: Prune and Harvest for Continuous Production
Prune leggy stems back by ⅓ to encourage bushier growth. Pinch back new growth tips when they reach 6 inches to redirect energy into calyx production. Remove yellow or diseased leaves immediately to prevent spread. Harvest calyces when they’re fully formed but still green—they’ll turn red as they ripen. Cut stems ½ inch below the calyx with clean pruners to avoid damaging the plant.
Harvesting stimulates more blooms, so pick regularly (every 2-3 weeks). Store fresh calyces in the fridge for up to 1 week or dry them in a dehydrator at 135°F for 4-6 hours to preserve. If your plant stops flowering, it may need more sunlight or a fertilizer boost. I’ve found that deadheading spent blooms keeps plants producing longer into the season.
⏰ Step 5: Overwinter or Extend the Season
In cooler climates, roselle hibiscus dies back in frost. Before temperatures drop below 50°F, cut back stems to 6 inches and move potted plants indoors to a bright, cool spot (60-65°F). Reduce watering to once every 10-14 days and avoid fertilizing until spring. Prune again in early spring to encourage fresh growth before moving back outdoors.
For a year-round harvest, grow roselle in containers and rotate them indoors during winter. Place them under grow lights for 12-14 hours daily to maintain production. You’ll see new shoots emerge in 3-4 weeks with proper light and care—proof that roselle can thrive even in less-than-ideal conditions.
Tips & tricks for growing roselle hibiscus
These practical insights will help you cultivate a thriving roselle hibiscus plant with minimal stress.
Sunlight Strategy: While roselle hibiscus needs at least 6-8 hours of direct sunlight daily, I've found that morning sun paired with afternoon shade in hot climates actually produces more vibrant calyces. If you're in a very sunny region, consider providing afternoon shade during peak heat (11 AM - 3 PM) to prevent leaf scorch while still getting the full sun exposure.
Soil Preparation Insight: The 2-3 inches of compost recommendation is perfect, but I always add a handful of perlite or coarse sand to improve drainage. Roselle hibiscus roots can't tolerate soggy conditions, and this simple amendment prevents root rot while maintaining the soil's ability to retain moisture. The ideal soil mix should feel like a well-squeezed sponge—moist but not wet.
Germination Game-Changer: That 12-hour seed soaking tip is crucial, but I've discovered an even better method: soak the seeds in warm water (around 80°F) for 12 hours, then transfer them to a damp paper towel in a sealed bag for 24 hours. This mimics natural conditions and often results in germination within 7-10 days instead of the typical 10-14 days. Just keep the towel moist but not dripping during this period.
Container Considerations: When growing in containers, I recommend using pots that are at least 12 inches deep but also 18-24 inches in diameter to accommodate the plant's sprawling root system. The extra width gives roots room to spread out, which leads to more vigorous growth and better calyx production. If you're planting multiple plants, space them 3-4 feet apart to prevent competition for nutrients and sunlight.
Pro Tips for Grow Roselle Hibiscus
- These practical insights will help you cultivate a thriving roselle hibiscus plant with minimal stress.
- Sunlight Strategy: While roselle hibiscus needs at least 6-8 hours of direct sunlight daily, I've found that morning ...
- Soil Preparation Insight: The 2-3 inches of compost recommendation is perfect, but I always add a handful of perlite ...
Frequently asked questions
Got questions about growing roselle hibiscus?
Here are answers to the most common ones—from soil prep to pest control—so you can grow this vibrant tropical plant with confidence!
How long does it take for roselle hibiscus to grow from seed?
Roselle hibiscus typically takes 4–6 weeks to germinate and 3–4 months to reach maturity (ready for harvesting). With warm soil (70°F+) and consistent moisture, you’ll see fast growth—especially in tropical or subtropical climates. Pro tip: Start seeds indoors 8–10 weeks before your last frost for a head start!
Can roselle hibiscus survive cold weather?
Roselle hibiscus is tender to frost and thrives in USDA zones 9–11. If you live in colder areas, grow it as an annual or bring potted plants indoors before temperatures drop below 50°F. In frost-prone zones, plant after the last frost or use row covers for young seedlings.
What pests or diseases commonly affect roselle hibiscus?
Watch for aphids, whiteflies, and spider mites (they love the sap!). Powdery mildew can also appear in humid conditions. Fix it: Spray plants with neem oil or insecticidal soap, and ensure good airflow between plants. Remove affected leaves promptly to prevent spread.
Can I grow roselle hibiscus in containers?
Roselle does well in 5-gallon+ containers with drainage holes. Use a well-draining potting mix (like 60% soil, 30% compost, 10% perlite) and place pots in full sun. Water when the top inch of soil is dry, and fertilize every 4–6 weeks with a balanced liquid fertilizer.
How do I harvest roselle hibiscus for tea or cooking?
Harvest calyces (the red, flower-like buds) when they’re tight but fully colored (about 2–3 inches long). Use clean scissors to snip them just above a leaf node. For tea, dry them in the sun or a dehydrator. Bonus: Leaves can also be used in soups!
Wrapping up and next steps
Growing roselle hibiscus is a rewarding journey that brings vibrant blooms, edible benefits, and a touch of tropical charm to your garden. With the right soil, sunlight, and care, you’ll enjoy a bountiful harvest in just six months—whether for tea, jams, or stunning flowers! 🌿✨
Ready to dive in? Start by gathering your supplies and planting your first seeds or saplings today. Your future harvest—and delicious roselle creations—are just a few steps away!