
Size
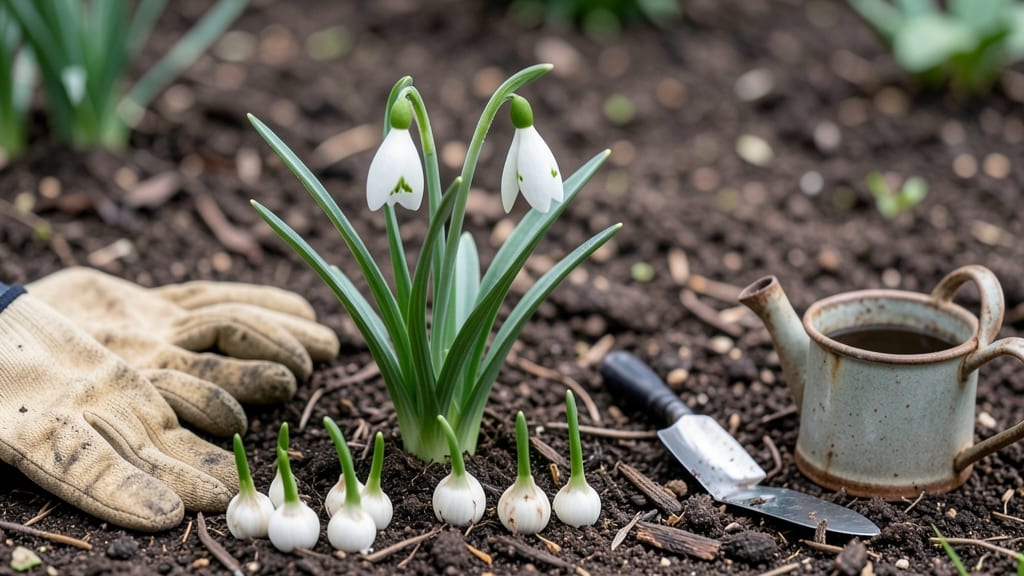
How to grow snowdrops is easier than you’d think—even if you’ve never planted bulbs before. Their delicate white blooms push through frozen soil when most gardens are still asleep, signaling spring’s arrival. The key lies in their patience: these hardy perennials thrive with minimal fuss once you get the basics right.
You’ll need a shady spot (they hate hot sun), well-draining soil, and a bit of winter patience. Plant bulbs 3-4 inches deep in fall, spacing them 3-4 inches apart—they multiply like wildfire over time.
Forget frequent watering; snowdrops store moisture in their bulbs and bloom beautifully with just seasonal rain. The real magic happens in late winter to early spring, when they defy the cold to show off their cheerful faces.
By summer, you’ll have clusters of bulbs ready to divide and share. Simply dig up the clumps, separate the smaller bulbs, and replant them elsewhere—your garden (and neighbors) will thank you.
These bulbs spread so reliably that you’ll soon have snowdrops popping up in unexpected spots, like nature’s way of rewarding your low-maintenance efforts.
They’re also disease-resistant and deer-proof, making them the ultimate low-stress garden star. Just avoid overwatering and planting in full sun, and you’ll enjoy their cheerful blooms for decades—some gardeners grow the same snowdrops their grandparents planted.
📚 In This Guide
- What you need
- Instructions
- Tips and common mistakes
- Wrapping up and next steps
What you need
- ● Snowdrop bulbs (Galanthus spp.) – Choose healthy, firm bulbs (10–20 per plant, depending on desired coverage). Opt for Galanthus nivalis (common snowdrop) or varieties like Galanthus elwesii for larger blooms.
- ● Well-draining soil – Snowdrops thrive in USDA Hardiness Zones 3–8 and prefer slightly acidic to neutral soil (pH 6.0–7.0). Amend heavy clay with compost or sand if needed.
- ● Organic mulch – A 2–3 inch layer of shredded bark, leaves, or straw to retain moisture and regulate temperature.
- ● Garden trowel or bulb planter – For digging holes 3–4 inches deep and 2–3 inches apart.
- ● Garden fork or spade – To loosen soil before planting (especially in clay-heavy areas).
- ● Watering can or hose with a gentle spray nozzle – Snowdrops need consistent moisture but hate soggy soil.
- ○ Garden gloves – Optional but helpful for protecting your hands while handling soil and bulbs.
- ● Slow-release fertilizer (balanced 10-10-10) – Sprinkle lightly at planting time for a nutrient boost.
- ● Garden twine or stakes – To mark planting spots if you’re adding snowdrops to an established garden.
- ● Frost cloth (early spring) – Protects tender shoots from late frosts in colder climates.
Step-by-step instructions for planting and cultivating snowdrops
These delicate harbingers of spring thrive with minimal fuss—here’s how to establish them for years of early blooms.
Choose the Right Planting Site
Snowdrops (Galanthus) prefer partial to full shade, making them ideal for woodlands, beneath deciduous trees, or along north-facing foundations where other plants struggle. The key is well-draining soil—they rot easily in soggy conditions. Test your spot by digging a 6-inch hole: if water pools after 30 minutes, amend with 2-3 inches of gritty compost or plant on a slight mound.
I always plant mine where spring snowmelt won’t linger—even a slight slope helps prevent waterlogging. Avoid heavy clay soils unless you’ve amended them with organic matter (like leaf mold or well-rotted manure) to improve drainage. Snowdrops also tolerate dry shade, making them perfect for underplanting shrubs or roses.
Plant Bulbs at the Correct Depth and Spacing
Unlike summer bulbs, snowdrops need shallow planting—bury them at a depth of 2-3 inches, just enough to cover the bulb with 1 inch of soil. Their natural habitat is forest floors, where they’re often half-buried. Use your finger to press the soil gently around each bulb; don’t compact it tightly, as their roots need air.
Space bulbs 4-6 inches apart in all directions. This gives them room to naturalize and multiply over time. I plant them in small clusters of 5-7 bulbs to mimic their woodland groupings, which makes them look more natural and encourages faster spread. Mark the planting area with stakes or flags if you’re unsure where you’ve planted them—snowdrops are subtle until they bloom.
Water and Mulch for Establishment
After planting, water deeply to settle the soil and eliminate air pockets around the bulbs. Snowdrops don’t need constant moisture, but they appreciate consistent dampness during their first growing season. Water again if the soil dries out completely in the following 2-3 weeks, then let nature take over—rainfall should suffice afterward.
Apply a 2-inch layer of mulch (such as shredded bark or leaf mold) to protect bulbs from winter temperature swings and suppress weeds. Avoid thick mulch layers, as they can smother the bulbs. In colder climates, a light covering of straw or evergreen boughs in late fall provides extra insulation, but remove it in early spring to prevent rot.
Provide Minimal Care Through the Growing Season
Snowdrops are low-maintenance once established, but they do benefit from occasional feeding. In early spring, just as shoots emerge, sprinkle a light layer of balanced fertilizer (10-10-10) around the planting area and water it in. This gives them a gentle boost without encouraging excessive foliage growth. Avoid fertilizing in summer or fall, as it can weaken the bulbs.
Deadhead spent flowers by snipping the stems at the base, but never cut the leaves until they yellow naturally in late spring. The foliage photosynthesizes to build next year’s blooms, so removing it prematurely reduces future flowers. If slugs or snails become a problem (they adore snowdrop flowers), handpick them at night or use beer traps—never chemical slug pellets, which harm the bulbs.
Encourage Natural Spread and Division
Snowdrops multiply slowly but steadily. After 3-5 years, you’ll notice clusters expanding as bulbs offset naturally. To propagate, dig up the entire clump in early summer (after foliage dies back) and separate the bulbs gently. Replant the healthiest offsets immediately at the same depth, spacing them 4-6 inches apart. Discard any soft or shriveled bulbs—they won’t regrow.
I’ve found that not disturbing established clumps yields the most reliable blooms. If you’re planting in a formal garden, you can also lift and divide every 4-5 years to maintain vigor. Snowdrops are particularly happy when left undisturbed, so unless you’re sharing them with friends, resist the urge to dig them up too often.
Tips & tricks for perfect snowdrop cultivation
These subtle details make all the difference when growing snowdrops that thrive for years.
Site Selection Secret: Look for areas where other shade-loving plants struggle—this is your snowdrop's ideal habitat. I've found that north-facing slopes with just a 5-degree angle prevent water pooling while still providing the shade they crave. Test drainage by digging that 6-inch hole and waiting the full 30 minutes to see if water lingers; this simple test prevents years of bulb rot.
Planting Depth Precision: The 2-3 inch depth rule might seem arbitrary, but it's critical—deeper planting can cause the bulbs to rot, while shallower planting exposes them to temperature fluctuations. Use your finger to press soil gently around each bulb; think of it like tucking them into a cozy blanket rather than burying them. This mimics their woodland habitat perfectly.
Mulch Layer Strategy: That 2-inch mulch layer isn't just decoration—it's insulation against winter's temperature swings. I've seen snowdrops survive harsh winters with proper mulching, but too-thick layers can smother them. Use shredded bark or leaf mold, and remember to remove any heavy winter protection in early spring to prevent rot from trapped moisture.
Division Timing: The 3-5 year window for natural spread might seem long, but patience pays off. I've watched clumps expand from 5 bulbs to 50 over five years with no intervention. When you do divide, wait until early summer after foliage dies back—this ensures you're not disturbing the bulbs during their critical growth period. The offsets you replant will bloom within 2-3 years.
Pro Tips for Grow Snowdrops
- These subtle details make all the difference when growing snowdrops that thrive for years.
- Site Selection Secret: Look for areas where other shade-loving plants struggle—this is your snowdrop's ideal habitat....
- Planting Depth Precision: The 2-3 inch depth rule might seem arbitrary, but it's critical—deeper planting can cause t...
Frequently asked questions
Got questions about growing snowdrops?
Here are answers to the most common ones—from timing to troubleshooting—so you can cultivate these early bloomers with confidence!
When is the best time to plant snowdrop bulbs?
Plant snowdrop bulbs in fall (September–November in most U.S. zones 3–8). This gives roots time to establish before winter. Avoid planting in late fall or spring—they need cold dormancy to thrive. For container growing, plant in early fall too, ensuring pots have drainage holes.
Will snowdrops grow in heavy shade?
Snowdrops love shade—they’re one of the few bulbs that bloom beautifully under trees or in north-facing gardens. In fact, they often perform worse in full sun, especially in hot climates. Just ensure the soil stays moist (but not soggy) during their growing season.
How do I protect snowdrops from squirrels or rodents?
Squirrels and voles may nibble on snowdrop bulbs. Prevent damage by:
- Planting bulbs deep (6–8 inches) where rodents can’t dig them out.
- Using wire mesh (1/4-inch hardware cloth) around planting areas.
- Applying granular repellent (like castor oil-based options) in fall.
Why aren’t my snowdrops blooming this year?
No blooms? Don’t panic—snowdrops often take 2–3 years to establish and flower. Check these fixes:
- Light: Too much sun can stress them. Ensure they’re in partial to full shade.
- Soil: Amend heavy clay with compost for better drainage.
- Patience: Some varieties (like Galanthus plicatus) bloom later. Wait until spring!
Can I grow snowdrops in containers or small spaces?
Yes! Snowdrops thrive in containers (12+ inches deep) with well-draining soil. Use a mix of:
- 50% potting soil
- 30% perlite or sand
- 20% compost
Wrapping up and next steps
Growing snowdrops is a rewarding way to welcome early spring with their delicate, cheerful blooms—even before the snow melts! 🌱 With the right soil, patience, and a few simple steps, you’ll soon enjoy their elegant charm year after year.
Start by planting bulbs in fall, ensuring they get partial shade and well-draining soil, and don’t forget to protect them from harsh winter conditions.
Ready to bring a touch of magic to your garden? Grab your gloves, pick a spot, and plant those bulbs this autumn! Your future snowdrop display will thank you.