
How To
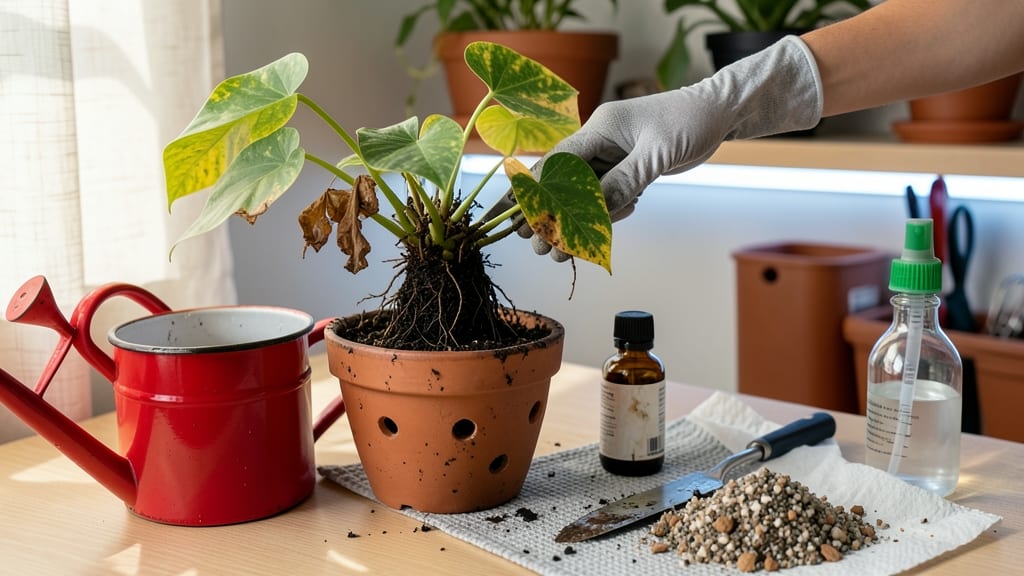
How to help an overwatered plant might mean it’s drowning—not thirsty. 🌱 I’ve nursed back more overwatered plants than I’d like to admit, and the first step is always the same: stop watering immediately. The roots can’t breathe when they’re sitting in soggy soil, and that’s when the real damage starts.
Start by gently removing the plant from its pot and examining the roots. Healthy roots are firm and white, but overwatered roots turn mushy and dark—sometimes they even smell rotten.
If you see this, trim away the bad sections with clean scissors and repot in fresh, well-draining soil. The goal is to give those roots a fighting chance to recover.
Once repotted, hold off on watering for at least a week—yes, even if the soil feels dry. Let the roots adjust to their new home and start growing fresh, white roots before you water again.
You’ll know it’s working when you see new growth within 2-3 weeks, and those leaves start perking up like they’ve been given a second chance.
Prevent future overwatering by choosing pots with drainage holes and using a soil mix designed for your plant’s needs. I swear by the finger test: stick your finger an inch into the soil—if it’s damp, wait. If it’s dry, water lightly. Trust me, your plants will thank you.
📚 In This Guide
- What you need
- Instructions
- Tips and common mistakes
- Wrapping up and next steps
What you need
- ● Well-draining potting mix: 2–3 bags (depending on pot size). Look for a mix labeled "well-draining" or "cactus/succulent blend" if your plant prefers drier soil.
- ● Clean, breathable pot: 1–2 inches larger than the current pot (if repotting). Ensure it has drainage holes!
- ● Perforated tray or saucer: 1, to catch excess water and improve airflow.
- ● Pruning shears or clean scissors: 1 pair, sterilized with rubbing alcohol.
- ● Spray bottle: 1, filled with room-temperature water (for misting, if needed).
- ○ Rooting hormone (optional but helpful): 1 small tube, to encourage root regrowth.
- ● Paper towels or clean cloth: A few sheets, for blotting excess moisture.
- ○ Gloves (optional): 1 pair, to protect your hands from soil or sharp tools.
- ● Fungicide (mild, plant-safe): 1 spray bottle, if roots show signs of rot or mold.
- ● Hydrogen peroxide (3% solution): A small bottle, diluted to 1:9 with water for sanitizing roots.
- ● Grow lights or sunny windowsill: Access to bright, indirect light to aid recovery.
- ● Moisture meter: 1, to monitor soil moisture accurately post-rescue.
Step-by-Step instructions for reviving an overwatered plant
Here's how I've saved dozens of plants—even the ones that looked hopeless.
🪴 Step 1: Stop Watering and Check the Roots
First things first: stop watering immediately. Even if the soil feels damp, the roots are already struggling. Gently remove the plant from its pot and examine the roots. Healthy roots should be firm and white or tan, but overwatered roots turn mushy, black, or smell foul. This is your first clue about how bad the damage is.
Don't panic if the roots look terrible. The key is acting fast. Use clean, sterilized scissors to trim away any black, mushy roots—these are dead and won't recover. Cut back to the healthy white or tan sections. This might seem drastic, but it's the only way to give the plant a fighting chance. I always say: "Better to save what's left than let the rot spread."
💧 Step 2: Repot in Fresh, Well-Draining Soil
Take your trimmed plant and place it in a clean pot—one that's only slightly larger than the original. Overwatering often happens because the pot is too big, keeping soil wet for too long. Fill the bottom of the new pot with a layer of perlite or coarse sand (about 1 inch deep) to improve drainage. This isn’t optional; it’s critical.
Now, fill the pot with fresh potting mix, but don’t pack it down. Overwatered plants need air around their roots to recover. Gently place the plant in the pot and add more soil around the roots, pressing lightly just to hold it in place. Leave about ½ inch of space between the soil and the pot’s rim—this prevents water from spilling out and keeps the roots from sitting in soggy conditions.
☀️ Step 3: Adjust Watering and Light Conditions
Water the plant sparingly—just enough to moisten the soil, but not soak it. Stick your finger 1 inch into the soil—if it feels damp, wait another day. Overwatered plants need time to dry out. I like to use the "knuckle test": if the soil feels damp at your first knuckle, hold off. If it’s dry, give it a light watering, but never until water runs out the bottom.
Move the plant to a bright, indirect light spot—no direct sun yet. Overwatered plants are stressed and can’t handle intense light right away. A north-facing window or a shaded area is ideal. Watch for new growth in 7-10 days. If you see fresh leaves emerging, your plant is on the mend. If not, repeat the root check and adjust care.
⏰ Step 4: Monitor and Adjust Care Long-Term
For the next 2-3 weeks, keep a close eye on your plant. If the soil dries out too quickly, you’re watering correctly. If it stays damp for days, your pot might still be too big or the soil too dense. Consider repotting into a smaller container or mixing in more perlite to improve drainage.
Once your plant shows signs of recovery—like new leaves or firmer stems—you can gradually return to a normal watering routine. But remember: better to underwater slightly than risk another soggy disaster. I’ve learned the hard way that a little patience goes a long way when reviving overwatered plants.
Tips & tricks for reviving overwatered plants
Here's what nobody tells you about saving plants that look like they've given up.
Root Inspection is Everything: In Step 1, when you're checking those roots, look for the color transition line between healthy and damaged roots—this is your cutting guide. Healthy roots should snap when bent, while mushy ones will crush easily. I've saved plants where only 10% of the roots were healthy, and they still made a full recovery. The key is removing every bit of blackened tissue, no matter how small. (Seriously, don't skip this step—it's the difference between a comeback and a compost pile.)
Drainage Layer Matters: That 1-inch layer of perlite or coarse sand in Step 2 isn't just decoration—it's your plant's new lifeline. If you don't have perlite, crushed gravel or even small pebbles work in a pinch. The goal is to create an air pocket at the bottom so water can escape freely. I once used a layer of coffee grounds (dried) as an emergency drainage solution when I was out of perlite—it worked, but perlite is still the gold standard.
Light Conditions Are Critical: When moving your plant to bright, indirect light in Step 3, think "gentle sunlight." East-facing windows are perfect—morning sun is less intense than afternoon rays. If you only have south or west windows, use a sheer curtain to diffuse the light. I've seen plants recover beautifully in these conditions, but direct sun can scorch stressed leaves. Watch for yellowing leaves as your first warning sign of too much light.
Patience Pays Off: Those 7-10 days for new growth in Step 3 can feel like forever, but trust the process. I've had plants show no signs of recovery for 2 weeks before suddenly putting out new leaves. Keep a small notebook by your plant to track daily observations—you'll notice subtle changes you might otherwise miss. And remember: the 2-3 week monitoring period in Step 4 is your safety net. If you see wilting or yellowing after recovery signs, it's time to check those roots again.
Pro Tips for Help Overwatered Plant
- Here's what nobody tells you about saving plants that look like they've given up.
- Root Inspection is Everything: In Step 1, when you're checking those roots, look for the color transition line between healthy and damaged roots—this is your cutting guide.
- Drainage Layer Matters: That 1-inch layer of perlite or coarse sand in Step 2 isn't just decoration—it's your plant's new lifeline.
Frequently asked questions
Got questions about saving your soggy, sad plant? You’re not alone!
Here are some of the most common concerns—and how to tackle them like a pro.
How do I know if my plant is too overwatered?
Look for these red flags: yellowing leaves (especially lower ones), mushy stems, root rot (black, slimy roots), or soil that smells sour or like wet socks. If the pot feels heavy and water drips out when squeezed, it’s time for a rescue! Start here to assess the damage.
How long does it take for an overwatered plant to recover?
Recovery time varies by plant type and severity. Mild cases may bounce back in 1–2 weeks with proper care, while severe root rot could take 4–6 weeks (or may not recover at all). Patience is key—focus on fixing drainage and avoiding stress.
Can I use hydrogen peroxide to save my overwatered plant?
Yes! Mix 1 part 3% hydrogen peroxide with 4 parts water to sanitize roots and boost oxygen. Soak roots for 10–15 minutes, then replant in fresh, dry soil. Pro tip: This method also helps prevent fungal infections.
What if my plant’s roots are completely mushy and falling apart?
If roots are irreversibly rotted (no firm core left), your plant may not survive. Try propagating healthy stems in water or soil to grow a new plant. For stubborn cases, consider pruning back to encourage regrowth from remaining healthy tissue.
Should I wait until the soil is completely dry before watering again?
Not necessarily! Let the top 1–2 inches of soil dry out first, then water lightly (only when the soil feels dry to the touch). Use your finger as a guide: if it’s damp 1 inch down, wait another day. Overwatering is easier to prevent than fix!
Can I use coffee grounds or other household items to fix overwatered soil?
Coffee grounds aren’t a fix for root rot—they’re acidic and can worsen drainage. Instead, amend soil with perlite, sand, or coconut coir to improve aeration. For a quick boost, mix in orchid bark (10%) to help soil dry faster. Learn more about ideal mixes.
Wrapping up and next steps
Reviving an overwatered plant isn’t just possible—it’s a rewarding challenge that strengthens your green thumb! 🌱 By acting quickly with the right steps, you’ve already given your plant a fighting chance. Now, keep an eye on its progress, adjust your watering habits, and watch it bounce back to health.
Ready to master plant care? Start small: Pick one plant to practice these techniques, and soon, you’ll be a pro at diagnosing and rescuing stressed greenery. Your future plants will thank you! 🌿