
How To
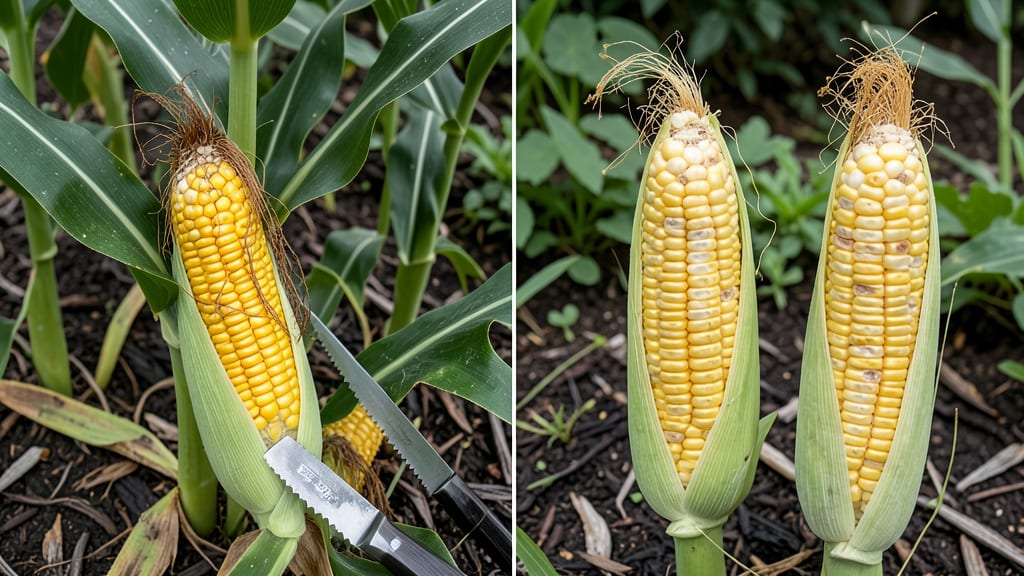
There's nothing worse than biting into sweet corn 🌽 only to know when it's ready and still discover it's tough, starchy, and lacks that perfect sweetness you crave. Knowing exactly when to harvest makes all the difference between a disappointing dinner and a flavor-packed feast.
Most gardeners miss the prime window because they don't know what to look for - those subtle clues that tell you the kernels are at their peak.
I've spent years perfecting the art of timing, and what I'm about to share will help you never guess again about whether your corn is ready.
We'll cover the three most reliable tests that take just seconds each: checking the silk color, testing kernel firmness, and that classic thumb pressure trick. These simple methods work every time, whether you're growing in Zone 6a or beyond.
Once you master these techniques, you'll consistently harvest corn that's sweet, tender, and packed with flavor - no more second-guessing at the dinner table. Let's get started with the exact steps that work in your garden.
3 Reliable tests to determine sweet corn ripeness
Sweet corn reaches its peak flavor in a narrow window—just a few days—so knowing exactly when to harvest makes all the difference. The good news? You don’t need fancy tools to tell if your corn is ready.
Instead, focus on three simple tests: silk color, kernel milk stage, and the thumb pressure test. Each method gives you a clear signal that your ears are primed for picking.
Start by checking the silks—those long, thread-like strands at the top of the ear. When they turn from bright green to tan or brown, that’s your first clue the corn is nearing maturity.
However, don’t rely on this alone, as some varieties may dry out faster in hot weather. Combine this with the next two tests for accuracy.
Here’s how to apply each test step-by-step, so you can confidently harvest corn at its sweetest:
Check if silks are dry and brown (not green or shriveled). If they’re still green, wait 2-3 days.
Pierce a kernel with your fingernail. If it releases milky white liquid, it’s ready. If it’s clear or hard, wait longer.
Gently squeeze the ear. It should feel full and firm (not hollow). If it’s light, it’s not ready.
The kernel milk test is my favorite because it’s foolproof. When you press a kernel and see that creamy white liquid, you know the sugars are peaking. This test works best on the side of the ear, where kernels are often the most tender.
If the liquid is clear or the kernel feels hard, give your corn a few more days to mature.
Don’t overlook the thumb pressure test, though. A ripe ear of corn should feel heavy for its size and resist slight pressure without denting. If it feels hollow or light, it’s likely still filling out.
This test is especially useful for larger varieties, which can take longer to reach full size.
One common mistake I see is harvesting corn too early because the silks look dry. But if the kernels aren’t milky or the ear feels light, it’s not ready yet. Patience pays off—waiting an extra day or two ensures that sweet, juicy perfection you’re craving.
Pro tip: Harvest in the morning when temperatures are cooler. This helps preserve the corn’s natural sugars, which can start converting to starch as the day heats up. Store harvested ears in the fridge for up to a week, or cook them within 24 hours for the best flavor.
Now that you’ve mastered these three tests, you’ll never miss the sweet spot again. The next time you’re eyeing those corn stalks, grab a knife, give the silks a glance, and press that thumb—your taste buds will thank you!
3 Reliable tests to determine sweet corn ripeness
Sweet corn doesn’t announce its readiness with fanfare—it’s all about subtle visual cues and physical tests you can perform right in your garden. The good news? You don’t need fancy tools. Just your eyes, fingers, and a little patience to unlock that peak sweetness every home gardener dreams of.
Mastering these three key tests will turn your corn harvest from "meh" to "mind-blowing." I’ve used them for years, and they’ve never failed me—whether I’m growing Silver Queen or Ambrosia varieties. Let’s dive into the foolproof methods that separate perfectly sweet corn from the starchy disappointment.
Silk Color Test
Peek under the husk to check the silk strands. When they’re dry and brown, your corn is ready. Bright green or yellow silks mean wait 2-3 more days—they’re not there yet!
Kernel Milk Test
Pierce a kernel with your fingernail. If it oozes milky white liquid, you’ve hit the sweet spot. Clear liquid? Too early. Yellow? You’ve missed the window by 1-2 days.
Thumb Pressure Test
Gently squeeze the ear near the tip. It should feel plump and firm—like a tennis ball. If it’s hollow-sounding or too soft, it’s past its prime. This test works best in the morning when sugars are highest.
Pro tip: Combine all three tests for 100% accuracy. I once harvested a batch where the silks were brown but the kernels were still hard—turns out, a late frost had stressed the plants. Always cross-check your observations!
Timing your harvest isn’t just about avoiding tough kernels—it’s about capturing that peak sugar content that makes sweet corn worth growing. Once you master these tests, you’ll never settle for anything less than garden-fresh perfection again. 🌽
Remember, sweet corn’s flavor declines rapidly after reaching peak ripeness. The longer you wait past the ideal window, the more starchy and bland those kernels become.
That’s why I harvest my ears first thing in the morning—when sugars are at their highest and the plants have had a full night to recharge.