
Flowers
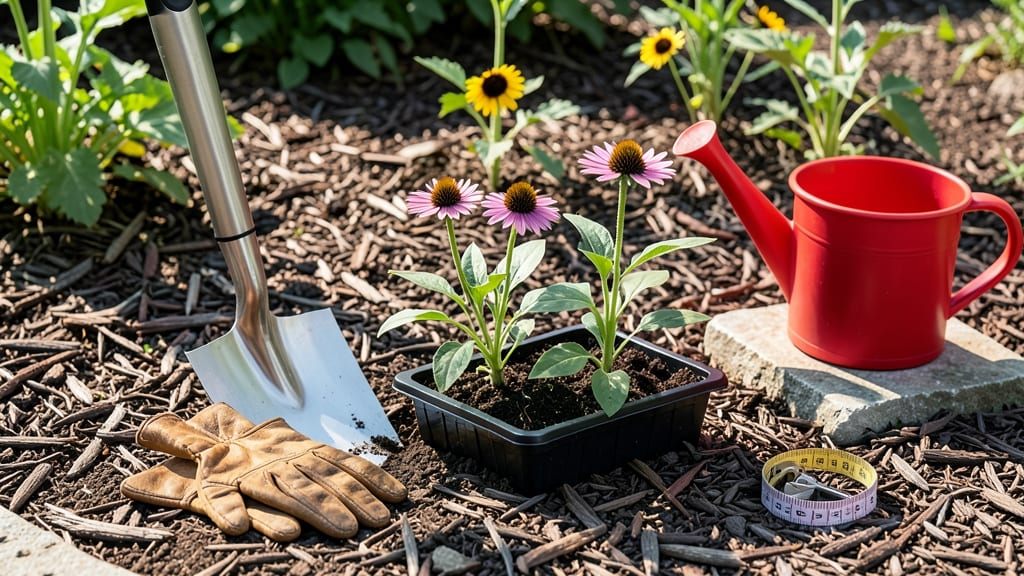
Creating a new flower bed transforms blank space into a vibrant centerpiece. 🌸 I’ve designed beds that bloom from spring to frost—starting with a simple layout that works for any yard, from city balconies to country gardens. The secret? Thoughtful planning before the first shovel hits the soil.
First, choose a sunny spot with good drainage—most flowers need at least 6 hours of sunlight daily. Sketch a rough shape (rectangular, circular, or freeform) that fits your space, then mark it with stakes.
Dig out grass or weeds, loosening soil to 12 inches deep for healthy roots. For clay-heavy soil, mix in compost or sand to improve drainage.
Layer plants by height, placing tall varieties at the back and shorter ones in front. Group plants with similar water needs together, and choose a 3-inch mulch layer (like shredded bark) to retain moisture and suppress weeds.
The result? A bed that looks polished with minimal upkeep and blooms season after season.
Pro tip: Start small—even a 3-foot by 4-foot bed makes an impact. Add a few perennials for structure, annuals for color, and native plants to attract pollinators. Once established, you’ll spend more time admiring than working!
📚 In This Guide
- What you need
- Instructions
- Tips and common mistakes
- Wrapping up and next steps
What you need
- ● Measuring tape (25+ ft for accuracy)
- ● Garden hose or sprinkler (for watering and marking)
- ● Shovel or spade (heavy-duty, 12"–18" blade)
- ● Garden fork or digging fork (for breaking up soil)
- ● Wheelbarrow or large bucket (for hauling soil/amendments)
- ● Garden gloves (durable, waterproof)
- ● Pruners or shears (for trimming weeds/edges)
- ● String or spray paint (to outline your design)
- ● Topsoil or garden soil mix (1–2 cubic yards, depending on bed size)
- ● Organic compost or mulch (2–3 bags for enriching soil)
- ○ Landscape fabric or cardboard (to suppress weeds, optional but helpful)
- ● Edging tools (metal or plastic, for clean borders)
- ● Gravel or decorative stones (for pathways or accents)
- ● Mulch (pine straw, wood chips, or shredded bark) (1–2 bags)
- ● Plant markers or stakes (to label and support new plants)
- ● Knee pads or a small stool (for comfort during long sessions)
- ● Hose nozzle with adjustable spray (for precise watering)
Step-by-Step instructions for designing a stunning flower bed
Here's how I create a flower bed that thrives year after year—starting with smart planning and ending with lush, layered beauty.
📏 Step 1: Plan Your Flower Bed Layout and Dimensions
Start by sketching your design on paper, marking the intended shape and dimensions. I always aim for a minimum 2-foot width to accommodate mature plants comfortably—narrower beds force competition for light and nutrients. Measure your space carefully, using a 10-foot tape measure for accuracy, and mark the outline with wooden stakes and string.
Consider the bed's exposure: full sun areas (6+ hours daily) suit sun-loving perennials like coneflowers and black-eyed Susans, while partial shade (3-6 hours) works better for hostas and astilbes. I jot down sun patterns throughout the day to ensure each plant gets its ideal light conditions. Pro tip: Avoid placing beds where lawnmowers or foot traffic might disturb them later.
✂️ Step 2: Clear the Area and Improve the Soil
Remove all grass, weeds, and debris from the marked area using a flat-edged shovel or transplant spade. Dig down 6-8 inches to break up compacted soil and eliminate grass roots that will compete with your flowers. I like to work in 2-foot sections to avoid exhaustion—small, manageable areas make the job easier.
Amend the soil with 2-3 inches of compost and 1-2 inches of aged manure (like cow or horse manure) to boost fertility. Mix these in thoroughly with a garden fork, ensuring even distribution. For heavy clay soil, add 1 part perlite or coarse sand to 3 parts soil to improve drainage. You'll know the texture is right when it crumbles easily between your fingers, not sticking together.
🌱 Step 3: Choose and Plant Your Flower Layers
Design your bed in three distinct layers: tall plants (like delphiniums or hollyhocks) at the back, medium-height flowers (such as daylilies or salvia) in the middle, and low-growing perennials or annuals (like ajuga or pansies) at the front. I group plants with similar water and sun needs together to simplify maintenance. Space perennials 12-18 inches apart and annuals 6-12 inches apart, depending on their mature size.
Dig holes twice as wide as the root ball but only as deep as the container. Gently remove plants from their pots, loosen any circling roots with your fingers, and place them in the holes so the top of the root ball sits flush with the soil line. Backfill with native soil, pressing lightly to eliminate air pockets. Water deeply to settle the roots—you’ll see the soil surface settle slightly as it absorbs moisture.
💧 Step 4: Mulch and Establish a Watering Routine
Spread 2-3 inches of mulch (like shredded bark or pine straw) over the soil surface, keeping it 2-3 inches away from plant stems to prevent rot. Mulch conserves moisture, suppresses weeds, and regulates soil temperature. I use a rake with a fine-toothed edge to spread it evenly, avoiding clumps that could smother young plants.
Water immediately after planting to help roots establish, then maintain 1 inch of water per week (either from rainfall or irrigation). For the first 2-3 weeks, check the soil daily—it should feel moist but not soggy 2 inches below the surface. Overwatering at this stage can lead to root rot, while underwatering stresses newly planted flowers. A soil moisture meter takes the guesswork out of it.
☀️ Step 5: Maintain and Refresh Seasonally
After the first growing season, assess your bed’s performance. Remove any plants that didn’t thrive and replace them with better-suited varieties. Divide overcrowded perennials in early spring or fall to keep them vigorous. I also top-dress with 1-2 inches of fresh compost in spring to replenish nutrients lost over winter.
Deadhead spent blooms regularly to encourage continuous flowering, and prune leggy growth in late summer to promote bushier, healthier plants. In fall, add a 3-inch layer of mulch to protect roots from freezing temperatures. By next spring, your bed will reward you with bold, vibrant blooms and minimal upkeep—proof that smart planning pays off.
Tips & tricks for perfect flower bed design
Creating a stunning flower bed isn't just about planting—it's about strategic planning and thoughtful execution that makes all the difference. Here's what I've learned from years of trial and error to ensure your garden thrives.
Layering Strategy: The three-layer approach in Step 3 isn't just decorative—it's functional. Tall plants at the back prevent smaller ones from being shaded out, while low-growing varieties at the front create a polished finish. I always sketch my design first, using a 12-inch ruler to visualize spacing. For example, place delphiniums (3-4 feet tall) at the back, daylilies (2 feet) in the middle, and ajuga (6 inches) at the front. This creates visual depth while ensuring each plant gets proper airflow and sunlight.
Soil Prep Shortcut: When amending soil in Step 2, don't just eyeball the compost and manure measurements. Use a leveling rake to create a flat base first, then spread the 2-3 inches of compost evenly across the entire area before adding the 1-2 inches of aged manure. This prevents clumps and ensures even nutrient distribution. For clay-heavy soil, I mix in 1 part perlite to 3 parts soil—this dramatically improves drainage without altering the soil's natural structure. The key is thorough mixing with a garden fork until the texture resembles crumbled cake.
Planting Precision: The "twice as wide" rule for planting holes in Step 3 is non-negotiable for root health. I use a round trowel to create these wider holes, then loosen the sides with my fingers to encourage root spread. When placing plants, I always check that the top of the root ball sits exactly at the soil line—never buried or exposed. This prevents stem rot while allowing roots to access moisture. A simple trick: Use a pencil to mark the soil line on the pot before removing the plant.
Watering Wisdom: The 1 inch per week guideline in Step 4 is perfect, but timing matters just as much. I water in the morning so plants have all day to absorb moisture before evening evaporation. For the critical first 2-3 weeks, I use a soil moisture meter to verify moisture at 2 inches depth—this prevents both overwatering and underwatering. A pro move: Water deeply but infrequently to encourage deep root growth rather than shallow, frequent watering that promotes surface roots.
Pro Tips for Make A New Flower Bed
- Creating a stunning flower bed isn't just about planting—it's about strategic planning and thoughtful execution that ...
- Layering Strategy: The three-layer approach in Step 3 isn't just decorative—it's functional. Tall plants at the back ...
- Soil Prep Shortcut: When amending soil in Step 2, don't just eyeball the compost and manure measurements. Use a level...
Frequently asked questions
Got questions about creating your dream flower bed? You’re not alone! Here are some of the most common concerns—and their solutions—to help you get started with confidence.
What’s the best time of year to start a new flower bed?
The ideal time depends on your climate! In mild zones, spring or early fall is perfect—soil is workable, and plants have time to establish roots. In hot or cold climates, opt for cooler months (spring or fall) to avoid stressing plants. Avoid planting in extreme heat or frost.
How long does it take for a flower bed to look full and beautiful?
Patience pays off! With proper care, you’ll see noticeable growth in 4–6 weeks, but a truly lush bed often takes 1–2 seasons. Fast-growing annuals (like zinnias or marigolds) fill gaps quickly, while perennials may need a full year. Mulch and consistent watering speed up the process!
Can I make a flower bed on a budget?
Skip expensive soil amendments by using compost or free yard waste instead. Choose seed packets over transplants, and propagate cuttings from existing plants. Repurpose materials like gravel, bricks, or logs for borders. Thrift stores often have affordable pots or garden decor too!
How do I keep pests and weeds from ruining my new flower bed?
Prevention is key! Start with healthy soil (rich in organic matter) to deter pests. Use mulch (2–3 inches) to smother weeds and retain moisture. Hand-pull weeds early, and introduce beneficial insects (like ladybugs) to control pests naturally. Avoid overwatering, which invites slugs and fungus.
What if my flower bed looks uneven or messy after planting?
Don’t stress—it’s normal! Rake the soil gently to tidy up, and add mulch or decorative stones to create a polished look. If gaps appear, fill them with fast-growing fillers like sweet alyssum or creeping thyme. Over time, plants will fill in naturally. A little patience (and maybe a few tweaks) goes a long way!
Wrapping up and next steps
Creating a stunning new flower bed is all about planning, preparation, and patience—but the results are worth every effort! 🌸 With the right soil, plants, and layout, you’ll enjoy vibrant blooms for seasons to come.
Don’t forget to water consistently, mulch for protection, and tweak your design as you go.
Now that you’re ready to roll up your sleeves, take the next step: sketch your dream bed, gather your tools, and start digging! Your garden will thank you—and so will your neighbors. Happy planting! 🌿✨