
Tools
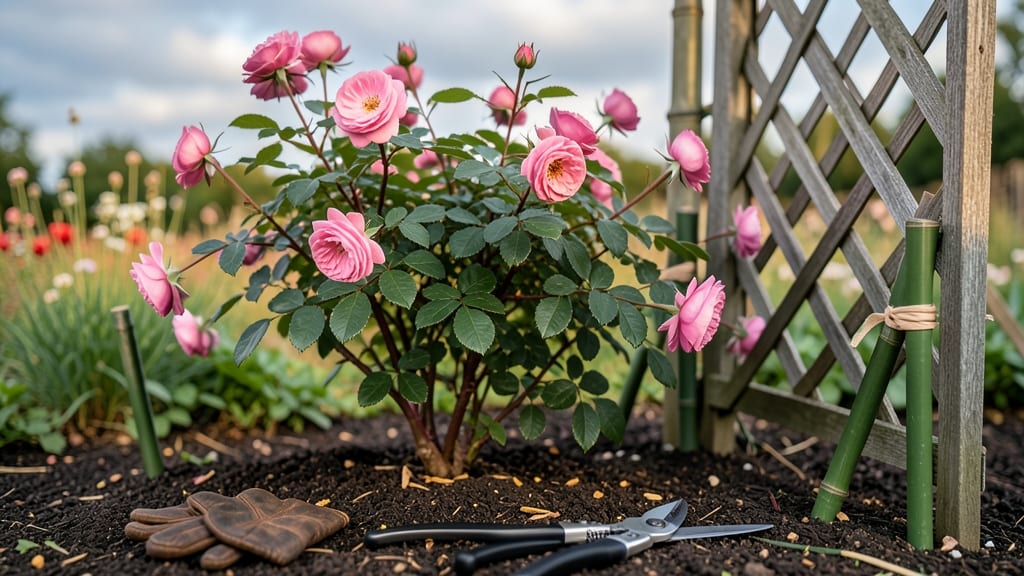
How to make a rose bush trellis that survives summer storms—lesson learned. 🌿 A sturdy trellis isn’t just decorative; it’s the backbone of healthy climbing roses, guiding their growth and preventing broken canes. The right design transforms a sprawling bush into a showstopping vertical display while protecting your investment from wind and rain. You’ll need basic materials—2x4s, metal rods, or bamboo stakes—depending on your design (arbor, obelisk, or arch). Wood offers classic charm but requires sealing, while metal lasts longer but needs anchoring. I’ve tested both, and the difference in durability is night-and-day after just one season. By the end, you’ll have a trellis that supports 10+ feet of rose growth without sagging, with canes trained to bloom at eye level. The best part? It doubles as a garden focal point—think lush green cascades framing your patio or entryway. Works for any yard size, from small balconies to sprawling gardens. Let’s build one that lasts!
📚 In This Guide
- What you need
- Instructions
- Tips and common mistakes
- Wrapping up and next steps
What you need
- ● Gather your supplies to build a sturdy and stylish trellis for your climbing roses! Here’s what you’ll need to bring your project to life:
Step-by-Step instructions for building a sturdy rose trellis
Here's the method I've used for years—simple enough for beginners but strong enough to support heavy blooms.
🪴 Step 1: Choose and Prepare Your Materials
For a 4-foot tall trellis supporting climbing roses, gather 4 wooden posts (4x4 inches, 6 feet long) and 1/2-inch thick wooden slats (2x4 inches, cut to 3 feet long). Cedar or redwood resists rot best, but untreated pine works too if you seal the cuts. I always pre-drill holes for screws to prevent wood splitting—this is where most DIY trellises fail.
Cut your slats to create 5 horizontal rungs spaced 12 inches apart vertically. The bottom rung should sit 6 inches off the ground to protect canes from soil moisture. Sand all edges smooth—rough surfaces can abrade delicate rose canes over time. Mark your post locations in the ground where the trellis will sit, ensuring they form a square or rectangular base for stability.
✂️ Step 2: Assemble the Frame and Attach Rungs
Set two posts upright at one corner of your marked area, securing them with stakes driven 12 inches deep at a 30-degree angle for extra stability. Use a level to ensure they're perfectly vertical before attaching the first horizontal rung with 3-inch deck screws. This bottom rung becomes your anchor point—don't skimp on screws here.
Attach the remaining three posts at your marked locations, keeping them level and plumb as you go. The top posts should meet at a 45-degree angle for a classic trellis shape. Once all four posts are secure, attach the remaining rungs between corresponding posts. Space them evenly—12 inches apart—so rose canes have multiple points to grip as they climb. I like to pre-assemble rungs on a flat surface before lifting them into place to avoid wobble.
🌿 Step 3: Reinforce and Weatherproof
Add diagonal braces between the top of each post and the ground for additional wind resistance. Cut 2x4 slats at a 45-degree angle and secure them with galvanized screws—this triangular reinforcement prevents the trellis from leaning. For extra durability, I coat all wood with outdoor-rated wood sealant, focusing on cut edges where moisture can seep in. Let it dry completely before planting.
Here's the thing—paint or stain isn't necessary for functionality, but if you choose to, use a non-toxic, UV-resistant finish. Some gardeners worry about chemical runoff, so I opt for natural linseed oil for a protective sheen without harsh chemicals. The trellis should last 5-7 years with proper sealing, even in rainy climates.
🌱 Step 4: Position and Train Your Roses
Install your trellis 3-4 feet away from the rose bush—close enough for easy training but far enough to avoid shading the base. Dig a 6-inch deep trench around the trellis base and fill it with gravel to improve drainage and prevent rot at the wood's base. The first year, gently tie the main cane to the bottom rung with soft plant ties (never wire—it can cut into the stem).
As new canes emerge, weave them through the rungs in a zigzag pattern rather than straight up. This encourages stronger growth and prevents the trellis from becoming top-heavy. I like to train roses to spiral upward—it creates a natural, elegant look while distributing weight evenly. Prune any canes growing directly into the trellis to maintain airflow and reduce disease risk.
Tips & tricks for perfect rose bush trellis construction
Building a trellis that lasts takes thoughtful preparation—here's how to avoid common pitfalls and create a structure that supports your roses beautifully for years.
Material Selection: While cedar and redwood resist rot naturally, untreated pine can work too—just seal all cut edges thoroughly. I've seen trellises fail within a season when wood wasn't properly prepped. For extra longevity in wet climates, consider pressure-treated lumber, though it's less traditional. The 4x4 posts are your foundation—don't skimp on thickness here, as they bear the weight of climbing roses.
Assembly Technique: In Step 2, when attaching those 3-inch deck screws, use a power drill with a clutch setting to prevent over-tightening. I learned this the hard way when I stripped threads in my first attempt. For the 45-degree angle at the top, mark your cuts precisely—using a speed square template makes this much easier. The 12-inch rung spacing isn't arbitrary: it matches the natural growth pattern of rose canes, giving them perfect handholds.
Weatherproofing Wisdom: The 6-inch gravel trench around the base is your first line of defense against rot. I recommend adding a layer of landscape fabric between the gravel and soil to prevent dirt from clogging the drainage. For sealing, apply two thin coats of outdoor wood sealant rather than one thick layer—this penetrates better and prevents peeling. And here's a pro move: brush on sealant to the underside of rungs too, where moisture collects but you might forget.
Training Tips: When positioning your trellis 3-4 feet away from the rose bush, consider the mature spread of your rose variety. Some vigorous climbers like 'New Dawn' need that extra space, while smaller varieties can handle closer placement. For the zigzag training pattern, use soft plant ties that stretch as the cane grows—this prevents constriction marks that can strangle the stem over time.
Pro Tips for Make A Rose Bush Trellis
- Building a trellis that lasts takes thoughtful preparation—here's how to avoid common pitfalls and create a structure that supports your roses beautifully for years.
- Material Selection: While cedar and redwood resist rot naturally, untreated pine can work too—just seal all cut edges thoroughly.
- Assembly Technique: In Step 2, when attaching those 3-inch deck screws, use a power drill with a clutch setting to prevent over-tightening.
Frequently asked questions
Got questions about building a rose bush trellis? Here are some common ones to help you get started:
What’s the best time of year to install a rose trellis?
The ideal time is early spring before new growth begins or in late winter when the ground is workable. This gives roots time to establish before climbing season. Avoid installing in summer heat, as stress from planting could weaken the bush.
Can I use wood scraps or recycled materials for the trellis?
Treated lumber, cedar, or even repurposed metal pipes or PVC work well. Just ensure materials are sturdy, rust-resistant (if metal), and chemically safe for plants. Avoid pressure-treated wood if it contains harmful chemicals—opt for ACQ-treated instead.
How do I train rose canes to climb the trellis without damaging them?
Gently tie new canes to the trellis with soft plant ties or strips of fabric (never wire or twine, which can cut). Space ties every 6–12 inches and loosen them as the cane thickens. Prune weak or crossing growth to encourage upward climbing.
What if my trellis sways or leans after installation?
Dig deeper and add stakes or guy wires to anchor it. For heavy roses, bury the posts at least 18 inches deep or use concrete footings for extra stability. Check for loose connections and tighten screws/brackets as needed.
Are there trellis alternatives for small spaces or container roses?
Yes! Try a mini obelisk, A-frame trellis, or even a sturdy bamboo stake for compact areas. For containers, use a small metal arch or spiral trellis—just ensure it’s lightweight but supportive to avoid tipping.
Still stumped? Drop your question in the comments—we’re happy to help!
Wrapping up and next steps
Building a rose bush trellis is a rewarding project that not only enhances your garden’s beauty but also gives your climbing roses the support they deserve! 🌹 With the right materials and a little patience, you can create a sturdy, functional trellis that elevates your roses to new heights—literally.
Whether you opt for a simple wooden frame or a decorative metal arch, the key is to tailor it to your roses’ needs and your garden’s style.
Now that you’re armed with the know-how, roll up your sleeves and get creative! Start by sketching your design, gathering supplies, and let your roses thrive with their newfound support. Happy gardening—your blooms will thank you! 🌱✨