
Tools
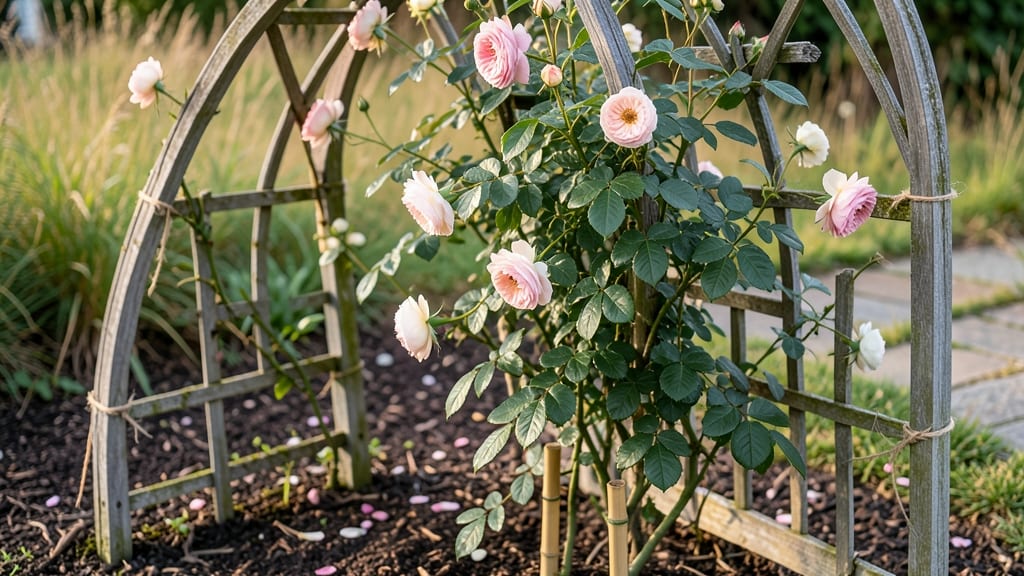
How to make a rose trellis is the secret to letting your climbing roses shine—no more flopping over fences! 🌹 After years of watching roses collapse, I designed a simple arbor that keeps them upright, improves airflow, and makes pruning effortless—no fancy tools required. You’ll need basic materials like 2x4 lumber, screws, and a saw, plus a weekend afternoon. The key is spacing: 4-6 feet tall with 12-inch horizontal slats spaced 6 inches apart for small varieties, or 8 feet tall with 18-inch slats for vigorous climbers like 'New Dawn' or 'Blaze'. Once built, your roses will grow stronger stems and bigger blooms because the trellis supports their weight and prevents disease from wet foliage touching the ground. The finished arbor doubles as a garden focal point—rustic wood or painted metal both work beautifully. This design works for small yards, container gardens, or even vertical walls. Let’s get started—your roses will thank you next summer!
📚 In This Guide
- What you need
- Instructions
- Tips and common mistakes
- Wrapping up and next steps
What you need
- ● Trellis Frame Materials: 2–4 wooden posts (4x4 or 6x6 inches, 8 feet tall)
- ● 1–2 horizontal support beams (2x4 or 2x6 inches, 6–8 feet long)
- ● Lattice panels or chicken wire (4x8 feet or custom size)
- ○ Metal or wooden stakes (optional, for extra stability)
- ● Fasteners: Galvanized screws or decking screws (2.5–3 inches long)
- ● Heavy-duty staples (for securing lattice/chicken wire)
- ● Concrete mix (for anchoring posts, ~10 lbs per post)
- ● Tools: Measuring tape
- ● Level (to ensure straight alignment)
- ● Drill/driver
- ● Staple gun (if using lattice)
- ● Post hole digger or auger
- ● Wheelbarrow (for mixing concrete)
- ● Safety gloves & goggles
- ● Pressure-treated wood (for longevity)
- ● Wood stain or paint (for a polished look)
- ● Decorative trim or brackets (for a custom touch)
- ● Post caps (to protect the top of wooden posts)
Step-by-step instructions for building a DIY rose trellis
Here's my go-to method for creating a sturdy, decorative arbor that supports climbing roses beautifully.
🪴 Step 1: Gather Materials and Tools
For a 4-foot tall arbor that supports climbing roses, you'll need two 4-foot lengths of 4x4 pressure-treated lumber for the vertical posts, two 4-foot lengths of 2x4 lumber for the horizontal supports, ½-inch exterior wood screws (at least 20), galvanized hurricane ties (4), wood glue, and outdoor wood stain or paint (optional). I always use pressure-treated wood for longevity—it resists rot and insects far better than untreated lumber.
You'll also need basic tools: a circular saw or miter box, drill with driver bit, measuring tape, pencil, speed square, safety glasses, and sandpaper (80-grit). Set up your workspace in a dry area where you can lay out the pieces flat before assembly. Measure and mark your lumber carefully—double-checking dimensions prevents wobbly arbors that can't support heavy rose canes.
✂️ Step 2: Cut and Prepare the Wood Pieces
Cut the 4x4 posts to 42 inches tall (accounting for 2 inches buried in the ground). For the horizontal supports, cut two 2x4 pieces at 40 inches and two at 30 inches—these create the classic diamond shape that roses love to climb. Sand all cut edges smooth to prevent splinters and make assembly easier. I like to round the edges of the 4x4 posts slightly with a router bit for a cleaner look.
Before assembly, test-fit all pieces by laying them out in a diamond shape on the ground. The 40-inch horizontals should sit 6 inches from the top of the posts, while the 30-inch horizontals go 12 inches from the bottom. This spacing creates a sturdy lattice that roses can twine through naturally. Mark the exact screw placement on each piece with a pencil—this ensures perfect alignment during assembly.
🪴 Step 3: Assemble the Arbor Frame
Lay one 4x4 post flat on the ground and place a 40-inch horizontal 2x4 against it, 6 inches from the top. Secure it with two 3-inch exterior wood screws (one at each end). Repeat on the opposite side of the post, ensuring both horizontals are perfectly level with each other. Use a speed square to check for 90-degree angles—this is critical for stability. Apply a dab of wood glue at each screw joint before driving them in for extra strength.
Now attach the 30-inch horizontals to the same posts, 12 inches from the bottom. These should cross the 40-inch horizontals in the middle, creating an "X" shape when viewed from the side. Connect all four horizontals at their crossing point with galvanized hurricane ties—these metal straps distribute weight evenly and prevent the structure from sagging under rose canes. Double-check that all pieces are square and level before moving to the final assembly.
💧 Step 4: Finish and Install the Trellis
Once the frame is complete, let it dry for 24 hours before staining or painting. I use a semi-transparent stain to preserve the wood's natural grain while protecting it from weather. Apply two coats, allowing each to dry completely (check the can for drying times). For extra durability, brush on a waterproofing sealant after the stain dries. If you're installing immediately, skip the sealant and apply it after the arbor is in the ground.
Dig two holes 12 inches deep and 6 inches wider than the 4x4 posts. Space them 3 feet apart to match the width of your horizontals. Set the posts in the holes, ensuring they're plumb (perfectly vertical). Backfill with soil, tamping firmly every 4 inches to eliminate air pockets. For windy areas, stake the posts with 2x4 braces buried at a 45-degree angle for additional support. Water the base thoroughly to settle the soil around the posts.
☀️ Step 5: Position and Plant Your Climbing Roses
Place your new trellis in full sun—climbing roses need at least 6 hours of direct sunlight daily for optimal blooms. I like to position it near a fence or wall for extra support, especially for heavy varieties like 'New Dawn' or 'Blaze'. When planting, dig a hole twice as wide as the root ball but no deeper—this encourages roots to spread horizontally for stability. Mix compost into the native soil to improve drainage and fertility.
After planting, gently weave the rose canes through the trellis lattice, securing them with soft plant ties or twistable garden tape. Avoid wrapping ties too tightly—they should allow the cane to grow while providing support. Mulch the base with 2-3 inches of organic mulch to retain moisture and suppress weeds. Water deeply once a week during the first growing season, ensuring the soil stays consistently moist but not soggy.
Tips & tricks for building a sturdy rose arbor
A few key insights that'll transform your rose trellis from functional to flawless. Between us, I've seen too many wobbly arbors collapse under heavy blooms—don't let that be yours.
Precision Cutting: When cutting your 4x4 posts to 42 inches, use a speed square to ensure perfectly straight cuts. I learned this the hard way after realizing my first attempt had a slight angle that made the arbor lean. For the horizontal supports, mark the 40-inch and 30-inch lengths with a pencil before cutting—this prevents costly mistakes when you're working with expensive lumber. A miter box will give you cleaner cuts than a freehand circular saw, especially for the angled brace cuts if you're adding wind support.
Assembly Alignment: In Step 3, when attaching the 40-inch horizontals 6 inches from the top, use a level to ensure they're perfectly parallel. I've seen arbors that looked great until roses climbed them—then the uneven horizontals caused the structure to sag. For extra stability, pre-drill screw holes to prevent wood splitting, especially with the 4x4 posts. The hurricane ties at the crossing point are non-negotiable—they're what keeps your arbor from twisting under heavy roses like 'New Dawn' that can produce 30-pound canes!
Ground Preparation: Before installing your posts, loosen the soil at the bottom of your 12-inch holes with a garden trowel. Compacted soil won't settle properly, leaving air pockets that cause the arbor to tilt. For windy areas, bury your 2x4 braces at a 45-degree angle and secure them with additional screws—this creates a triangular support system that's far stronger than vertical staking. I've seen arbors blow over in storms because this critical step was skipped.
Seasonal Timing: The 24-hour drying period before staining is crucial, but even more important is when you install your arbor. Plant in early spring when roots can establish before summer blooms, or late summer for fall planting. This gives your roses time to anchor to the trellis before heavy growth. If you must install in winter, choose a mild day above freezing and protect the wood with a tarp until planting season.
Pro Tips for Make A Rose Trellis
- A few key insights that'll transform your rose trellis from functional to flawless.
- Precision Cutting: When cutting your 4x4 posts to 42 inches, use a speed square to ensure perfectly straight cuts.
- Assembly Alignment: In Step 3, when attaching the 40-inch horizontals 6 inches from the top, use a level to ensure they're perfectly parallel.
Frequently asked questions
Got questions about building your own rose trellis? You’re not alone! Here are answers to the most common queries to help you create a sturdy, beautiful climbing rose arbor with confidence.
What’s the best material for a DIY rose trellis?
A sturdy rose trellis should prioritize durability and rust resistance. Cedar or redwood are top picks for their natural rot resistance, while galvanized metal or powder-coated steel offers long-lasting strength. For a budget-friendly option, pressure-treated lumber (like pine) works well—just seal it to prevent weather damage.
How long does it take to build a rose trellis?
Most DIY rose trellises take 1–3 hours, depending on complexity. A simple A-frame arbor can be done in under an hour, while intricate lattice designs or multi-tiered structures may require a few hours. Plan ahead for drying time if staining or sealing!
When is the best time to plant roses on a new trellis?
Plant bare-root roses in early spring or fall for ideal establishment. If using potted roses, spring is best. Give the trellis 6–12 months to stabilize before training vigorous climbers. Young roses need support as they grow—install the trellis before planting if possible!
Can I reuse or repurpose materials for a rose trellis?
Old fencing, lattice panels, or even a sturdy wooden pallet
can be repurposed with a little creativity. Just ensure materials are rot-resistant and securely fastened. Avoid treated wood with toxic chemicals—opt for natural or eco-friendly alternatives like bamboo or reclaimed cedar.
How do I keep my rose trellis from rotting or rusting?
Prevention is key! Seal wood with a waterproof stain or outdoor paint, and apply a metal primer to galvanized parts. Elevate the base with gravel or bricks to improve drainage. For extra protection, inspect annually for cracks, loose screws, or rust—tighten or replace components as needed.
What if my roses aren’t climbing well?
Encourage climbing by tying canes gently to the trellis with soft plant ties (avoid wire—it can damage bark). Prune in early spring to remove crowded or weak growth, and fertilize lightly to boost vigor. Some roses need patience—wait until they’re established before expecting rapid climbing!
Wrapping up and next steps
Building a rose trellis is a rewarding project that adds beauty and structure to your garden—and you’ve got all the skills now to make it happen! 🌸 Whether you choose a classic arbor, a simple lattice, or a rustic wooden frame, the key is patience and precision.
Your climbing roses will thank you with stunning blooms all season long.
Ready to take the next step? Start by sketching your design, gathering your materials, and getting hands-on! With a little creativity and elbow grease, you’ll have a trellis that’s both functional and a showstopper in your outdoor space.