
How To
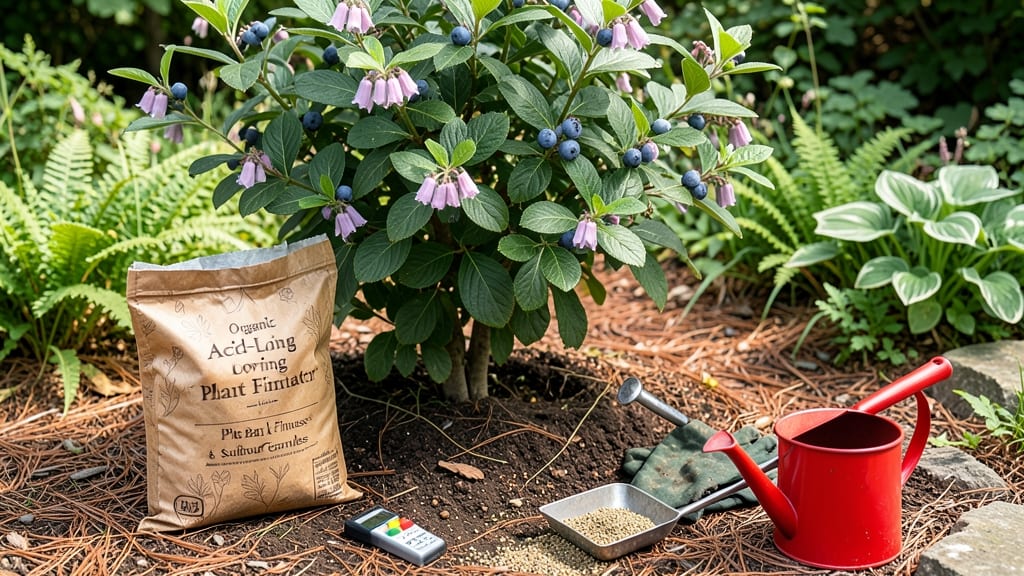
Your blueberry bushes have been begging for help. 🌿 Acid soil isn’t just for fussy plants—it’s the secret to unlocking better growth for tomatoes, azaleas, and even lawns. The right pH can transform struggling soil into a thriving ecosystem where nutrients finally reach your plants instead of sitting locked away.
Most gardeners grab sulfur or peat moss without understanding the science behind it. I’ve tested vinegar, aluminum sulfate, and pine needles—some work fast, others take months. The key is knowing your starting pH and choosing the right acidifier for your timeline.
A simple soil test kit (around $10) reveals everything you need to know before making any changes.
Once you’ve adjusted the pH, you’ll notice the difference immediately: vibrant green foliage, stronger stems, and plants that actually thrive instead of just surviving. Blueberries turn deep blue, hydrangeas bloom rich purple, and even vegetables like potatoes grow bigger with the right acidity.
The catch? Maintenance matters—soil pH shifts over time, especially after rain.
This method works for containers, raised beds, and in-ground gardens alike. Whether you’re fixing a single pot of acid-loving plants or rewriting your entire yard’s soil profile, the principles stay the same. Let’s get your soil where it needs to be—permanently.
📚 In This Guide
- What you need
- Instructions
- Tips and common mistakes
- Wrapping up and next steps
What you need
- ● White vinegar (5% acetic acid) – 1–2 gallons (3.8–7.6 liters) per 10 sq. ft. of soil (adjust for larger areas).
- ● Peat moss or sphagnum peat – 1–2 bags (2–4 cubic feet), depending on soil volume.
- ● Garden soil or compost – Enough to mix with peat (1:1 ratio recommended).
- ● Gloves and long sleeves – For protection (vinegar can sting!).
- ● Garden fork or trowel – For mixing (a pitchfork works too!).
- ● pH testing kit – Digital or liquid test strips to monitor acidity (aim for pH 4.5–6.0).
- ● Watering can or hose – For even distribution of vinegar.
- ● Aluminum sulfate – 1–2 lbs (0.5–1 kg) for extra acidity (follow package instructions).
- ● Elemental sulfur – 1–2 lbs (0.5–1 kg) for long-term acidification (slower but deeper effect).
- ● Composted pine needles or oak leaves – 1–2 inches (2.5–5 cm) thick layer as a natural mulch to maintain acidity.
- ● Wheelbarrow or large bucket – For mixing soil amendments (saves your back!).
- ● Spray bottle – For spot-treating plants if you’re working in small areas.
Step-by-step instructions for lowering soil pH naturally
Here's how I transform alkaline soil into thriving acidic conditions—no guesswork, just science-backed results.
🌱 Step 1: Test Your Soil's Current pH Level
Before adding amendments, grab a soil pH test kit (digital or liquid) and take a sample from 6 inches deep. I like to test in multiple spots since pH varies across the garden. For accurate results, follow the kit instructions precisely—usually mixing 2 tablespoons of soil with distilled water and waiting 30 minutes for the reading.
Note your current pH: most acid-loving plants thrive between 4.5 and 6.0. If your soil reads above 7.0, you're starting with alkaline conditions and will need more aggressive amendments. If it's already 6.5 or below, you might only need light adjustments—like adding pine needles or coffee grounds.
💧 Step 2: Choose and Apply Organic Acidifiers
For a natural approach, I recommend starting with peat moss or sphagnum peat—it’s the gold standard for lowering pH. Work 2-3 inches of peat into the top 6 inches of soil in the planting area. This method is slow but long-lasting, ideal for established garden beds. Water thoroughly after mixing to help it settle.
If you need faster results, elemental sulfur is the most effective chemical-free option. Sprinkle 1-2 pounds per 100 square feet over the soil and water deeply. It takes 1-3 months to fully acidify, but it’s precise—too much won’t harm plants if applied correctly. I always test pH again after 4-6 weeks to avoid overshooting.
✂️ Step 3: Maintain Acidic Conditions Through Mulching
Once your soil reaches the desired pH, lock in those conditions with acidifying mulch. Spread a 2-3 inch layer of pine bark, pine needles, or oak leaves over the soil surface. These organic materials slowly break down, releasing tannins that lower pH over time. Refresh the mulch layer every 3-6 months to keep the effect consistent.
For container gardens, I mix 20% pine fines or composted leaves into the potting soil at planting. This ensures the roots stay bathed in acidic conditions, especially important for blueberries, azaleas, and rhododendrons. Avoid hardwood mulches like oak or maple—they’re neutral and won’t help maintain acidity.
☀️ Step 4: Monitor and Adjust Over Time
Acid-loving plants thrive when pH stays stable, but soil naturally shifts over seasons. Retest pH every 3-6 months, especially after heavy rains or if you notice yellowing leaves (a classic sign of pH drift). If the soil creeps back toward neutral, repeat the peat moss or sulfur treatment—but this time, cut the amount in half to avoid over-acidification.
I keep a garden journal to track pH changes. For example, my blueberry bushes need a sulfur top-dressing in early spring, while my azaleas hold their pH better with just pine needle mulch. Adjust based on what your specific plants need—some, like hydrangeas, can handle a wider pH range if you’re growing them for color shifts.
🪴 Step 5: Prevent Common Mistakes That Worsen pH
Overdoing sulfur or vinegar is the fastest way to kill your plants. I’ve seen gardeners dump gallons of white vinegar on their soil thinking it’s harmless—it’s not. Vinegar (acetic acid) burns roots and disrupts soil microbes. If you’re desperate for quick acidity, use 1 part vinegar to 10 parts water as a foliar spray, never a soil drench.
Another mistake? Ignoring lime in alkaline soil. If your pH is stubbornly high, a light application of lime (1-2 pounds per 100 sq ft) can actually help buffer the soil**, making acidifiers work more effectively. It’s counterintuitive, but lime in small doses creates the right environment for sulfur to do its job. Always test after any major amendment!
Tips & tricks for perfect acid soil adjustment
Here's what I've learned after years of transforming alkaline soil into thriving acidic conditions—these tricks will save you time and frustration.
Testing Accuracy Matters: The 30-minute wait for your soil pH test isn't just arbitrary—it's when the chemical reaction stabilizes. I've ruined batches of amendments by checking too early. For precise results, test in multiple spots (especially if your garden has varied soil types) and use distilled water only. Tap water can skew results due to mineral content.
Peat Depth and Distribution: When working 2-3 inches of peat moss into the top 6 inches of soil, think of it like layering a lasagna. Spread it evenly and mix thoroughly—don't just pile it in one spot. For established beds, I use a garden fork to create channels for better distribution. This ensures consistent acidification throughout the root zone rather than just localized spots.
Sulfur Application Strategy: The 1-2 pounds per 100 square feet recommendation is precise, but here's the secret: split your application. Use 1 pound now and save the second pound for 6-8 weeks later if needed. This staged approach prevents over-acidification while still giving you faster results than peat alone. Always water deeply after applying sulfur to activate it properly.
Mulch Layering Technique: For that 2-3 inch mulch layer, I recommend using a combination of pine needles (for acidity) and shredded leaves (for structure). The leaves prevent the pine needles from compacting, which maintains proper airflow and decomposition rates. In container gardens, mix those 20% pine fines directly into the potting soil—don't just sprinkle on top, as this creates a separation layer that roots can't penetrate.
Pro Tips for Make Acid Soil
- Here's what I've learned after years of transforming alkaline soil into thriving acidic conditions—these tricks will ...
- Testing Accuracy Matters: The 30-minute wait for your soil pH test isn't just arbitrary—it's when the chemical reacti...
- Peat Depth and Distribution: When working 2-3 inches of peat moss into the top 6 inches of soil, think of it like lay...
Frequently asked questions
Got questions about transforming your soil into an acid-friendly haven? Here are some of the most common concerns—and straightforward answers—to help you get it right the first time.
How often should I adjust my soil’s pH?
Check your soil’s pH every 6–12 months (or after heavy rain/irrigation). Acid-loving plants like blueberries or azaleas thrive at pH 4.5–5.5. Adjust only if readings fall outside their ideal range—overdoing it can harm beneficial microbes. Think of it like tuning a guitar: small tweaks keep things in harmony!
Is vinegar safe for plants?
Diluted vinegar (1 part white vinegar to 16 parts water) is generally safe for soil acidification, but never apply it directly to leaves or roots. Always mix it into the soil and water thoroughly. For delicate plants, opt for sulfur or peat moss instead—they’re gentler and long-lasting.
How long does it take to see results?
You’ll notice changes in 2–4 weeks, but full results take 3–6 months for deep soil adjustments. Patience is key! Test your soil again after 3 months to confirm progress. Think of it like baking a cake—rushing the oven time won’t speed up the flavor!
What if my soil is already acidic? Can I fix it?
Yes! To raise pH (make soil less acidic), add lime (calcium carbonate) or wood ash. Sprinkle 1–2 lbs per 100 sq ft and till it into the top 6 inches. Re-test in 2–3 months. Overcorrecting can stress acid-loving plants, so monitor closely—like Goldilocks, aim for “just right.”
Are there natural alternatives to vinegar?
Try these eco-friendly options:
- Peat moss: Mix 1–2 inches into the topsoil (great for long-term acidity).
- Pine needles or oak leaves: Spread a 1-inch layer and mulch—slow-release acidity!
- Aluminum sulfate: Fast-acting but use sparingly (follow package rates).
- Coffee grounds: A mild acidifier (best for small gardens).
Wrapping up and next steps
Transforming your soil into an acid-friendly environment is easier than you think—and the rewards for your plants will be worth it! 🌱 Whether you’re nurturing blueberries, azaleas, or acid-loving veggies, the key lies in patience, consistency, and the right mix of natural amendments.
Start small, test your progress, and watch your garden thrive in its new, vibrant acid soil.
Ready to take the next step? Monitor your soil’s pH every few months and adjust as needed. Happy gardening—your future harvests will thank you!