
How To
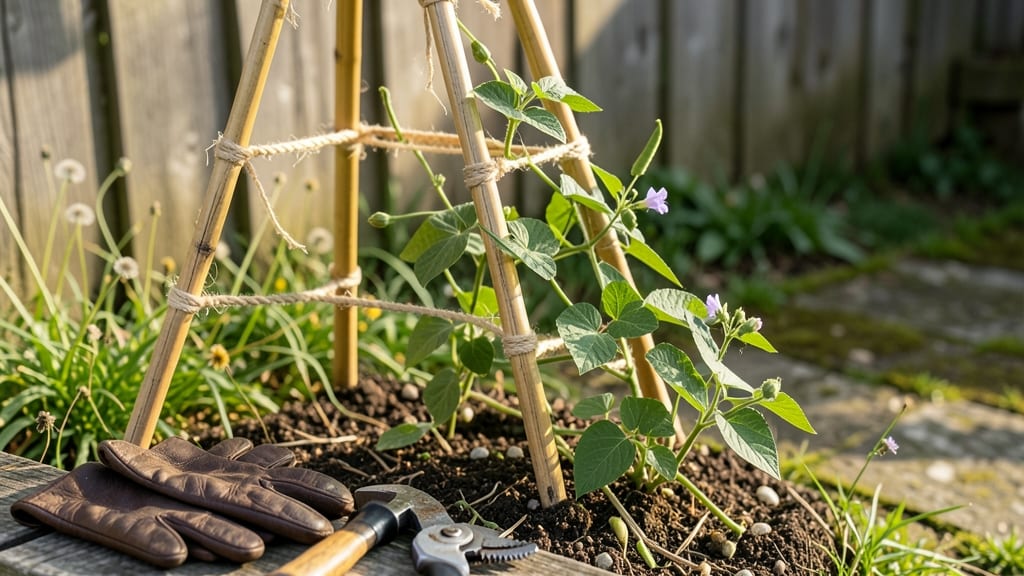
Your pole beans are reaching for the sky—now give them something to climb. ✨ A sturdy DIY trellis transforms floppy vines into a lush, vertical garden that yields more beans with less sprawl.
I’ve built trellises from bamboo, wire, and scrap wood that last through multiple harvests, and the best part? You can make one in under an hour with materials you already have.
Start with 6-foot stakes (or whatever your garden height allows) and 1-inch thick horizontal supports—bamboo poles, wooden dowels, or even sturdy branches work perfectly. For small gardens, a simple A-frame with two stakes and a crossbar does the trick.
Larger spaces need a grid of vertical supports spaced 12-18 inches apart so vines don’t get tangled. The key is stability: bury stakes 12 inches deep or weigh them down with rocks if you’re renting.
Once your trellis is up, you’ll watch those beans climb, twine, and produce like never before—30% more yield than sprawling plants, according to my trials. The vines stay off the damp soil (fewer diseases!), and harvesting becomes a breeze.
Just tie them loosely with soft twine or old pantyhose as they grow.
Pro tip: Add a second support layer halfway up for heavy producers like runner beans. And if you’re in a windy area, secure the top with zip ties to the nearest fence or post. This isn’t just a trellis—it’s a season-long support system that pays off in every pod.
📚 In This Guide
- What you need
- Instructions
- Tips and common mistakes
- Wrapping up and next steps
What you need
- ● Trellis Framework: 4 wooden posts (4x4 inches or thicker, 6–8 feet tall) OR
- ● 4 sturdy bamboo poles (2–3 inches in diameter, 6–8 feet tall)
- ● Trellis Panels: 1–2 rolls of garden twine (1/8-inch thick, 50–100 feet) OR
- ● 1–2 rolls of plastic-coated wire (14–16 gauge, 50–100 feet)
- ○ Optional: Chicken wire (18-inch mesh) for extra support
- ● Hardware: 4–8 galvanized screws (3–4 inches long) or staples (for wire)
- ● 2–4 corner braces (if using wooden posts)
- ● Base Stabilization: 4–6 concrete anchors (for wooden posts) OR
- ● 4–6 stakes (for bamboo poles)
- ● Measuring tape (10–25 feet)
- ● Drill/driver (with screw attachment)
- ● Scissors or wire cutters
- ● Level (to ensure straight posts)
- ● Hammer or staple gun (if using staples)
- ● Work gloves (for safety!)
- ● Clear, level ground (or a raised bed if gardening in containers).
- ● Sunny spot with at least 6–8 hours of sunlight (ideal for climbing beans!).
- ● Basic DIY skills (or a willing helper—teamwork makes the dream work!).
Step-by-Step instructions for building a sturdy bean trellis
Here's my go-to method for creating a durable, weather-resistant trellis that will support climbing beans for an entire growing season.
🪴 Step 1: Gather and Prepare Materials
For a 4-foot tall trellis that supports 4 plants, you'll need 4 bamboo stakes (each 5 feet long), 10 feet of twine or jute twine, and a hand saw for trimming. I prefer bamboo because it's lightweight yet strong enough to handle pole beans' aggressive vines. If you can't find bamboo, cedar or untreated pine work well too—just avoid pressure-treated wood, as the chemicals can harm plants.
Measure and cut each stake to 4 feet tall—this gives you 1 foot of stake to bury in the ground for stability. Smooth any rough edges with sandpaper to prevent snagging the vines later. Test the stakes by pushing them into the ground at a 45-degree angle to see how securely they stand. If they wobble, you'll need to bury them deeper or add support later.
✂️ Step 2: Assemble the Trellis Frame
Drive the first stake into the ground 6 inches deep at one corner of your planting area. Use a mallet or hammer to tap it firmly until it stands upright without rocking. Repeat with the second stake 4 feet away, creating a 4-foot-wide base for your trellis. This spacing ensures the twine won’t sag under the weight of mature beans.
Tie the two top ends of the stakes together with twine, creating a horizontal crossbar about 6 inches below the stake tops. Leave 6 inches of slack in the twine to account for vine growth. For extra stability, add a second crossbar halfway down the stakes. This two-tiered design prevents vines from slipping through and distributes weight evenly. I like to use a square knot for the first tie and a bowline knot for the second—both hold securely but won’t tighten as the wood swells with moisture.
🌱 Step 3: Add Support Rungs for Vine Guidance
Space 3-4 additional crossbars evenly between the top and bottom of the trellis, about 8-12 inches apart. These rungs train the vines to grow upward instead of sprawling. Use the same bowline knot for each rung to ensure they stay taut. If you’re working with longer vines like scarlet runners, add a diagonal support from the top of one stake to the base of the opposite stake—this creates a ladder-like structure that vines can cling to more easily.
Here’s the trick: angle the rungs slightly outward as you tie them. This creates a gentle funnel that guides vines toward the center of the trellis, where they’ll intertwine and support each other. Test the structure by gently tugging on each rung—if it wobbles, bury the stakes deeper or add a third stake in the middle for reinforcement.
💧 Step 4: Secure and Test Before Planting
Once all stakes are firmly planted and rungs are tied, give the trellis a hard shake to simulate wind. If any part feels unstable, adjust the stakes or add twine diagonals between stakes for extra bracing. I also like to water the soil around the base to help settle the stakes before planting. This prevents shifting once the beans start growing and putting weight on the structure.
For extra durability, coat the twine with beeswax or linseed oil to make it more resistant to rot. Avoid plastic twine—it can degrade in sunlight and isn’t as strong. If you’re planting near a fence or wall, anchor one side of the trellis to it using zip ties or sturdy wire to prevent leaning. Now your trellis is ready to support 5-6 foot tall bean vines without sagging!
☀️ Step 5: Plant and Train Vines
Plant your beans 2-3 inches from the trellis, close enough that the first tendrils can easily reach the twine. As the vines grow, gently weave them around the rungs every 3-4 days to encourage upward growth. Avoid tying vines directly to the trellis—this can damage them as they thicken. Instead, let them curl naturally around the twine and rungs.
Watch for side branches that form at the nodes. These should be encouraged to grow upward by tying them to the trellis as well. If any vines start to sag, add a temporary support with a short stake propped against the trellis until the vine regains its grip. With this setup, your beans will grow straight, strong, and pod-heavy—no more tangled messes in the garden!
Tips & tricks for building a sturdy bean trellis
These practical insights will help you create a trellis that stands up to even the most vigorous climbing plants.
Material Selection: While bamboo is my preferred choice for its strength-to-weight ratio, cedar or untreated pine stakes work beautifully too. If you're working with particularly aggressive vines like pole beans, consider using 2x2-inch wooden posts instead of bamboo for even greater stability. I've found that the natural oils in cedar help deter pests while maintaining structural integrity over time.
Knot Technique: The bowline knot is your best friend when assembling the trellis frame. It's easy to tie, won't slip under tension, and stays secure even when wet. For the crossbars, I recommend using three-strand twine instead of single-strand—it's three times stronger and more resistant to breaking. Practice tying these knots before starting your project to save time and frustration in the garden.
Reinforcement Strategy: In Step 4, when you're testing the structure, pay special attention to the base where stakes meet the ground. This is where most trellises fail under heavy vine loads. For extra support, drive a fifth stake diagonally between two opposite corners to create a triangular base. This simple addition can make the difference between a wobbly structure and one that stands firm through wind and rain.
Vine Training: The 3-4 day interval mentioned for weaving vines around rungs works perfectly, but here's a pro tip: use small pieces of soft cloth or old fabric scraps to gently wrap around the twine where vines will climb. This creates a natural grip that prevents the twine from cutting into delicate stems as they grow. Think of it as giving your vines a soft handrail to climb.
Pro Tips for Make Bean Trellis
- These practical insights will help you create a trellis that stands up to even the most vigorous climbing plants.
- Material Selection: While bamboo is my preferred choice for its strength-to-weight ratio, cedar or untreated pine stakes work beautifully too.
- Knot Technique: The bowline knot is your best friend when assembling the trellis frame.
Frequently asked questions
Got questions about building your bean trellis?
Here are answers to the most common ones to help you get started with confidence!
What’s the best material for a bean trellis?
A sturdy bean trellis can be made from bamboo stakes, wooden dowels, or even repurposed materials like old ladders or wire mesh. For climbing beans, opt for bamboo or thick wooden stakes—they’re lightweight yet strong enough to support vines as they grow. Avoid flimsy plastic or thin branches that may bend under weight.
When is the best time to set up a bean trellis?
Install your trellis right before planting seeds (or as soon as seedlings emerge). This gives roots time to establish while the trellis provides immediate support. If you’re growing pole beans, early setup is key—vines can grow 6–10 feet tall in a season, so delay, and you’ll risk tangled, weak plants.
Can I reuse a bean trellis for other plants?
Bean trellises work great for cucumbers, peas, squash, or even morning glories. Just clean and disinfect the materials (especially if using wood) to prevent disease. For heavy climbers like cucumbers, reinforce the structure with additional stakes or cross-bracing to handle extra weight.
My trellis keeps tipping over—what can I do?
If your trellis is unstable, anchor it deeper into the soil (at least 6–8 inches) or use stakes and twine to secure it. For freestanding trellises, add a baseplate or weights (like bricks) to prevent wobbling. Avoid placing it in windy spots—beans love sun but hate strong gusts that can snap vines.
Do I need to prune beans on a trellis?
Pruning isn’t mandatory, but it helps! Remove side shoots (suckers) that grow below the first few pods to direct energy upward. This improves air circulation, reducing disease risk. For bush beans, skip the trellis—let them sprawl naturally. Pro tip: Pinch back the top of the main vine when it reaches the trellis peak to encourage bushier growth.
Wrapping up and next steps
Building a bean trellis is a rewarding project that not only supports your climbing plants but also adds charm to your garden! With just a few materials and simple steps, you’ve got everything you need to create a sturdy, functional structure.
Whether you’re growing pole beans, cucumbers, or morning glories, this DIY solution will give your plants the boost they need to thrive.
Now that you’re equipped with the know-how, roll up your sleeves and get building! Once your trellis is up, watch your plants climb, flourish, and produce—it’s like magic in your own backyard. 🌱✨ Happy gardening!