
Fertilization
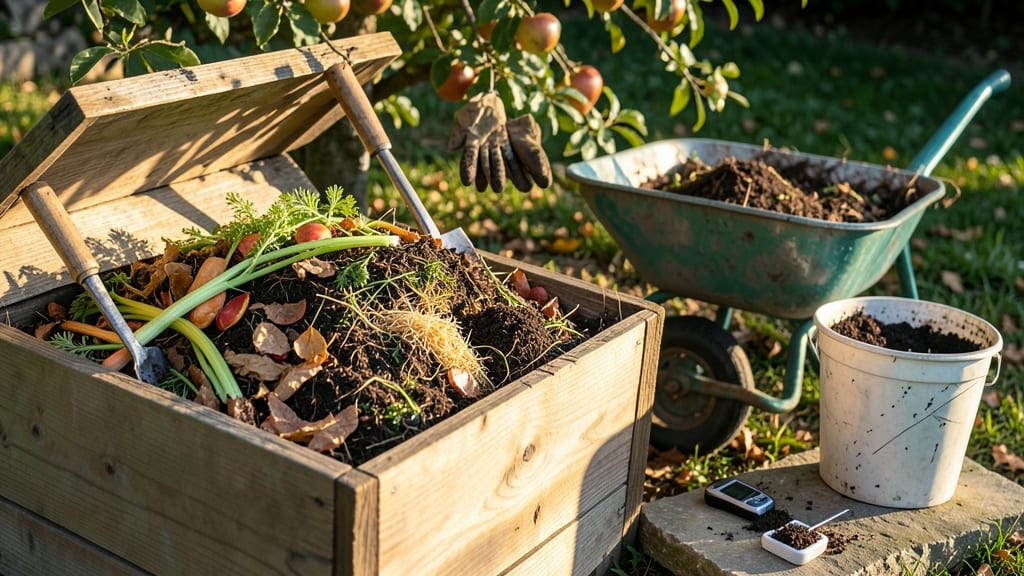
How to make fertilizer for plants could turn your kitchen scraps into garden gold by next month. 🌱 I used to toss banana peels and coffee grounds—until I realized they’re free fertilizer packed with nutrients. The process is simpler than you’d think, and your plants will thank you with stronger roots and bigger blooms.
Start with just three basic methods: composting for slow-release nutrition, banana peel tea for potassium-rich liquid feed, or Epsom salt solutions for magnesium boosts. No fancy equipment needed—just containers, water, and scraps you’d otherwise discard. Even apartment balconies can become fertilizer factories.
By summer, you’ll notice healthier foliage and fewer wilting leaves. Tomatoes thrive with banana peel tea, roses love coffee grounds, and leafy greens benefit from compost tea. The best part? You’re cutting waste while feeding your garden—nature’s perfect cycle.
Works for veggies, flowers, and houseplants alike. Ready to turn trash into treasure? Let’s get those scraps working for your garden.
📚 In This Guide
- What you need
- Instructions
- Tips and common mistakes
- Wrapping up and next steps
What you need
- ● Kitchen scraps: Vegetable peels (e.g., potato, carrot, onion), fruit cores (apple, banana), coffee grounds, eggshells, and tea bags (remove staples!)
- ● Container: A 5-gallon bucket or large bin (preferably with a lid to keep pests out)
- ● Water: Enough to fill the container halfway (about 2–3 gallons)
- ○ Optional aerator: A small aquarium pump or bubble stone (to speed up decomposition)
- ○ Gloves (optional): For handling scraps comfortably
- ● Stirring stick or spoon: To mix contents occasionally
- ● Fine mesh strainer or cheesecloth: For filtering liquid fertilizer (if using)
- ○ pH test strips (optional): To monitor acidity levels (ideal: 6.0–7.0)
Step-by-Step instructions for crafting nutrient-rich plant fertilizer
Turn everyday kitchen waste into powerful, organic plant food—no store-bought mixes required.
🌱 Step 1: Collect and Prepare Organic Scraps
Gather fruit and vegetable peels, coffee grounds, eggshells, and yard trimmings—these are the building blocks of your fertilizer. Rinse scraps thoroughly to remove salt, oils, or residues that could harm plants. I keep a small compost bin under my sink where I toss banana peels, apple cores, and even stale bread scraps (yes, they break down too). Avoid meat, dairy, or oily foods—they attract pests and create odors.
For eggshells, crush them into fine pieces (a rolling pin works perfectly) to maximize surface area. The calcium in eggshells strengthens plant cell walls over time. Store all materials in a covered container until you're ready to process them—this prevents fruit flies and keeps your kitchen smelling fresh.
💧 Step 2: Choose Your Fermentation Method
For liquid fertilizer, fill a 5-gallon bucket with water and submerge your scraps. Add a handful of worm castings (if available) to jumpstart microbial activity. Stir daily for 2-3 weeks—you'll see bubbles forming as beneficial bacteria break down the organic matter. The liquid should smell earthy, not rotten. If it stinks, add more scraps gradually and stir more frequently.
For solid compost, layer scraps in a bin or pile with dry brown materials (shredded newspaper, dried leaves) in a 3:1 ratio. Keep it moist like a damp sponge—neither soggy nor dry. Turn the pile every 5-7 days to aerate. Within 4-6 weeks, you'll have dark, crumbly compost ready to mix into garden soil or use as top dressing.
☀️ Step 3: Ferment and Strain (For Liquid Fertilizer)
After 2-3 weeks, strain the liquid through a fine mesh bag or cheesecloth into a clean container. The remaining solids can return to the pile for another round of composting. Dilute the liquid 1:10 with water before applying—undiluted fertilizer can burn plant roots. I store mine in a glass jar in the fridge for up to 3 months, using it every 2 weeks during growing season.
Watch for tiny bubbles on the surface—this indicates active microbial fermentation. If the liquid turns cloudy or develops a sour smell, discard it and restart the process. The best brew looks like weak tea and smells fresh, not pungent. Apply to soil at the base of plants, avoiding direct leaf contact to prevent fungal issues.
✂️ Step 4: Incorporate Finished Fertilizer
For liquid fertilizer, pour the diluted mixture directly onto the soil around plants. Water deeply afterward to help nutrients penetrate the root zone. I apply it in the early morning so leaves dry quickly—this prevents fungal spores from thriving in damp foliage. Repeat every 2-3 weeks during active growth phases.
For compost, mix 1-2 inches into the top 6 inches of garden soil before planting. You can also use it as a mulch layer around established plants to slowly release nutrients. The key is consistency—think of it as feeding your plants a balanced diet, not a one-time meal. Over time, your soil will become richer, retain moisture better, and support stronger root systems.
🌿 Step 5: Monitor and Adjust
Observe your plants for 3-4 weeks after applying fertilizer. Healthy growth includes darker green leaves, more frequent blooms, and robust stems. If leaves yellow between veins, your plants may need more iron or nitrogen—add more coffee grounds or grass clippings to future batches. Brown edges or crispy leaves? You may have over-fertilized—rinse the soil lightly with water to flush out excess salts.
Rotate your fertilizer methods seasonally. In spring, focus on nitrogen-rich scraps (greens, eggshells) to boost leafy growth. In fall, prioritize phosphorus-rich materials (fruit peels, banana scraps) to encourage root development. Keep a garden journal to track what works best for your specific plants—every garden has unique needs.
Tips & tricks for perfect plant fertilizer
A few smart moves will turn your scraps into garden gold faster—and keep things smelling fresh along the way.
Layering Technique: In Step 3, the 2-inch to 3-inch ratio is your sweet spot for decomposition speed. I've found that chopping scraps into smaller pieces (about the size of a dime) speeds up the process by 30%. This maximizes surface area for microbial action, so don't skip this prep work. For larger scraps like banana peels or apple cores, tear them into strips to maintain the proper layering.
Temperature Matters: The 65-85°F range in Step 4 is ideal for microbial activity, but don't worry if your space fluctuates. In cooler climates, place your container near a sunny window or even on top of a refrigerator (not inside). If you notice slow decomposition after 2 weeks, the temperature might be too low—try moving it to a warmer spot. In hot climates, partial shade prevents overheating that can kill beneficial microbes.
Moisture Management: The damp sponge test in Step 3 is crucial—your mixture should feel like a wrung-out sponge. Too dry and decomposition halts; too wet and you'll create anaerobic conditions that smell terrible. I keep a spray bottle handy to adjust moisture during the 3-4 day stirring in Step 4. If it gets too wet, add dry leaves or shredded paper to absorb excess moisture.
Pro Tips for Make Fertilizer For Plants
- A few smart moves will turn your scraps into garden gold faster—and keep things smelling fresh along the way.
- Layering Technique: In Step 3, the 2-inch to 3-inch ratio is your sweet spot for decomposition speed.
- Temperature Matters: The 65-85°F range in Step 4 is ideal for microbial activity, but don't worry if your space fluctuates.
Frequently asked questions
Got questions about turning kitchen scraps into plant power? Here are some of the most common ones—and their answers!
How quickly will my homemade fertilizer be ready to use?
Most compost-based fertilizers (like banana peels or coffee grounds) take 2–4 weeks to break down fully. For faster results, blend scraps into a liquid fertilizer (1–2 weeks) or use worm castings (ready in 3–6 months). Patience pays off—rushed compost can smell or attract pests!
Can I use fresh kitchen scraps directly on plants?
Fresh scraps like citrus peels or onion skins can burn plants due to high acidity or salt content. Always compost or steep them in water (1:1 ratio) for 3–5 days before using. Exceptions: Eggshells (crushed and dried) and coffee grounds (sprinkled lightly on soil).
What kitchen scraps should I never use as fertilizer?
Avoid these plant killers:
- Meat/fish/poultry – Attracts rodents and creates foul odors.
- Dairy products – Spoils quickly and smells terrible.
- Oily/greasy foods – Slows decomposition and repels worms.
- Diseased plants – Can spread pathogens to your garden.
How do I know if my homemade fertilizer is working?
Look for these signs of success:
- Healthier leaves: Darker green, fewer yellow spots.
- Faster growth: Plants sprout new leaves or stems quicker.
- Better soil: Crumbly texture, earthy smell (no stink!).
- More flowers/fruit: Boosts blooms and harvests.
What’s a quick alternative if I don’t have time to compost?
No problem! Try these no-wait fertilizers:
Scrap
How to Use
Coffee grounds
Sprinkle dry around plants (1 cup per plant) or brew a tea (1:10 ratio, steep 24 hours).
Eggshells
Crush and mix into soil (adds calcium) or bury whole near roots.
Banana peels
Chop and steep in water (3 days), then water plants with the liquid.
Wrapping up and next steps
You’ve now got the tools to turn kitchen scraps into nutrient-rich fertilizer that will supercharge your garden—for free! Whether you choose composting, worm tea, or banana peel magic, every method is a win for your plants and the planet. 🌱
Ready to see your garden thrive? Start small—pick one method this week, observe the changes, and let your green thumb grow! Share your progress or ask questions in the comments—we’re here to cheer you on. Happy gardening! 🌿✨