
Planting
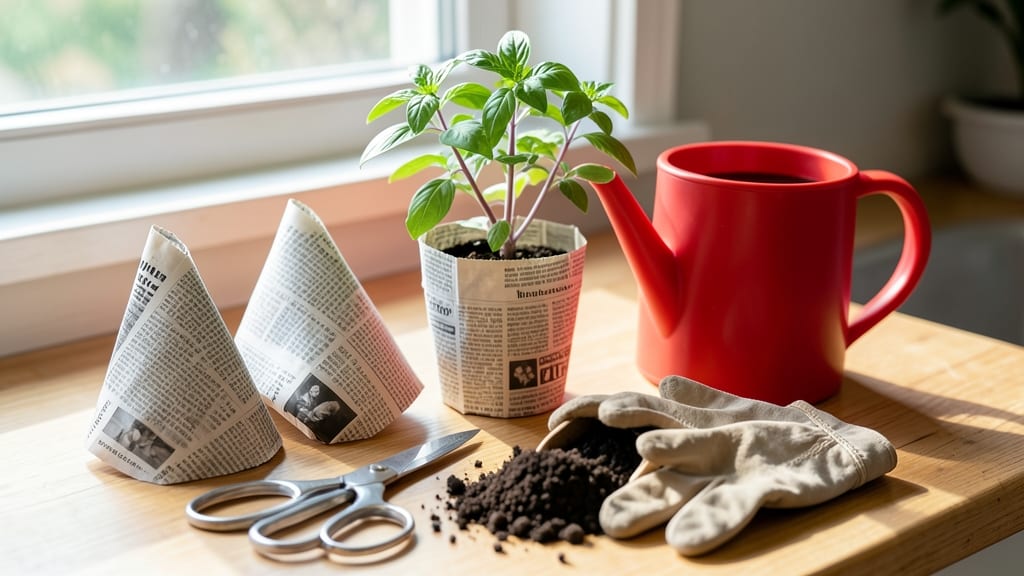
How to make newspaper plant pots—my first seedlings thrived in them, and now I’ll never go back to plastic. No waste, no fuss, just pure genius. 🌱 These biodegradable pots grow roots outward, making transplanting shock-free and soil-friendly. The process takes 5 minutes with supplies you already own, and you’ll never buy flimsy plastic pots again.
Start with 2-3 sheets of newspaper (black-and-white only) and a handful of potting mix. The key is rolling tightly but not crushing the paper—think "snug like a burrito." Add a pinch of compost for extra nutrients, and your pots will break down seamlessly when it’s time to plant.
Perfect for herbs, flowers, or veggies that hate root disturbance.
By week 3, seedlings will outgrow their cozy homes, but their roots will spread evenly instead of circling like in plastic pots. The best part? Pop them straight into the ground—the paper dissolves, and your plants keep growing without stress. No mess, no fuss, just happy plants and happy soil.
Works for any seedling, from delicate basil to sturdy sunflowers. Pro tip: Add a sprinkle of cinnamon to the mix to deter mold. Ready to try? Grab some paper and let’s grow!
📚 In This Guide
- What you need
- Instructions
- Tips and common mistakes
- Wrapping up and next steps
What you need
- ● Newspapers: 4-6 sheets (standard broadsheet size, ~22" x 34") – must be black-and-white (no color ink, as it can harm plants).
- ● Scissors: Sharp pair for clean cuts (avoid dull scissors—they tear paper!).
- ● Water: A spray bottle or small bowl for dampening.
- ● Seedling soil: 1-2 cups of lightweight potting mix (or coconut coir for a peat-free option).
- ● Seeds or seedlings: Your chosen plants (herbs, flowers, or veggies—just ensure they’re small enough for the pot!).
- ● Newspaper glue or flour paste: 1 tbsp flour + 2 tbsp water (to seal edges if needed).
- ● Twine or string: For securing the pot’s base (if it unfolds).
- ● Plastic wrap: To cover the top and retain moisture (great for humidity-loving seeds!).
- ● Markers or labels: To tag your pots if growing multiple varieties.
Step-by-step instructions for making newspaper plant pots
Here's my go-to method for creating sturdy, compostable pots using just newspaper—perfect for seedlings that hate root disturbance.
🪴 Step 1: Gather and Prepare the Newspaper
Start with 4-6 sheets of newspaper (black and white only—colored inks can harm plants). Fold each sheet in half lengthwise, then unfold it to create a crease down the center. This crease will serve as your pot's spine, helping it hold shape. Avoid glossy sections or pages with heavy ink coverage, as these can leach chemicals into the soil.
Cut the newspaper into 8-inch squares—this size gives you pots that hold about 2 cups of soil, ideal for most seedling varieties. I like to stack the squares neatly as I cut them to avoid confusion later. Keep a clean workspace because stray paper scraps can complicate the folding process.
🌱 Step 2: Fold the Newspaper into Pot Shape
Take one square and place it on a flat surface with the crease running vertically. Fold the bottom left corner up to meet the top edge, creating a triangle. Then fold the bottom right corner up to meet the same top edge, forming a diamond shape. This creates the base of your pot—press firmly along each fold to keep it secure.
Next, fold the top corners down toward the center, overlapping slightly. The overlapping edges will form the pot's rim. Fold the top edge down once more to create a sturdy lip. Moisten the folded edges lightly with water—this helps the paper hold its shape as it dries. You'll make 4 pots per sheet, so prepare all four before moving to the next step.
💧 Step 3: Soak and Assemble the Pots
Fill a shallow tray or bowl with 2-3 inches of water. Place your folded newspaper shapes in the water, ensuring the bottom edges soak completely while the top remains dry. Let them sit for 5-10 minutes—this softens the fibers and makes the pots stronger. Handle them gently to avoid tearing while they're wet.
Remove the pots one at a time and let excess water drip off. Immediately place each pot into a small plastic cup or mold (like a yogurt container) to hold its shape while drying. The cups act as temporary supports. Leave them undisturbed for 1-2 hours until fully dry and rigid. This step is critical—rushing it can result in flimsy pots that collapse when planted.
✂️ Step 4: Fill and Plant Your Seedlings
Once dry, carefully remove the pots from their molds. Fill each with 2 cups of seed-starting mix, pressing lightly to eliminate air pockets. Moisten the soil until it's damp but not soggy—newspaper pots absorb moisture quickly, so you'll need to water more frequently than with plastic pots. Plant your seeds according to packet instructions, covering them with a thin layer of soil.
Place the pots in a seed tray or directly in your garden bed. The beauty of newspaper pots is that you can plant them directly into the soil—roots grow right through the paper as it breaks down. Water gently to settle the soil around the seeds. Keep the pots in a warm, sunny spot (or under grow lights) until germination. You'll notice the soil stays moist longer than in plastic pots, which helps prevent damping-off.
🌿 Step 5: Transplant Directly Into the Garden
When seedlings develop 2-3 true leaves, they're ready to move outdoors. The newspaper pot will decompose naturally, so you can plant the entire pot into the soil. Gently press the edges of the pot into the planting hole to ensure good soil contact. Water deeply after transplanting to help the roots establish quickly.
If you're transplanting into a larger container, simply peel the pot away from the seedling's roots—it should come apart easily. The newspaper will break down within 4-6 weeks, enriching the soil with organic matter. I've used these pots for everything from basil to marigolds, and they always work like a charm. Just remember: keep them out of direct rain before planting, or they'll soften and lose their structure.
Tips & tricks for perfect newspaper plant pots
Here's what I've learned after making hundreds of these—simple tricks that make all the difference between flimsy pots and sturdy, compostable containers.
Paper Selection Matters: Not all newspaper works equally well. I always use black-and-white sections only—colored inks can leach chemicals that harm seedlings. Also, avoid glossy pages or sections with heavy images; they don't hold shape as well. For extra strength, I sometimes use two layers of newspaper for larger plants like tomatoes or peppers. The extra thickness prevents cracking during watering.
Folding Technique for Strength: When creating the diamond shape in Step 2, press each fold firmly with your thumb—this creates crisp edges that hold the pot's structure. For the rim, I make a second fold on the top edge after the initial fold. This double-folded rim prevents the pot from splaying open when you remove it from the mold. Think of it like reinforcing the seams of a paper bag.
Soaking Time is Critical: Those 5-10 minutes of soaking might seem short, but don't rush this step! The bottom edges need to soften enough to hold the pot's shape when dry, but if you soak too long, the entire pot will weaken. I test the readiness by gently lifting a pot from the water—if it holds its shape when lifted, it's ready. Also, use room-temperature water; cold water slows the softening process.
Drying Strategy: The 1-2 hours of undisturbed drying is non-negotiable for sturdy pots. I've learned the hard way that rushing this step leads to pots that collapse when planted. For faster drying in humid conditions, I place the pots in a warm, dry spot with good airflow, like near a sunny window with a fan blowing gently. Just avoid direct heat sources—like radiators—which can cause uneven drying and weak spots.
Pro Tips for Make Newspaper Plant Pots
- Here's what I've learned after making hundreds of these—simple tricks that make all the difference between flimsy pot...
- Paper Selection Matters: Not all newspaper works equally well. I always use black-and-white sections only—colored ink...
- Folding Technique for Strength: When creating the diamond shape in Step 2, press each fold firmly with your thumb—thi...
Frequently asked questions
Got questions about newspaper plant pots? You’re not alone! Here are answers to the most common concerns to help you grow with confidence.
1. How long do newspaper pots last before breaking down?
Newspaper pots typically last 4–8 weeks before decomposing in soil, depending on moisture and soil conditions. For faster decomposition, use 2–3 layers of newspaper. If they hold together longer, they’re still functional—just monitor for structural integrity as plants grow!
2. Can I reuse newspaper pots for multiple plantings?
No, newspaper pots aren’t designed for reuse. The fibers weaken after one use, especially when wet. For sustainability, compost the old pots or repurpose the newspaper for other eco-friendly projects like mulch or seedling trays. Pro tip: Save scraps to make new pots!
3. What if my newspaper pot leaks or falls apart too soon?
Leaks or early breakdowns usually happen if the pot isn’t sealed properly. Double-check your layers—3 sheets (with overlapping edges) work best. For extra reinforcement, add a thin layer of soil on the outside or use a plastic wrap seal on the bottom before folding. Avoid overwatering!4. Are newspaper pots safe for all types of plants?
Yes! Newspaper pots are safe for seedlings and small plants, including herbs, flowers, and vegetables like tomatoes or peppers. However, avoid using them for large or heavy plants (like mature tomatoes) or those with aggressive roots, as the pots may not provide enough support. Transplant seedlings into the ground or larger containers once roots outgrow the pot.
5. What’s a good alternative if I don’t have newspaper?
No newspaper? No problem! Try these eco-friendly alternatives:
- Cardboard egg cartons (cut into individual pots)
- Biodegradable peat pots (store-bought and compostable)
- Molded coconut coir pots (reusable and sustainable)
- Old plastic containers (clean and repurpose)
- Dried leaves or grass clippings (for temporary seedling trays)
Wrapping up and next steps
Creating newspaper plant pots is a simple, budget-friendly, and eco-conscious way to kickstart your gardening journey!
With just a few sheets of newspaper and a little creativity, you’ve got a sustainable seed-starting solution that’s perfect for beginners and green thumbs alike. Why not try this method for your next planting project?
Now that you’re ready to go, grab those seeds and get planting! Share your progress with fellow gardeners or experiment with different plants to see what thrives best. Happy growing! 🌱✨