
Container Gardens
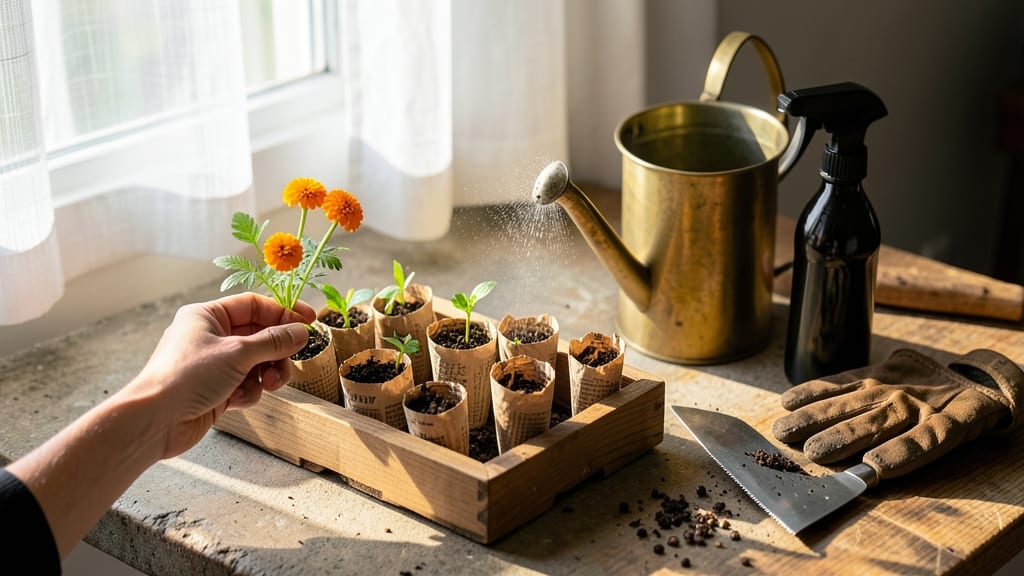
Your seedlings deserve a head start—and newspaper pots give them one. 🌱 These biodegradable planters dissolve right into the soil, eliminating transplant shock while saving you money on disposable pots.
I used to buy plastic trays every spring, but now I make these in under five minutes with supplies I already have.
The beauty of newspaper pots is their simplicity: just newspaper, water, and soil. You’ll need a roll of newspaper (no glossy sections), a pencil, and your favorite potting mix.
The pots hold moisture better than plastic and break down completely, so no digging out roots later. Perfect for tomatoes, peppers, or herbs—just avoid heavy feeders like squash.
By the time your seedlings are ready to move, the pots will have softened into the soil, giving roots a gentle transition. No more tangled roots or shock—just lush, established plants. The process is eco-friendly, budget-friendly, and works for both indoor starts and outdoor transplants.
Pro tip: Size matters—aim for 3-4 inches tall for most seedlings. Water lightly after planting to help the pot hold shape, and keep them in a warm spot until germination. Ready to try? Grab some newspaper and let’s get growing!
📚 In This Guide
- What you need
- Instructions
- Tips and common mistakes
- Wrapping up and next steps
What you need
- ● Newspapers: 4-6 sheets per pot (standard broadsheet size, ~22" x 28"). Use uncoated, non-glossy pages for best results.
- ● Water: A spray bottle or small cup for dampening (room-temperature is ideal).
- ● Scissors or a utility knife: For clean cuts—sharpness makes all the difference! A ruler or straightedge helps with precision.
- ● Potting soil: Lightweight seed-starting mix (avoid garden soil; it’s too dense). Aim for 1-2 cups per pot.
- ● Seeds or seedlings: Choose fast-growing varieties like herbs, lettuce, or marigolds (they thrive in small pots!).
- ● Newspaper clamps or binder clips (to hold shapes while drying—game-changer for beginners!).
- ● Plastic wrap or parchment paper: Lays under your workspace to catch drips.
- ● Rubber bands: Secure layers if clamps aren’t available.
- ● Non-toxic glue (like white school glue): Reinforces seams if your pot feels flimsy (use sparingly!).
- ● Marker or pencil: Sketch templates for consistent shapes.
- ● A flat, dry workspace (a table or countertop works great).
- ● Patience! Let pots dry for 1-2 hours before planting (rushing = soggy collapses).
- ● Outdoor access: Place finished pots in a sunny spot (or under grow lights) for your seedlings.
Step-by-step instructions for making newspaper pots
Here's how to create sturdy, eco-friendly pots in minutes using just a few household items.
📰 Step 1: Gather and Prepare Your Materials
Collect 4 sheets of newspaper—the thicker, the better. I like to use the Sunday comics section because the pages are sturdy and hold their shape well. Tear off any staples or tape, then cut the newspaper into strips about 2 inches wide and 12-15 inches long. You'll need about 8 strips total for 4 pots.
Fold each strip in half lengthwise so you have a clean crease down the center. This fold will help the pot hold its shape when wet. Lay the folded strips in a pile so they're all facing the same direction—this keeps everything neat and consistent.
🪴 Step 2: Shape the Base of the Pot
Take one folded strip and roll it tightly into a cone shape, starting from the wide end. The roll should be about 3 inches in diameter at the base. Secure the cone by tucking the loose end into the roll or using a small piece of tape on the inside—just enough to hold it together while you work.
This is the foundation of your pot. If the base feels flimsy, add a second strip inside the first one for extra stability. The key here is to keep the roll snug but not too tight—you want it to hold its shape when dampened later.
🌱 Step 3: Build the Walls and Secure the Pot
Take a second folded strip and wrap it around the cone, overlapping the edges by about ½ inch. Start at the base and spiral upward, keeping the layers tight but not cramped. You'll need about 3-4 strips per pot to reach a height of 3-4 inches, which is perfect for most seedlings.
Once you've built the walls, reinforce the pot by tucking the loose end of the top strip into the roll. You can also add a small piece of tape on the inside of the seam to keep everything in place. The goal is a pot that holds its shape but still feels flexible—newspaper softens when wet, so it needs this extra support.
💧 Step 4: Soak and Strengthen the Pot
Fill a shallow container with warm water and place your completed pots inside. Let them soak for about 10-15 minutes until the newspaper is fully saturated and the pot feels sturdy. This step is crucial—it activates the paper fibers and makes the pot strong enough to hold soil and seedlings.
After soaking, gently squeeze each pot to remove excess water. You want them damp but not dripping. If the pot feels too flimsy after soaking, add an extra strip or two to reinforce the walls before proceeding.
☀️ Step 5: Fill and Plant Your Seedlings
Fill each pot with seed-starting mix up to ½ inch from the top. Press the soil down lightly so it's firm but not compacted. Plant your seeds according to the packet instructions, then water gently until the soil is evenly moist. The newspaper pot will start to decompose over time, so there's no need to remove it when transplanting.
Place your pots in a warm, sunny spot and keep the soil consistently moist. You'll see the pots break down naturally as the seedlings grow, enriching the soil with organic matter. This method is perfect for seedlings like herbs, lettuce, or flowers that don't need deep roots.
Tips & tricks for perfect newspaper pots
Here's the thing—newspaper pots might seem too simple, but these little details make all the difference between pots that hold up and ones that fall apart.
Paper Selection Matters: Not all newspaper works equally well. Sunday comics pages are ideal because they're thicker and less likely to tear. Avoid glossy inserts or pages with heavy ink—they can leach into soil and affect seedlings. If you're using regular newsprint, look for pages with minimal images and text to maintain strength.
The Soaking Secret: Those 10-15 minutes in warm water are non-negotiable for sturdy pots. I've learned this the hard way—skipping the soak or using cold water results in flimsy pots that collapse when wet. For extra strength, add a splash of white vinegar to the water (about 1 tablespoon per gallon)—it helps set the fibers and makes the pots even more durable.
Reinforcement Strategy: If your pots feel wobbly after soaking, don't just add more strips—focus on the seams. The weakest points are where the strips overlap. For critical spots, fold a small piece of tape inside the seam (the kind used for gift wrapping works perfectly) to create an invisible but ultra-strong bond. This technique makes the difference between pots that last weeks and ones that fall apart after planting.
Plant Pairing Wisdom: While these pots work for most seedlings, they're especially great for shallow-rooted plants like lettuce, herbs, and flowers. For deeper-rooted plants like tomatoes or peppers, consider making larger pots (up to 6 inches tall) by using longer newspaper strips. The key is matching pot size to root depth—this prevents the pots from breaking down too quickly.
Pro Tips for Make Newspaper Pots
- Here's the thing—newspaper pots might seem too simple, but these little details make all the difference between pots ...
- Paper Selection Matters: Not all newspaper works equally well. Sunday comics pages are ideal because they're thicker ...
- The Soaking Secret: Those 10-15 minutes in warm water are non-negotiable for sturdy pots. I've learned this the hard ...
Frequently asked questions
Got questions about making newspaper pots? You’re not alone! Here are some common concerns—and easy answers—to help you get started with confidence.
Can I use any type of newspaper for these pots?
Ideally, use uncoated, ink-free newspaper (like recycled newsprint) to avoid chemicals that could harm seedlings. If you must use printed paper, opt for black-and-white sections with minimal gloss. Pro tip: Avoid colored ink or glossy magazines—these can leach harmful substances into the soil.
How long do newspaper pots last before they break down?
Newspaper pots typically last 4–6 weeks in moist soil before decomposing. For faster germination (like with fast-growing herbs or lettuce), transplant seedlings into the ground or larger pots within 3–4 weeks. If pots degrade too quickly, try adding a thin layer of compost or peat moss to reinforce them.
What if my newspaper pots fall apart when I try to plant them?
This usually happens if the paper gets too wet or isn’t secured properly. To prevent it:
- Use tightly rolled strips with a staple or twist tie at the bottom.
- Avoid overwatering—keep soil damp but not soggy.
- Plant the pot partially buried in soil to stabilize it.
Are newspaper pots safe for all types of seedlings?
Newspaper pots work great for small seedlings like herbs, lettuce, or flowers, but avoid them for large or deep-rooted plants (e.g., tomatoes, peppers). These need more space—transplant them into bigger containers or the garden once they outgrow the pot. For delicate roots, like basil, handle pots with care to avoid tearing.
What’s a good alternative if I don’t have newspaper?
No worries! Try these eco-friendly alternatives:
- Egg cartons (cut into cups)
- Toilet paper rolls (remove the plastic liner)
- Biodegradable peat pots (store-bought)
- Mugs or yogurt cups (with drainage holes)
Wrapping up and next steps
You’ve now mastered the art of creating eco-friendly, zero-waste newspaper pots—a simple yet brilliant way to nurture seedlings while reducing plastic waste! 🌱 These biodegradable planters are perfect for gardeners of all levels, offering a sustainable twist on traditional gardening.
Whether you’re a beginner or a seasoned green thumb, this method proves that small actions can make a big impact.
Ready to take your gardening further? Try experimenting with different seed types or even upcycling other materials like egg cartons or toilet paper rolls. Happy planting! 🌿