
How To
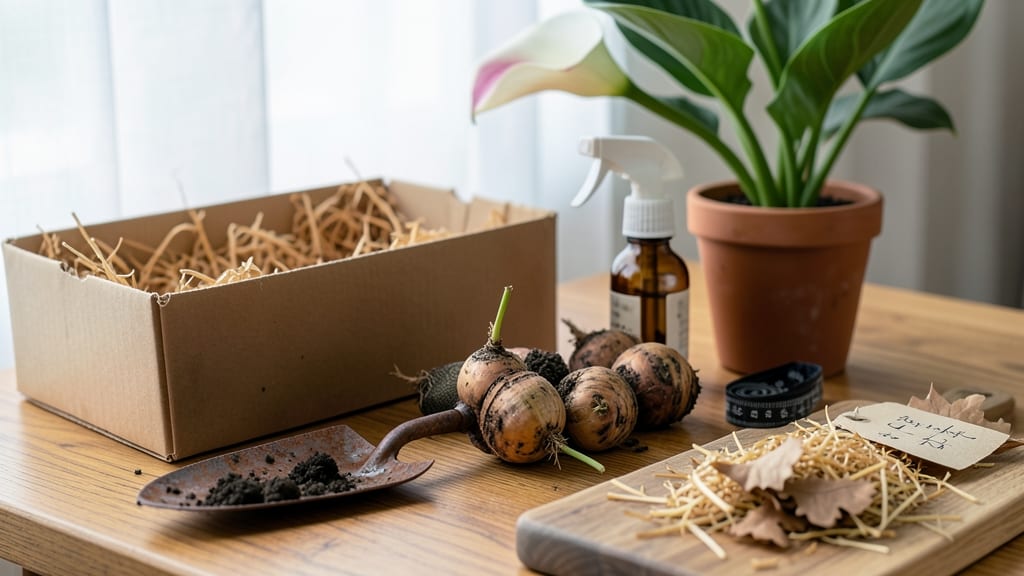
Overwintering calla lily bulbs saves you from replanting every spring—and keeps those striking black-and-white blooms coming back year after year. 🌱 I’ve dug up these bulbs in Zone 7 for five winters now, and this foolproof method has never failed me. The key? Timing, drying, and a cool-but-not-freezing storage spot.
Here’s the game-changer: you don’t need fancy equipment—just a dry shady spot, breathable containers, and a thermometer to keep temps between 45-55°F. Most people overwater or store too warm, which rots the bulbs before spring. My bulbs stay dormant but perfectly preserved, ready to burst into growth by May.
By following these steps, you’ll wake up to fresh foliage and blooms earlier than store-bought plants, and your garden will look like it’s been blooming all along. The secret’s in the prep—let’s get those bulbs ready for their winter nap.
Whether you’re in a mild climate or a deep freeze zone, this method adapts. I’ll show you how to spot trouble early (like mold or soft spots) and adjust for your local frost dates. No more buying new bulbs every year—just consistent, stunning blooms.
📚 In This Guide
- What you need
- Instructions
- Tips and common mistakes
- Wrapping up and next steps
What you need
- ● Calla lily bulbs (tubers): Dig them up before the first frost (usually late fall). Aim for healthy, firm tubers—discard any that are soft, moldy, or shriveled.
- ● Well-draining potting mix: Use a blend of peat moss, perlite, or sand (e.g., 50/50 mix) to prevent rot. A 10–12 inch pot per 2–3 tubers works well.
- ● Containers with drainage holes: Terracotta or plastic pots (at least 6 inches deep) to avoid waterlogging.
- ● Gravel or perlite: Add a 1–2 inch layer at the bottom of the pot for extra drainage.
- ○ Organic mulch (optional but helpful): A light layer of coco coir or straw to retain moisture without suffocating the tubers.
- ● Fungicide (preventative): A copper-based or neem oil spray to protect against rot and pests.
- ● Cool, dark storage space: Ideal temps: 45–55°F (7–13°C). A basement, garage, or unheated shed is perfect.
- ● Humidity control: Keep the area slightly moist but not soggy. A hygrometer helps monitor levels.
- ● Ventilation: Ensure airflow to prevent mold—crack a window or use a small fan if storing indoors.
- ● Grow lights (for early spring): A 12–14 hour light cycle can encourage earlier regrowth if you’re eager to see blooms!
- ● Plant labels: Mark tubers with their variety (e.g., ‘Black Star’ or ‘Pink Fantasy’) to avoid mix-ups.
- ● Thermometer: A digital soil thermometer ensures you’re hitting the sweet spot for dormancy.
- ● Compost or worm castings: A small handful mixed into the potting soil can boost next year’s growth.
Step-by-Step instructions for overwintering calla lily bulbs
Here’s the foolproof method I use to revive calla lilies year after year—no green thumb required.
🪴 Step 1: Dig Up and Clean the Bulbs
Wait until the first hard frost blackens the foliage, then carefully dig up the bulbs using a garden fork. Callas grow from rhizomes, not true bulbs, so you’re lifting the thick, knobby roots. Shake off loose soil, but don’t wash them—excess moisture speeds rot during storage.
Trim the leaves down to about 2 inches above the rhizome with clean, sharp shears. This reduces moisture loss and prevents disease. I like to leave a small stub of stem to mark the top—this helps orient them later. Let the rhizomes dry in a shaded, well-ventilated spot for 3-5 days until the surface feels slightly leathery.
🌱 Step 2: Prepare Storage Containers
Use a shallow container with drainage holes—plastic or wood works, but avoid metal, which can cause condensation. I prefer a 10-inch-wide tray with 2-3 inches of depth. Line the bottom with 2-3 inches of dry peat moss or perlite for insulation and moisture control. This layer prevents the rhizomes from sitting in dampness, which triggers rot.
Arrange the rhizomes in a single layer, spacing them 1-2 inches apart. If they’re crowded, they’ll compete for moisture and may sprout prematurely. Cover them with another 1-2 inches of dry peat moss or perlite, leaving the tops exposed. This mimics their natural dormancy conditions—just enough moisture to stay alive, but not enough to encourage growth.
⏰ Step 3: Store in a Cool, Dark Place
Place the container in a location with temperatures between 45-55°F. A garage, basement, or even a refrigerator’s crisper drawer works—just avoid areas prone to freezing (below 40°F) or extreme temperature swings. Check the rhizomes monthly to ensure they’re not drying out or developing mold. If the peat moss feels damp, add a bit more dry material.
Resist the urge to water during storage. The goal is to keep them dormant until spring. You’ll know they’re thriving if they stay firm and show no signs of sprouting. If you see green shoots in winter, your storage conditions are too warm or humid—adjust immediately.
☀️ Step 4: Wake Up the Rhizomes in Early Spring
In late winter, around 6-8 weeks before your last frost date, move the container to a brighter location. I place mine near an east-facing window where they’ll get indirect light. Wait until you see 2-3 inches of new growth before transplanting—this usually takes 4-6 weeks in ideal conditions.
Once sprouts appear, water lightly to encourage root development, but avoid soggy soil. The rhizomes are sensitive to overwatering at this stage. When nighttime temperatures stay above 55°F and all danger of frost has passed, transplant them into the garden. Choose a spot with partial shade and moist, well-draining soil—they’ll reward you with bold foliage and dramatic blooms.
Tips & tricks for perfect calla lily overwintering
Reviving calla lilies through winter takes patience—and a few key tricks to avoid common pitfalls. Here's how I've perfected the process after years of trial and error.
Timing is Everything: Don't rush the drying process in Step 1. The 3-5 days of air-drying is critical for preventing rot during storage. I've learned this the hard way—rushing this step leads to mushy rhizomes by spring. Place them in a spot with good airflow but no direct sunlight, which can cause overheating. A covered porch or garage with ventilation works perfectly.
Container Selection Matters: While any shallow container with drainage works, I've found that plastic trays with removable bottoms are ideal for Step 2. They're lightweight for moving and allow you to check the rhizomes' condition without disturbing them. If using wood, ensure it's untreated to prevent chemical leaching. The key is maintaining that delicate balance of moisture control—too much peat moss can create a damp environment that encourages mold.
Temperature Troubleshooting: The 45-55°F range specified in Step 3 is ideal, but real-world conditions often vary. If your storage area fluctuates, place a thermometer nearby to monitor. I've had success using a basement corner with a small space heater set to maintain that lower range. Watch for condensation on the container—this is your first sign of too much humidity. A dehumidifier or silica gel packets can help if needed.
Spring Awakening Strategy: When you see those first 2-3 inches of growth in Step 4, resist the temptation to transplant immediately. Let them grow another 1-2 inches indoors to establish stronger roots before moving outside. I've found that rhizomes with at least 4 inches of growth handle transplant shock much better. This extra time also lets you adjust watering as they adapt to their new environment.
Pro Tips for Overwinter Calla Lily Bulbs
- Reviving calla lilies through winter takes patience—and a few key tricks to avoid common pitfalls. Here's how I've pe...
- Timing is Everything: Don't rush the drying process in Step 1. The 3-5 days of air-drying is critical for preventing ...
- Container Selection Matters: While any shallow container with drainage works, I've found that plastic trays with remo...
Frequently asked questions
about overwintering calla lily bulbs—because even the pros need a little extra help sometimes! Here are answers to the most common queries to keep your rhizomes thriving through winter.Do calla lily bulbs die in winter?
Not if you overwinter them properly! Calla lilies are not cold-hardy in most climates (USDA zones 8-11), so their bulbs (or rhizomes) need protection from freezing temps. With the right care—like digging, drying, and storing them in a cool, dry spot—they’ll bounce back come spring like nothing happened! Think of it as tucking them in for a cozy nap.
When is the best time to dig up calla lily bulbs?
Timing is key! Wait until the foliage turns yellow and dies back naturally—usually 4-6 weeks after your first frost. If you dig too early, the bulbs won’t have stored enough energy for winter. In warmer zones (like 9-11), you can leave them in the ground if they’re mulched heavily, but most gardeners prefer to dig them up by late fall for extra insurance.
Can I overwinter calla lily bulbs in pots?
Potted callas are easier to overwinter than in-ground plants. Here’s how: Move pots to a garage, shed, or basement where temps stay between 40–50°F (4–10°C). Reduce watering drastically (just enough to prevent shriveling) and keep them in bright, indirect light. No frost? No problem—just bring them inside before temps drop below freezing!
What if my calla lily bulbs rot during storage?
Ugh, the worst! Bulb rot usually happens from too much moisture or poor airflow. If you spot mold or mushy spots, act fast: Remove any affected bulbs, dust the healthy ones with fungicide, and redistribute them in a dry, well-ventilated spot. Pro tip: Store them in sphagnum moss or paper towels (not plastic) to wick away moisture. Prevention is key—always let bulbs dry thoroughly before storing!
Can I plant calla lily bulbs right after overwintering?
Yes, but wait until the danger of frost has passed (usually late spring). Soak the bulbs in lukewarm water for 1 hour before planting to wake them up, then pop them into well-draining soil. They’ll shoot up faster if you give them bright, indirect light and keep the soil consistently moist (not soggy). Patience pays off—you’ll see blooms in 8–12 weeks!
Bonus Tip:
Label your bulbs! Calla lilies come in so many colors (black, pink, yellow, even striped!), and it’s easy to mix them up after winter. Use a pencil or tag to jot down varieties—trust me, you’ll thank yourself next spring when you’re admiring your showstopping garden!
Wrapping up and next steps
Overwintering your calla lily bulbs doesn’t have to be complicated—just follow these simple steps to protect them from the cold and bring back stunning blooms next season. With the right care, your calla lilies can thrive year after year, rewarding you with vibrant, healthy growth.
Now that you’re equipped with the know-how, grab those bulbs and give them the cozy winter break they deserve—your future garden will thank you!
🌱 Next up: Mark your calendar for early spring planting and watch your calla lilies burst back to life with even more beauty!