
Size
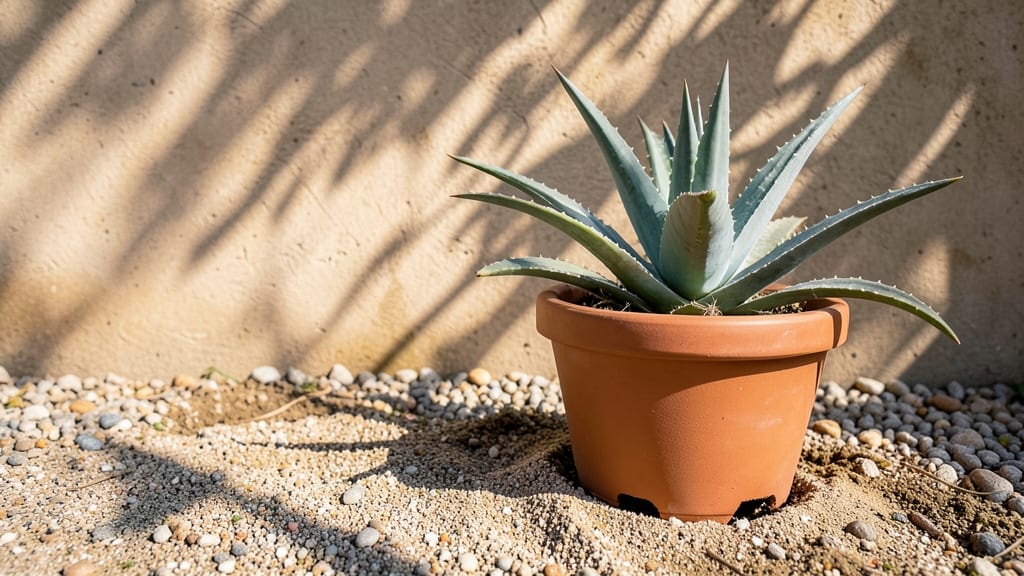
Learning aloe vera how to grow outdoors turns your sunny patch into a living first-aid kit. ✨ The key? Mimicking its desert roots—bright light, fast-draining soil, and patience. My first attempt nearly died from overwatering, but once I got the rhythm right, it thrived with minimal fuss.
You’ll need a spot with 6+ hours of direct sun daily (morning light is best) and well-draining soil—mix equal parts cactus mix and coarse sand. Aloe hates soggy roots, so raised beds or containers with drainage holes are ideal. Space plants 12-18 inches apart to prevent crowding and improve airflow.
Water only when the soil is completely dry—once every 2-3 weeks in summer, less in winter. Overwatering is the #1 killer, but underwatering causes puckered leaves.
Watch for brown tips (too much sun) or soft, mushy leaves (too much water). A healthy plant grows 12-18 inches tall with thick, fleshy leaves.
In frost-prone areas, bring pots indoors or mulch heavily. Pests are rare, but mealybugs hide in leaf crevices—wipe them off with rubbing alcohol if spotted. With the right setup, your aloe will multiply, giving you free plants to share (or heal burns with!).
📚 In This Guide
- What you need
- Instructions
- Tips and common mistakes
- Wrapping up and next steps
What you need
- ● 1-2 healthy aloe vera pups or mature plants (ensure they’re at least 2-3 inches tall for outdoor planting).
- ● Well-draining potting mix (5+ gallons, mix cactus/succulent soil with perlite or coarse sand in a 2:1 ratio).
- ● Container or garden bed (if potted: 12+ inches deep with drainage holes; if in-ground: full sun exposure with sandy, rocky soil).
- ● Gloves (to protect hands from sap—aloe can be irritating!).
- ● Watering can or hose with a gentle spray nozzle (avoid overwatering!).
- ○ Mulch (optional but helpful) (gravel or pebbles to retain heat and prevent rot).
- ● Slow-release fertilizer (balanced 10-10-10, used sparingly 1-2x/year).
- ● Plant markers (to label varieties if growing multiple types).
- ● Shade cloth (30-50%) (for hot climates to prevent sunburn).
- ● Pruning shears (for trimming dead leaves or offsets).
Step-by-step instructions for growing aloe vera outdoors
Here's how to cultivate thriving aloe vera plants in your outdoor space with minimal fuss.
🪴 Step 1: Select the Right Location and Prepare the Soil
Aloe vera thrives in full sun with at least 6 hours of direct sunlight daily. Choose a spot where it will receive morning sun and afternoon shade in hot climates to prevent leaf scorch. I always test the location first by placing a pot of aloe there for a week—if the leaves start yellowing or developing brown tips, it's getting too much harsh afternoon sun.
This succulent prefers well-draining soil to prevent root rot. Mix cactus or succulent soil with perlite or coarse sand in a 2:1 ratio for optimal drainage. Aloe vera roots are shallow but spread outward, so a wide, shallow container works better than a deep one. If planting directly in the ground, amend the native soil with 50% compost to improve aeration and nutrient availability.
☀️ Step 2: Plant Your Aloe Vera with Proper Spacing
Plant aloe vera in spring or early summer when temperatures are warm but not yet scorching. Dig a hole slightly larger than the root ball of your aloe plant, then place it in so the base of the plant sits just above the surrounding soil level. Aloe vera roots are sensitive to being buried too deep, which can cause rot.
Space plants 12-18 inches apart to allow for airflow and prevent fungal diseases. I like to plant them in a slightly raised bed or mound of soil to further improve drainage. After planting, give the soil a thorough watering to help settle the roots, but avoid overwatering—aloe vera is drought-tolerant and doesn't need frequent watering once established.
💧 Step 3: Water and Fertilize Correctly for Healthy Growth
Water aloe vera only when the soil is completely dry, typically every 2-3 weeks in warm weather and even less in winter. Stick your finger 2 inches into the soil—if it feels dry, it's time to water. When you do water, soak the soil thoroughly until water runs out the drainage holes, then let it dry out completely before watering again.
Fertilize aloe vera lightly during the growing season with a balanced, diluted succulent fertilizer (half-strength) every 2-3 months. Over-fertilizing leads to weak, watery growth and can harm the plant. I always skip fertilizing in winter when the plant is dormant. Yellowing leaves often indicate overwatering or excess fertilizer—cut back on both immediately if you notice this.
✂️ Step 4: Prune and Maintain for Long-Term Success
Remove any dead or dying leaves by twisting them gently at the base until they come off cleanly. If your aloe vera produces offsets (pups) at the base, you can carefully dig them up and replant them in separate containers. This encourages the mother plant to grow stronger and gives you more aloe plants for free. I like to do this in early spring when new growth is just beginning.
Watch for signs of pests like mealybugs or scale insects, which can infest aloe vera. Wipe leaves gently with a damp cloth and a drop of mild soap if you spot any. Aloe vera is generally pest-resistant, but stress from overwatering or poor drainage can make it more susceptible. Mulch around the base with gravel or coarse sand to further improve drainage and prevent soil-borne diseases.
⏰ Step 5: Protect During Extreme Weather
In winter, if temperatures drop below 40°F, move potted aloe vera indoors or cover it with a frost cloth. Aloe vera can tolerate light frosts but will suffer damage if exposed to prolonged cold. In summer, if your area experiences extreme heat waves, provide afternoon shade to prevent leaf burn. I often use shade cloth or move potted plants to a more sheltered spot during peak heat.
Regularly inspect your aloe vera for signs of stress, such as wrinkled leaves or soft spots, which indicate overwatering. Brown, crispy edges usually mean underwatering or too much sun. Adjust your care routine accordingly—aloe vera is resilient but will tell you if something's off. With the right conditions, your aloe vera will grow into a sturdy, long-lived plant that thrives outdoors for years.
Tips & tricks for thriving aloe vera outdoors
Here's what nobody tells you about keeping your aloe vera lush and healthy once you've planted it.
Lighting Strategy: That 6+ hours of full sun is non-negotiable, but timing matters just as much. Position your plants to receive morning sun first—this gradual exposure prevents leaf burn during peak afternoon heat. I've seen aloe vera leaves develop crispy edges when planted in direct midday sun without acclimation. Start with 3-4 hours daily and gradually increase over 2 weeks to harden them off.
Soil Science: The 50-30-20 mix ratio (cactus soil/perlite/sand) is your foundation, but don't overlook the 2-inch gravel layer in ground beds. This isn't just about drainage—it creates an air pocket that mimics aloe vera's natural desert environment. I've had plants thrive in containers with this same layer at the bottom, even when using the exact same soil mix. Test your drainage by pouring water and timing how quickly it drains—if it takes longer than 10 minutes, you need more perlite.
Watering Wisdom: The 3-4 week watering schedule is perfect for established plants, but new transplants need special attention. For the first 6 weeks after planting, water every 2 weeks instead—this gives roots time to establish without rotting. And that 2-inch soil check? I've learned the hard way that checking at different spots in the pot gives you a more accurate moisture reading than just one spot. The soil near the edges dries faster than the center, so check both areas.
Propagation Hack: Those fallen leaves you think are wasted? They're actually free propagation material. Lay them on dry soil in bright light (no water needed) and they'll root in 2-3 weeks. I keep a small tray of spare leaves in my greenhouse area—it's my insurance policy against plant loss. Just be patient: if you water them immediately, they'll rot before they root.
Pro Tips for Aloe Vera How To Grow Outdoors
- Here's what nobody tells you about keeping your aloe vera lush and healthy once you've planted it.
- Lighting Strategy: That 6+ hours of full sun is non-negotiable, but timing matters just as much.
- Soil Science: The 50-30-20 mix ratio (cactus soil/perlite/sand) is your foundation, but don't overlook the 2-inch gravel layer in ground beds.
Frequently asked questions
Got questions about growing aloe vera outdoors? You’re not alone! Here are answers to the most common concerns—plus a few pro tips to keep your plants happy and thriving.
How much sunlight does aloe vera need, and what if my yard doesn’t get enough?
Aloe vera thrives in 6 to 8 hours of direct sunlight daily. If your yard is shady, place it near a south-facing window or use a grow light for 4–6 hours a day. Without enough light, the leaves may stretch (a sign of etiolation) or turn pale. A sunny patio or balcony works too!
How long does it take for aloe vera to grow big enough to harvest?
With proper care, aloe vera can reach harvestable size (12–18 inches tall) in 1–2 years. Young plants grow slowly at first, but once established, they add 4–6 inches per year. Patience pays off—don’t harvest until the plant is at least 2 years old to avoid stressing it.
Can aloe vera survive winter outdoors, or should I bring it inside?
Aloe vera is cold-hardy only down to 25–30°F. In frost-prone areas, move pots indoors or cover the plant with burlap or frost cloth. If left outside, mulch the base with straw to insulate roots. Never let it sit in freezing temps—it’ll turn mushy and die.
What should I do if my aloe vera leaves turn brown or get spots?
Brown tips or spots usually mean overwatering, sunburn, or pests. Check the soil—aloe vera hates soggy roots! If the issue is sunburn, move it to partial shade for a week. For pests (like mealybugs), wipe leaves with rubbing alcohol or spray with neem oil. Yellowing leaves = overwatering; crispy edges = underwatering.
Can I grow aloe vera from a store-bought leaf, or do I need to buy a whole plant?
Yes! Store-bought leaves can root—just let the cut end dry for 2–3 days, then place it in well-draining soil. Keep it warm and slightly moist until roots form (4–6 weeks). However, pups (offspring) from mature plants are easier to grow and more reliable. Pro tip: Use a rooting hormone to speed up the process!
Wrapping up and next steps
Growing aloe vera outdoors is a rewarding journey that brings beauty, healing, and sustainability to your space! With the right sunlight, well-draining soil, and proper spacing, your plant will thrive and reward you with vibrant, healthy leaves.
Whether you're a beginner or a seasoned gardener, these tips will set you up for success.
Now that you’re armed with the knowledge, take the next step—pick a sunny spot, grab your supplies, and start planting! Your aloe vera will thank you with lush growth and endless benefits. Happy gardening! 🌱✨