
Companion Plants
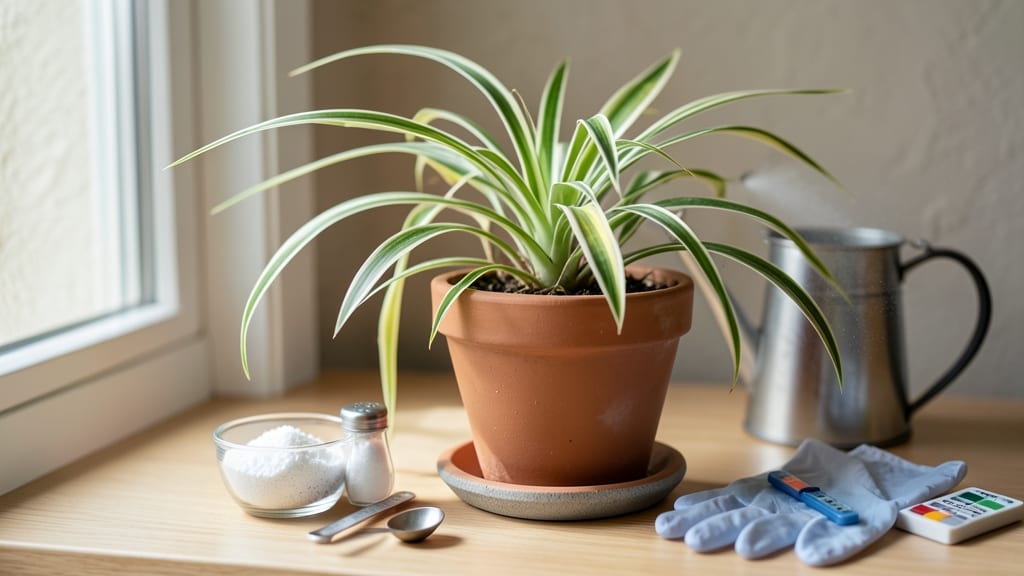
How to add magnesium to plants—yellow leaves between veins are a clear sign your greens are crying out for help. 🌿 I’ve saved dozens of struggling plants with this simple fix—no fancy tools or horticultural degree required. The secret’s in what you already have in your pantry or garden shed.
Magnesium deficiency shows up as yellowing between leaf veins, especially on older leaves, while the veins stay green. Common in acid-loving plants like tomatoes, peppers, and citrus, it’s a fixable issue—not a death sentence.
The easiest method? Epsom salt (magnesium sulfate), but compost, wood ash, and even banana peels work too.
Start with 1 tablespoon of Epsom salt per gallon of water, applied as a foliar spray or soil drench every 2-4 weeks. Overdo it, and you’ll burn roots—so test soil first if possible. The results? Greener leaves in 7-10 days and plants that bounce back stronger than ever.
Works for container plants, raised beds, or in-ground gardens—just adjust the dose for your space. Once you spot those telltale yellow stripes, you’ll know exactly what to reach for. Let’s get those leaves back to vibrant!
📚 In This Guide
- What you need
- Instructions
- Tips and common mistakes
- Wrapping up and next steps
What you need
- ● Magnesium source: Epsom salt (magnesium sulfate) – 1–2 tablespoons per gallon of water (adjust based on plant size and deficiency severity).
- ● Magnesium oxide or sulfate granules – ½ to 1 teaspoon per plant (sprinkle around roots or dissolve in water).
- ● Magnesium-rich compost or worm castings – 1–2 cups mixed into soil (slow-release option).
- ● Watering can or spray bottle – For foliar sprays or soil application (1–2 gallon capacity recommended).
- ○ Gloves (optional but recommended) – To protect hands from Epsom salt or granules.
- ● pH test kit – To check soil pH (ideal range for magnesium uptake: 6.0–7.0).
- ● Measuring spoons or scale – For precise magnesium dosage (avoid overapplication!).
- ● Garden trowel or small shovel – For mixing granules into soil (if not watering).
- ● Label or marker – To tag treated plants if testing multiple solutions.
- ● Chelated magnesium supplement – For faster absorption (especially for hydroponic or container plants).
- ● Foliar spray nozzle – To evenly distribute magnesium on leaves (great for severe deficiencies).
- ● Soil moisture meter – To avoid applying magnesium to dry soil (wait until soil is slightly damp).
- ● Journal or app – To track magnesium treatments and plant responses over time.
Step-by-Step instructions for adding magnesium to plants
Here's how I quickly boost magnesium levels in struggling plants—no guesswork, just results.
🌿 Step 1: Diagnose Magnesium Deficiency First
Yellowing leaves between veins—especially on older foliage—is the classic sign of magnesium deficiency. I check the undersides of leaves first because early symptoms often appear there. Magnesium is mobile in plants, so when levels drop, it moves from older leaves to new growth, leaving those yellow patches behind.
Don't confuse this with nitrogen deficiency (which causes overall yellowing) or iron deficiency (which shows as yellowing between veins but starts on new growth). Rub a small pinch of soil between your fingers—if it feels gritty and compacted, that can block magnesium uptake too. Loosen the top inch of soil if needed before proceeding.
💧 Step 2: Choose Your Magnesium Source
For fast results, I use Epsom salt (magnesium sulfate)—it's the most accessible and works within days. Dissolve 1 tablespoon per gallon of water for most plants. For severe deficiencies, double the dose temporarily, but never exceed 2 tablespoons per gallon as excess magnesium can block calcium uptake.
For organic options, try langbeinite (a mineral fertilizer) or kelp meal—both provide magnesium along with other micronutrients. Mix 1 teaspoon of langbeinite per 1 gallon of water or work 1 tablespoon of kelp meal into the top 2 inches of soil per plant. Avoid using both simultaneously to prevent nutrient imbalance.
✂️ Step 3: Apply Magnesium Correctly
For foliar feeding (fastest method), spray the solution directly onto leaves in the early morning or late afternoon when temperatures are below 80°F. Use a fine mist nozzle to ensure even coverage on both leaf surfaces. I focus on the undersides first—they absorb nutrients most efficiently. Reapply every 7-10 days until new growth appears.
For soil application, water the plant thoroughly first to move existing nutrients deeper into the root zone. Then, pour the magnesium solution directly into the soil at the drip line (where the outer leaves extend). This prevents surface runoff and ensures roots absorb the magnesium. For container plants, mix the solution into the top 2 inches of soil and water lightly to activate it.
☀️ Step 4: Monitor and Adjust
Watch for new growth emerging with restored green color within 10-14 days. If yellowing persists after two applications, test your soil pH—magnesium becomes less available below 6.0 or above 7.5. Adjust the pH toward 6.5 using lime (to raise pH) or sulfur (to lower pH) before reapplying magnesium.
Stop applying magnesium once leaves return to their original color. Overapplication causes calcium deficiency symptoms (brown leaf edges) or blocks other nutrients. For preventive care, I mix ½ tablespoon Epsom salt per gallon of water into my monthly fertilizer schedule during active growing seasons.
⏰ Step 5: Maintain Long-Term Magnesium Levels
For heavy feeders like tomatoes, peppers, and citrus, I incorporate magnesium-rich compost into the soil annually. Work in 1-2 inches of well-aged compost during spring planting to provide slow-release magnesium. For container plants, repot every 12-18 months using a fresh potting mix with added magnesium sulfate granules.
I also rotate crops annually to prevent magnesium depletion. Plants like beans and peas naturally enrich soil with magnesium, making them excellent predecessors for magnesium-hungry crops. If you notice yellowing returning after harvest, it's time to refresh the soil with another magnesium boost.
Tips & tricks for adding magnesium to plants
Here's what nobody tells you about making this magnesium boost truly effective—no more guesswork, just results.
Diagnosis Accuracy: When checking for magnesium deficiency in Step 1, look for the classic "interveinal chlorosis" pattern—yellowing between veins while veins stay green. This pattern appears first on older leaves because magnesium is mobile in plants. If you see yellowing on new growth, you're likely dealing with nitrogen or iron deficiency instead. Confusion here leads to wasted magnesium applications.
Temperature Timing: The 80°F temperature limit in Step 3 isn't arbitrary—it prevents foliar burns and nutrient loss through evaporation. Early morning or late afternoon applications work best because cooler temps slow nutrient uptake, giving leaves time to absorb magnesium before the heat of midday. I've seen dramatic differences when applying at 90°F versus 75°F—the cooler application shows results within 3 days, while hot applications take twice as long.
Application Technique: For soil applications in Step 3, pour the magnesium solution at the drip line rather than near the base. This targets the root zone where lateral roots absorb nutrients most efficiently. For container plants, mix the solution into the top 2 inches of soil and water lightly to activate it—this prevents surface crusting that blocks magnesium uptake. I've had containers where the top inch became crusty, leaving roots starved despite having magnesium in the soil.
Monitoring Strategy: The 10-14 day window in Step 4 is when you'll see new growth emerge with restored green color. Mark the date of your first application and track progress—if you don't see improvement after two applications, it's time to check soil pH. I keep a simple garden journal noting application dates and leaf color changes; it's saved me from overapplying magnesium when the real issue was compacted soil or incorrect pH.
Pro Tips for Add Magnesium To Plants
- Here's what nobody tells you about making this magnesium boost truly effective—no more guesswork, just results.
- Diagnosis Accuracy: When checking for magnesium deficiency in Step 1, look for the classic "interveinal chlorosis" pattern—yellowing between veins while veins stay green.
- Temperature Timing: The 80°F temperature limit in Step 3 isn't arbitrary—it prevents foliar burns and nutrient loss through evaporation.
Frequently asked questions
about adding magnesium to your plants—because even the greenest thumbs have questions!Is it safe to add magnesium to all plants?
Most plants benefit from magnesium, but some—like azaleas, blueberries, and rhododendrons—thrive in acidic soil and don’t need extra magnesium. Always check your plant’s specific needs before treating. Overdoing it can harm sensitive species, so start with a light dose and monitor for changes.
How long does it take to see results after adding magnesium?
Results vary, but you’ll often notice improvements in 2–4 weeks. New growth should look healthier, and yellowing leaves may regain their green hue. For severe deficiencies, it might take up to 6–8 weeks. Patience is key—consistency matters more than speed!
Can I use Epsom salt as a foliar spray, or should I stick to soil application?
Both methods work, but soil application is usually more effective for long-term fixes. For foliar sprays, dilute 1 tablespoon of Epsom salt per gallon of water and apply lightly to avoid leaf burn. Soil drenching (mixing into water and pouring at the base) ensures roots absorb magnesium directly.
What are signs of magnesium overdose in plants?
Too much magnesium can cause leaf tip burn, stunted growth, or even root damage. Watch for crispy brown edges or unusual wilting. If you suspect an overdose, flush the soil with water and reduce future applications. Always follow recommended ratios!
Are there organic alternatives to Epsom salt for magnesium?
Yes! Try compost, worm castings, or dolomitic lime (for alkaline soil). Banana peels (blended into compost) also provide magnesium, though they’re slower-acting. For quick fixes, kelp meal or magnesium sulfate (Epsom salt) are the most reliable.
Wrapping up and next steps
Adding magnesium to your plants is a simple yet powerful way to revive struggling foliage and boost overall growth. Whether you choose Epsom salt, organic amendments, or soil drenches, the key is consistency and proper application.
With these methods, your plants will soon show signs of renewed vitality—think lush green leaves and stronger stems!
Ready to see the difference? Start with one plant and monitor its progress. Your green thumb is closer than you think—just give it a try! 🌱✨