
How To
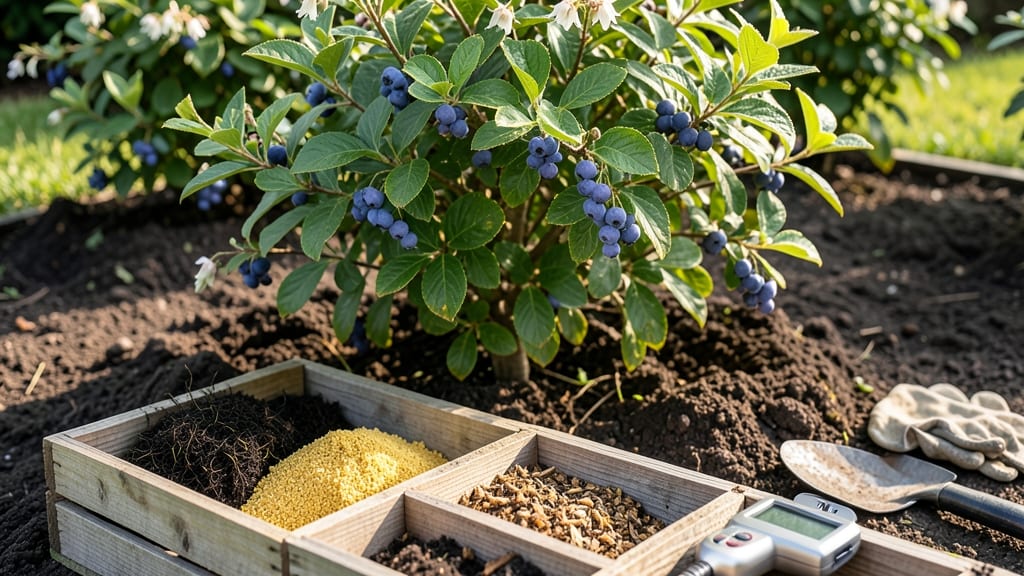
Your blueberry bushes are screaming for help—literally. 🌿 How to amend acidic soil is the first step to saving them, because acidic soil isn’t just a problem; it’s a silent killer for plants that need a neutral pH to thrive.
The good news? You can fix it without a chemistry degree, just the right amendments and a little patience.
The first step is testing your soil’s pH—most garden centers sell cheap test kits. Aim for a reading between 6.0 and 7.0 for most vegetables, while acid-lovers like azaleas and rhododendrons prefer 5.0 to 5.5.
Once you know your baseline, you’ll need lime to raise pH (for overly acidic soil) and compost to balance nutrients without shocking the soil.
Spread pelletized lime evenly over the soil surface in early spring, water it in, and mix the top 6 inches with compost. For fast results, re-test in 4-6 weeks—but don’t overdo it.
Too much lime can make soil alkaline, which is just as harmful. Think of it like Goldilocks: you want it just right.
If your soil still resists change after a season, dig deeper. Compacted or clay-heavy soil holds onto amendments like a grudge—amend with sand or peat moss first to improve drainage.
Patience is key: some soils take 6-12 months to fully adjust, but the payoff is plants that finally look (and grow) like they’re supposed to.
📚 In This Guide
- What you need
- Instructions
- Tips and common mistakes
- Wrapping up and next steps
What you need
- ● Lime (for raising pH): Calcium carbonate (garden lime) – 10–20 lbs per 100 sq ft (for moderate acidity, pH 5.5–6.0)
- ● Dolomitic lime (adds magnesium) – 15–25 lbs per 100 sq ft (for severe acidity, pH <5.5)
- ● Pelletized lime (easier to handle) – follow package rates
- ● Organic Matter: Compost (well-aged, 2–3 inches deep) – 1–2 cubic yards per 100 sq ft
- ○ Peat moss (optional, improves drainage) – 1–2 inches mixed into topsoil
- ● Leaf mold (slow-release nutrients) – 1–2 inches spread evenly
- ● Soil Amendments: Wood ash (use sparingly, raises pH quickly) – ½ cup per 10 sq ft (max!)
- ● Crushed eggshells (slow-release calcium) – 1 cup per 10 sq ft
- ● Garden gloves (to protect hands from lime dust)
- ● Garden rake (for mixing amendments into soil)
- ● Garden trowel or broadfork (for aerating compacted soil)
- ● pH test kit (digital or liquid test strips) – to measure current soil pH
- ● Wheelbarrow (for hauling materials)
- ● Watering can or hose (for settling amendments)
- ● Weather check: Do this on a dry, wind-free day (lime dust can irritate lungs!)
- ● 🌡️ Test first! Use a pH kit to determine how much lime you need—over-limeing can harm plants.
- ● ✨ Layer it right: Spread lime evenly, then top with compost before raking in.
- ● 🎯 Timing matters: Amend soil 2–3 months before planting for best results.
Step-by-Step guide to amending acidic soil
Balancing soil pH isn't guesswork—it's science you can control with the right materials.
🌱 Step 1: Test Your Soil's Current pH Level
Before adding anything, grab a soil pH test kit from your local garden center. Dig a 6-inch deep sample from multiple spots in your garden bed, mix the soil fragments together, and follow the kit instructions. Most plants thrive in a pH range of 6.0 to 7.0, while acid-loving plants like blueberries prefer 4.5 to 5.5. You'll see the pH level within minutes—this tells you exactly how much to adjust.
I like to take readings in both sunny and shaded areas because moisture retention and organic matter breakdown can vary. If your soil tests below 5.5, you're dealing with acidic conditions that need correction. Write down the exact reading—this becomes your baseline for calculations later.
💧 Step 2: Calculate and Apply Lime for pH Adjustment
For every 1 point of pH increase needed, apply 5-10 pounds of garden lime per 100 square feet of soil. For example, if your soil tests at 5.0 and you want to reach 6.5, that's a 1.5-point increase, requiring 7.5-15 pounds of lime for a 100 sq ft area. Use pelletized lime for even distribution—it's easier to spread without clumping.
Spread the lime evenly over the soil surface using a broadcast spreader. Work it into the top 2-3 inches of soil with a garden fork or tiller. Water the area thoroughly after application to help the lime dissolve and integrate. This step takes patience—lime can take 2-3 months to fully adjust soil pH, so don't rush it.
☀️ Step 3: Incorporate Organic Matter to Stabilize pH
Now that you've adjusted the pH, add 2-3 inches of compost or well-rotted manure to the same area. Organic matter helps buffer pH swings over time, preventing future acidity spikes. I like to mix in aged bark or pine needles (in moderation) for plants that prefer slightly acidic conditions, like azaleas or hydrangeas.
Use a garden fork to gently loosen the topsoil while mixing in the compost. Avoid compacting the soil—you want a light, airy texture that encourages root growth. Water the amended soil until it's moist but not soggy, and let it settle for 1-2 weeks before planting. This gives the organic materials time to decompose and integrate.
⏰ Step 4: Monitor and Maintain Soil pH Long-Term
Retest your soil's pH 3 months after amending. You might need a second application of lime if the pH hasn't shifted enough. For ongoing maintenance, add 1-2 inches of compost annually to keep the soil structure and pH balanced. I also recommend a slow-release organic fertilizer in early spring to support plant health.
Watch your plants for signs of stress—yellowing leaves or stunted growth can signal pH imbalance. Acid-loving plants may develop chlorotic (yellow) leaves if the soil becomes too alkaline, while others might struggle in overly acidic conditions. Adjust as needed, but remember: soil chemistry is a marathon, not a sprint. Small, consistent changes yield the best results.
Tips & tricks for balancing acidic soil
Balancing your soil's pH is like giving your plants the perfect foundation—here's how to avoid common pitfalls and get it right the first time.
Precision in Step 1: When testing your soil's pH in Step 1, take samples from both sunny and shaded areas of your garden. I've seen cases where one spot tested at 5.8 while another just 10 feet away was 5.2—this variation can happen due to differences in moisture retention and organic matter decomposition. Always average your readings to get an accurate baseline for your entire garden area.
Lime Application Strategy: In Step 2, don't be tempted to use more lime than calculated just to "make sure" the pH rises enough. Over-limeing can create alkaline conditions that are just as harmful as acidity. Instead, apply the exact calculated amount (5-10 pounds per 100 sq ft per pH point) and retest after the full 2-3 months. You can always add more lime later if needed, but you can't easily remove excess lime once it's in the soil.
Organic Matter Selection: For Step 3, while compost is essential, choose your organic amendments wisely. Peat moss can lower pH further, which defeats our purpose here. Stick with well-aged compost and consider adding a thin layer of wood ash (sparingly!) for slightly alkaline conditions. I've found that mixing in 1 inch of aged pine bark helps maintain the pH balance for acid-loving plants while still providing organic matter.
Long-Term Monitoring: The 3-month retest in Step 4 is non-negotiable. Soil pH changes gradually, and environmental factors like rainfall can affect results. Keep a garden journal to track your pH readings over time—this helps you understand natural fluctuations and when adjustments are truly needed. I've seen gardens where seasonal changes caused pH swings of up to 0.5 points between spring and fall.
Pro Tips for Amend Acidic Soil
- Balancing your soil's pH is like giving your plants the perfect foundation—here's how to avoid common pitfalls and ge...
- Precision in Step 1: When testing your soil's pH in Step 1, take samples from both sunny and shaded areas of your gar...
- Lime Application Strategy: In Step 2, don't be tempted to use more lime than calculated just to "make sure" the pH ri...
Frequently asked questions
Got questions about fixing acidic soil?
You’re not alone! Here are answers to the most common concerns—from timing to troubleshooting—so you can get back to growing with confidence.
How often should I test my soil’s pH after amending it?
Test your soil’s pH again in 2–4 months after applying lime or amendments. Soil pH can shift over time due to rain, plant uptake, or organic matter breakdown. For long-term gardens, aim for an annual check—especially if you notice plants struggling or pests returning.
How long does it take for lime to work in acidic soil?
Lime typically starts adjusting pH within 2–4 weeks, but full results take 2–6 months depending on soil type, rainfall, and organic matter. Fast-acting dolomitic lime shows effects sooner, while pelletized lime works gradually. Patience pays off—don’t rush to reapply too soon!
Is there a cheaper alternative to lime for acidic soil?
Yes! Try these budget-friendly options:
- Wood ash (from untreated wood)—use sparingly (1–2 lbs per 100 sq ft) as it raises pH quickly but can overdo it.
- Crushed eggshells (baked and crushed)—adds calcium slowly; best for small areas.
- Composted manure (like cow or horse)—improves organic matter and buffers acidity over time.
Will rain wash away my lime before it works?
Heavy rain can slow lime’s effectiveness, but don’t worry—it won’t wash it all away! Apply lime after a dry spell or water it in gently post-application. For clay soils, till lime into the top 2–3 inches to protect it from runoff. If rain is forecast, consider using pelletized lime for better retention.
Why are my blueberries still struggling after liming?
Blueberries thrive in acidic soil (pH 4.5–5.5), so over-liming is a common mistake. If they’re still yellowing or wilting:
- Test your soil again—aim for the lower end of the pH scale.
- Use sulfur (for pH < 5.5) or peat moss to lower pH naturally.
- Check for iron deficiency (common in limed soil)—use chelated iron supplements.
Wrapping up and next steps
Amending acidic soil doesn’t have to be intimidating—with the right mix of lime, compost, and organic matter, you can create a thriving garden oasis. 🌱 Start small, test your soil regularly, and watch your plants flourish!
The next step? Grab your gloves, pick your amendments, and get growing—your garden’s future is just a few adjustments away.
Pro tip: Keep a soil journal to track pH changes and refine your approach over time!