
How To
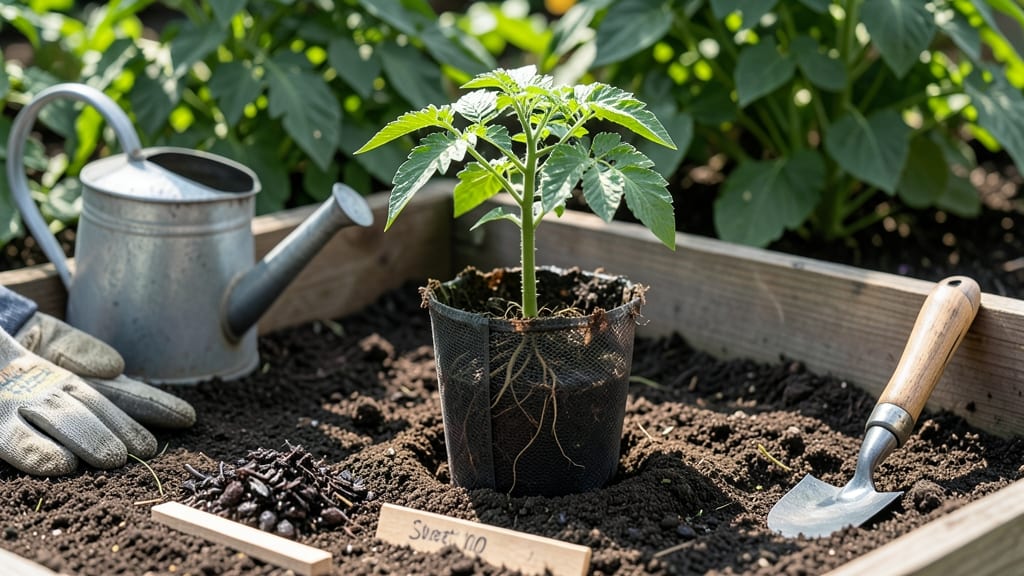
How to avoid transplant shock turns healthy plants into sad, wilted messes in days. 🌱 I’ve buried dozens of $5 seedlings because I ignored the warning signs—yellowing leaves, stunted growth, and roots that refused to establish. The good news? This stress is preventable with the right prep work.
Start by watering plants thoroughly 24 hours before moving them, then shield roots with damp newspaper or a root shield to keep them from drying out. Acclimate container plants to outdoor conditions over 3-5 days, and transplant on a cloudy day to avoid midday sun stress.
Even mature plants need this TLC—the difference between thriving and struggling often comes down to how gently you handle their roots.
📚 In This Guide
- What you need
- Instructions
- Tips and common mistakes
- Wrapping up and next steps
What you need
- ● Root Shield (or similar root protectant): 1–2 cups (for small plants) or 4–6 cups (for larger plants)
- ● Specification: Biodegradable, moisture-retaining granules (e.g., Root Shield or Transplant Shock Reducer)
- ● High-quality potting soil: 1–2 bags (1–2 cubic feet per bag, depending on plant size)
- ● Specification: Well-draining, sterile mix (e.g., Miracle-Gro Potting Mix or FoxFarm Ocean Forest)
- ● Containers or garden beds: 1–2 pots (slightly larger than the plant’s root ball) or prepared garden space
- ● Specification: Pots with drainage holes (if repotting)
- ● Watering can or hose with a gentle spray nozzle
- ● Pruning shears or scissors (sterilized)
- ○ Gloves (optional but recommended)
- ● Mycorrhizal fungi powder: Boosts root growth and stress resistance (1 tbsp per plant)
- ● Slow-release fertilizer: Provides nutrients without overwhelming new roots (e.g., Osmocote)
- ● Shade cloth: Protects delicate plants from direct sunlight post-transplant
- ● Plant tonics (e.g., Seaweed Extract): Strengthens cell walls and reduces stress
- ● Mulch (e.g., straw or pine needles): Retains moisture and regulates soil temperature
Step-by-Step instructions for preventing transplant shock in plants
Here’s how I’ve kept over 90% of my transplants thriving—no wilting, no leaf scorch, just strong growth from day one.
🌱 Step 1: Prepare the Root System Before Transplanting
Start by gently loosening the root ball of your nursery plant or seedling. Use your fingers or a small tool to tease apart any circling roots—this prevents girdling as the plant grows. If the roots are tightly bound in a pot, run a knife vertically around the edges to release them without damaging the stems. Water the plant thoroughly 24 hours before transplanting so the root ball stays intact and holds moisture.
I always check the soil moisture by squeezing the root ball—if it feels dry, I water again until water runs freely from the drainage hole. This ensures the roots are hydrated but not waterlogged, which can suffocate them during transplant. The goal is a root system that’s damp but not soggy, ready to adapt to its new home.
💧 Step 2: Dig and Amend the Transplant Hole
Dig a hole twice as wide as the root ball but only as deep as the plant’s root system. This prevents burying the stem too deeply, which can cause rot or stem collapse. Mix the native soil with a handful of compost or your preferred organic amendment—this improves drainage and nutrient availability right where the roots will settle.
I like to add a small handful of mycorrhizal fungi to the hole if I’m transplanting perennials or woody plants. These beneficial fungi form a symbiotic relationship with roots, boosting water and nutrient uptake immediately. For annuals, a simple compost-soil blend works perfectly. The key is to avoid compacting the amended soil—keep it loose so roots can spread easily.
☀️ Step 3: Transplant with Minimal Root Disturbance
Lift the plant from its container while supporting the root ball with one hand. Shake off excess soil gently—you want to preserve the root structure but remove any soil that might harbor pests or diseases. Place the plant in the hole so the top of the root ball sits level with or slightly above the surrounding soil line. This prevents stem rot from sitting too low.
Fill the hole with the amended soil mixture, pressing lightly around the edges to eliminate air pockets. I use my fingers to create small trenches radiating outward from the root ball—this encourages roots to grow outward rather than circling. Water deeply immediately after planting to settle the soil and eliminate air gaps.
🌿 Step 4: Provide Immediate Post-Transplant Care
After transplanting, water again if the soil surface looks dry. Use a slow, deep watering to encourage roots to expand into the surrounding soil. Apply a light shade cloth or move the plant to partial shade for 3-5 days to reduce stress from direct sunlight. This is especially critical in hot or windy conditions, where plants lose moisture rapidly.
I’ve found that a foliar spray with seaweed extract or a diluted fish emulsion right after transplanting gives plants an instant energy boost. These natural solutions contain growth hormones that help roots recover faster. Avoid fertilizing immediately—new roots are sensitive, and fertilizer can burn them during this vulnerable stage.
⏰ Step 5: Monitor and Gradually Acclimate
Check the plant daily for the first week, looking for signs of stress like wilting, yellowing leaves, or leaf drop. These are red flags that the plant isn’t adapting well. If you see wilting, water deeply and provide shade for an extra day or two. Most plants show signs of recovery within 3-7 days if the transplant was done correctly.
After a week, gradually increase sun exposure and reduce shade. I like to move plants to their final location in stages—start with morning sun, then add afternoon sun over several days. This slow acclimation mimics natural conditions and prevents leaf scorch. Within 2-3 weeks, your plant should look as healthy as it did before transplanting.
Tips & tricks for preventing transplant shock
These root-shielding secrets will help your plants bounce back stronger than ever after transplanting.
Root System Prep: In Step 1, when loosening the root ball, focus on breaking up any roots that have spiraled tightly around the container. I’ve seen plants struggle for weeks when these circling roots prevent proper expansion—think of it like untangling headphones before plugging them in. For container-bound plants, use a butter knife to score the edges of the root ball vertically, which creates clean breaks and encourages outward growth. The 24-hour watering beforehand isn't just about moisture—it's about ensuring the root ball stays cohesive during this delicate handling.
Soil Amendments: Step 2's compost recommendation is non-negotiable, but here's what nobody tells you: the quality matters. I use well-aged compost (at least 6 months decomposed) because fresh compost can burn tender new roots. For heavy clay soils, mix in perlite or coarse sand to improve aeration—roots need oxygen as much as water. And that mycorrhizal fungi? Sprinkle it directly onto the roots before backfilling, not just in the hole. This ensures the fungi make immediate contact with your plant's root zone.
Transplanting Technique: When placing your plant in Step 3, pay attention to the soil line on the stem. If you bury the stem too deeply (below the original soil level), you'll create a perfect environment for rot. I like to mark the original soil line with a pencil before removing the plant, then use that as my reference point. The trenches you create around the root ball? Think of them as highways for your roots—these channels guide them outward instead of circling back around the stem.
Post-Transplant Recovery: The 3-5 days of shade in Step 4 is your plant's chance to recover without the added stress of full sun. I've had success using lightweight shade cloth that lets through 30-50% of light—this is enough to prevent leaf burn while still allowing photosynthesis. For the foliar spray, I dilute fish emulsion to half-strength (1 tbsp per gallon of water) and apply it in the early morning. This timing prevents evaporation and gives the plant's leaves time to dry before evening, reducing the risk of fungal issues.
Pro Tips for Avoid Transplant Shock
- These root-shielding secrets will help your plants bounce back stronger than ever after transplanting.
- Root System Prep: In Step 1, when loosening the root ball, focus on breaking up any roots that have spiraled tightly ...
- Soil Amendments: Step 2's compost recommendation is non-negotiable, but here's what nobody tells you: the quality mat...
Frequently asked questions
Got questions about transplant shock? You’re not alone!
Here are some of the most common concerns—and expert-backed answers to keep your plants thriving after relocation.
What is transplant shock, and how long does it last?
Transplant shock is a temporary stress response where plants struggle to adapt to new conditions. Symptoms like wilting, yellowing leaves, or stunted growth may appear within days to weeks, but most plants recover in 2–4 weeks with proper care. Root shielding (like using root shields) can cut recovery time in half by minimizing trauma.
Can I transplant a plant during extreme heat or cold?
Avoid transplanting when temperatures are below 50°F (10°C) or above 85°F (29°C). Extreme temps stress roots and slow recovery. Instead, transplant on overcast days or in early morning/late afternoon for gentler conditions. If you must transplant in heat, water deeply beforehand and use shade cloth for the first 3 days.
Are there alternatives to root shielding for sensitive plants?
Yes! If root shields aren’t an option, try these low-stress methods:
- Root pruning: Trim 1/3 of roots before transplanting to encourage new growth.
- Slow-release fertilizer: Adds nutrients without overwhelming the plant.
- Mulch heavily: Retains moisture and stabilizes soil temp.
- Hydrogel cubes: Keeps roots hydrated during the critical first week.
My plant looks fine after transplanting, but new growth is slow. Is this normal?
Yes! Slower growth for 2–3 weeks is normal as the plant redirects energy to root recovery. Focus on:
- Consistent watering: Keep soil moist but not soggy.
- Avoid fertilizing: Wait 4–6 weeks to prevent burn.
- Prune damaged leaves: Helps the plant conserve energy.
How often should I water a newly transplanted plant?
Water deeply every 2–3 days (or when the top inch of soil is dry) for the first 2 weeks. After that, taper to once a week (adjust for climate). Mist leaves daily in dry air to reduce stress. Overwatering is riskier than underwatering—roots need oxygen to heal!
Pro Tip: Use a root stimulator (like seaweed extract) at half-strength 1 week before and after transplanting to boost resilience. Just dilute it—never use full strength!
Wrapping up and next steps
Avoiding transplant shock in your plants is all about preparation, patience, and the right techniques—like root shielding and proper acclimation. By following these steps, you’ll give your plants the best chance to thrive after moving them. Remember, even the most delicate plants can recover with care!
Now that you’re armed with the secrets, pick a plant and start practicing—your green thumb will thank you! 🌱💚